🔹 LoRaWAN
For LoRaWAN, the Device Management system supports WISE-6610 V2 and WISE-2200-M. Please refer to LoRaWAN chapter for detail configurations of WISE-6610 V2 and WISE-2200-M.
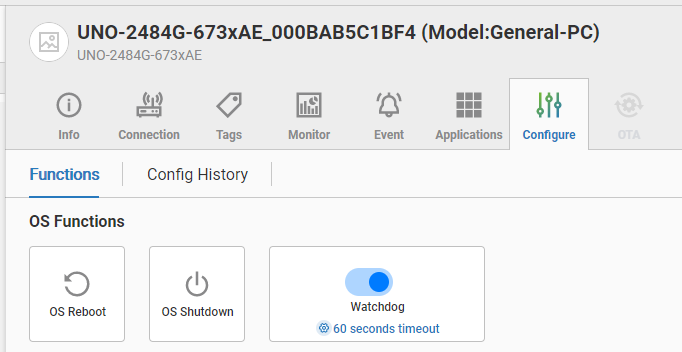
🔹 Computer
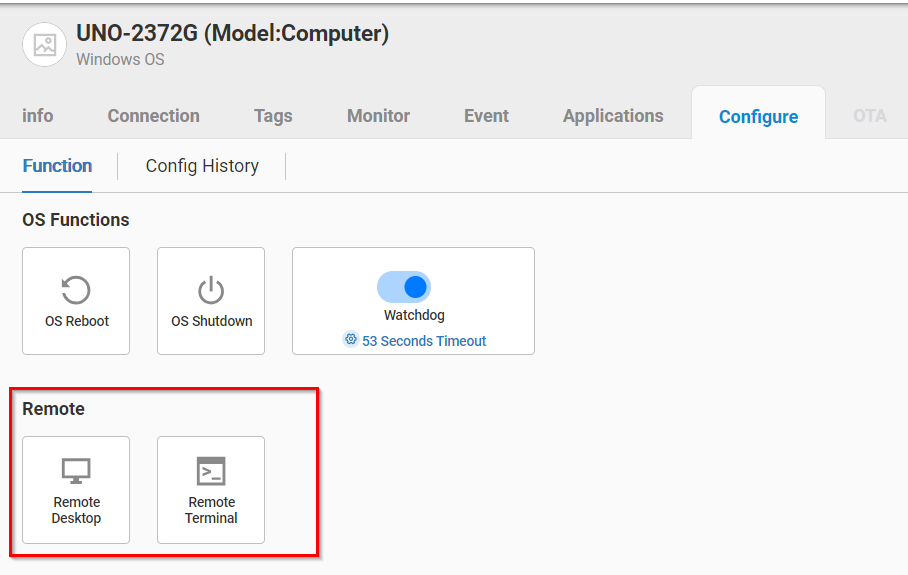
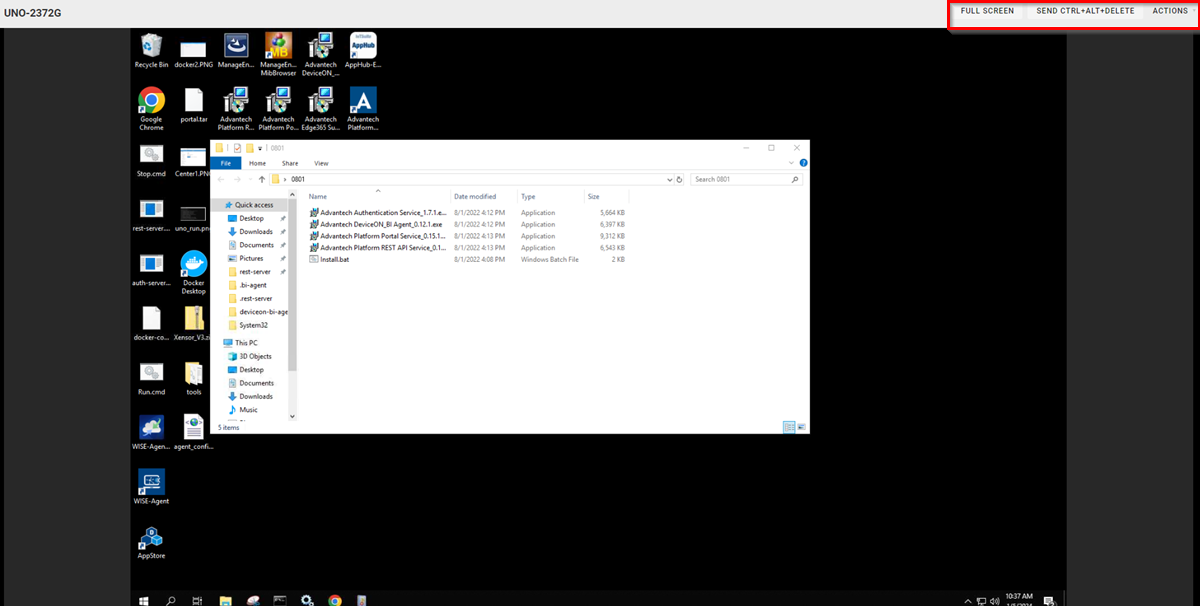
For Computer/General PC(ex: UNO, TPC, ARK, MIC...series modules), user could perform actions like: OS reboot, OS shutdown or Watchdog timer setting(only available when device supports this watchdog).
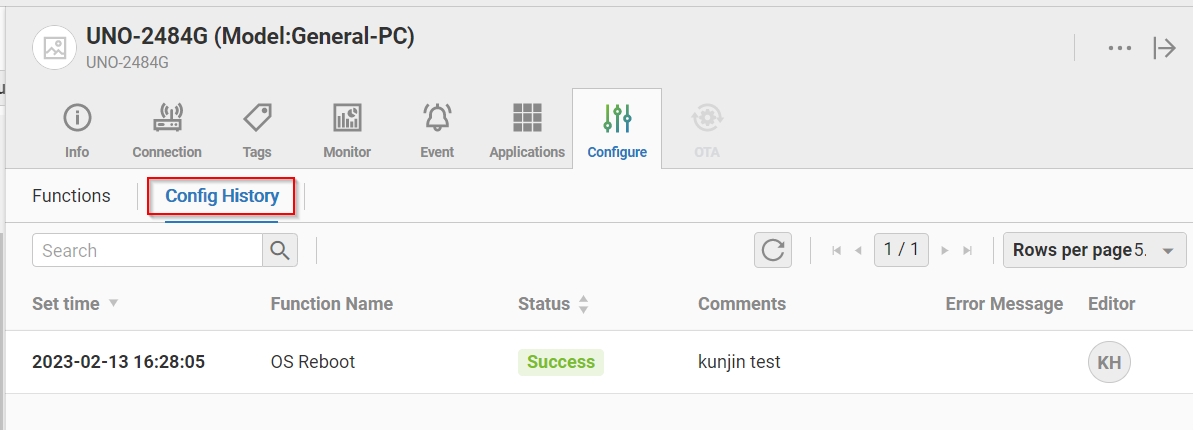
All configuration progress and results are displayed in Config History tab:
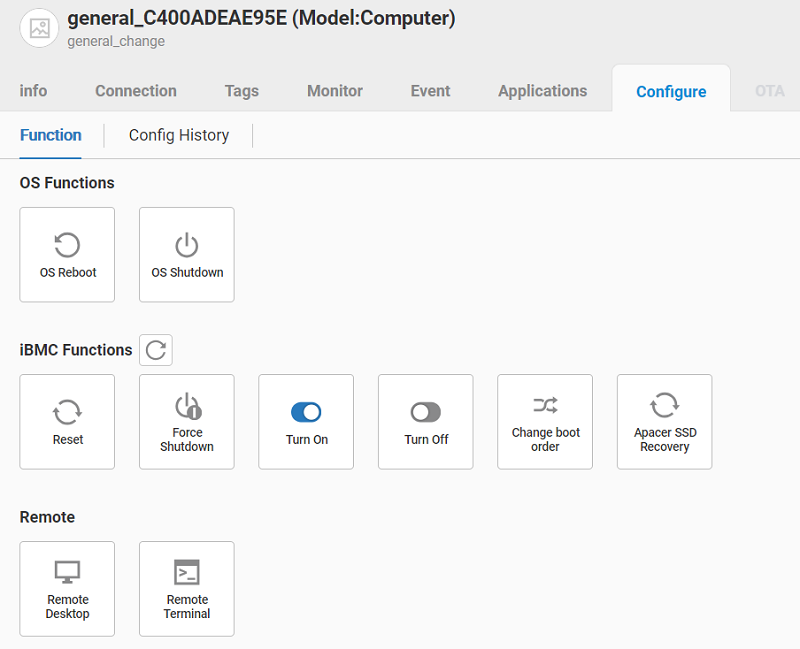
🔹 iBMC
iBMC(Intelligent Baseboard Management Controller) is embedded hardware-based technology that allows managers to perform power management tasks remotely even in abnormal or out-of-range conditions, such as during a software failure or operating system (OS) crash.
In the Configuration tab of device, system only disaplys the supported iBMC operations for this device. The available iBMC operations are listed as below:
- Reset
- Force Shutdown
- Turn On
- Turn Off
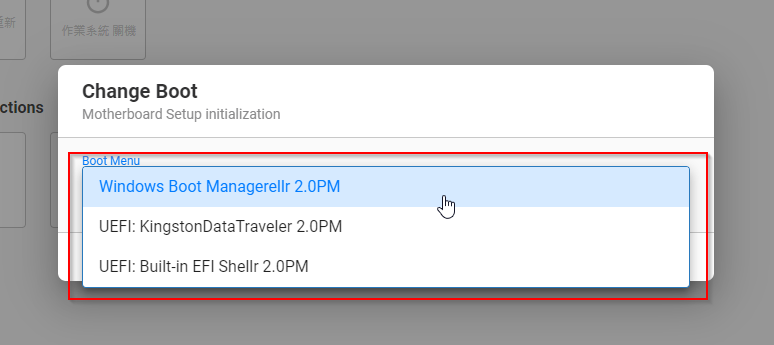
- Change boot order: User could get and change the boot sequence of device(ex: UEFI, Windows Boot Manager...).
- Apacer SSD Recovery(Currently only Windows 10 is supported.) : Perform hardware data recovey of SSD hard drive. Apacer SSDWidget 2.0 software must be installed in Windows 10 before perform SSD recovery.
When the user clicks the icon of "Change boot order", the available boot items are displayed and the user could select one as the first boot item.
Note: Due to iBMC limitation, the device must be turned on and turned off twice if the user manually inserts a bootable USB drive. Thus iBMC could refresh the bootable items completely.
For all iBMC operations, there is a cool-down time between iBMC operations. During the cool-down times, icons of iBMC will be disabled. User could click the refresh button to refresh the status of icons.
All iBMC configuration progress and results are displayed in the Config History tab:
🔹 Remote Desktop and Terminal
If device installs DeviceON agent and is correctly configured, system will display icons of Remote Desktop and Remote Terminal. Currenly Windows and Linux OS are supported.
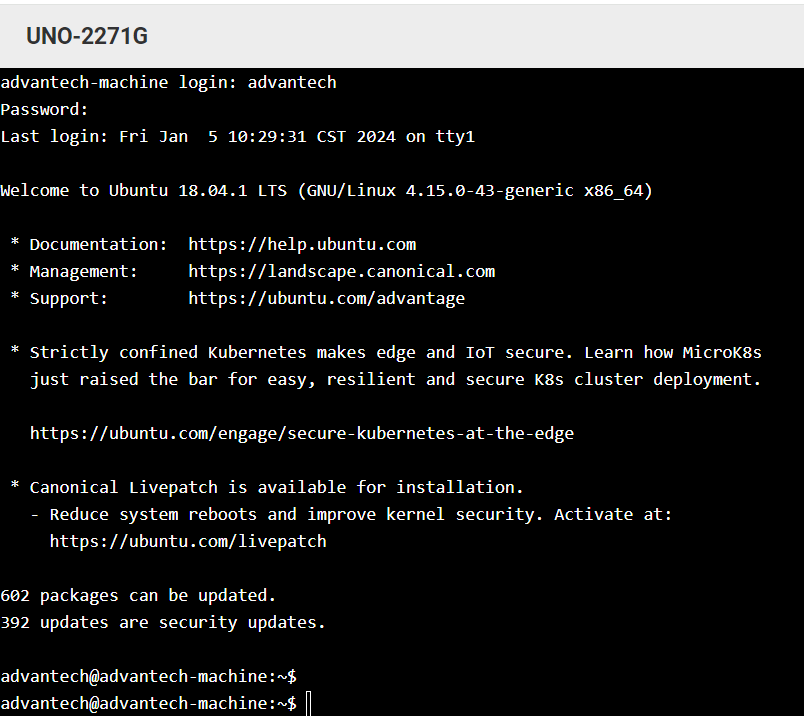
For Remote Terminal of Linux, user could input command directly.
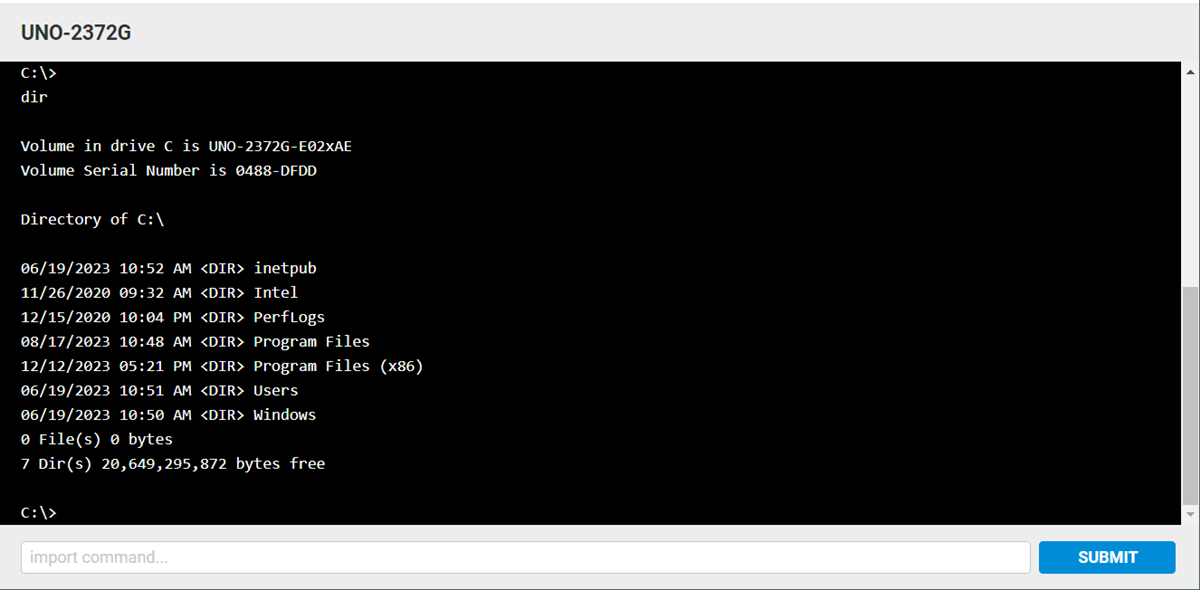
For Remote Terminal of Windows, please input command in the bottom and click SUBMIT to execute command.
For Remote Desktop of Windows, there are Windows specified action buttons in the right top corner.
🔹 ADAM/WISE IO configurations
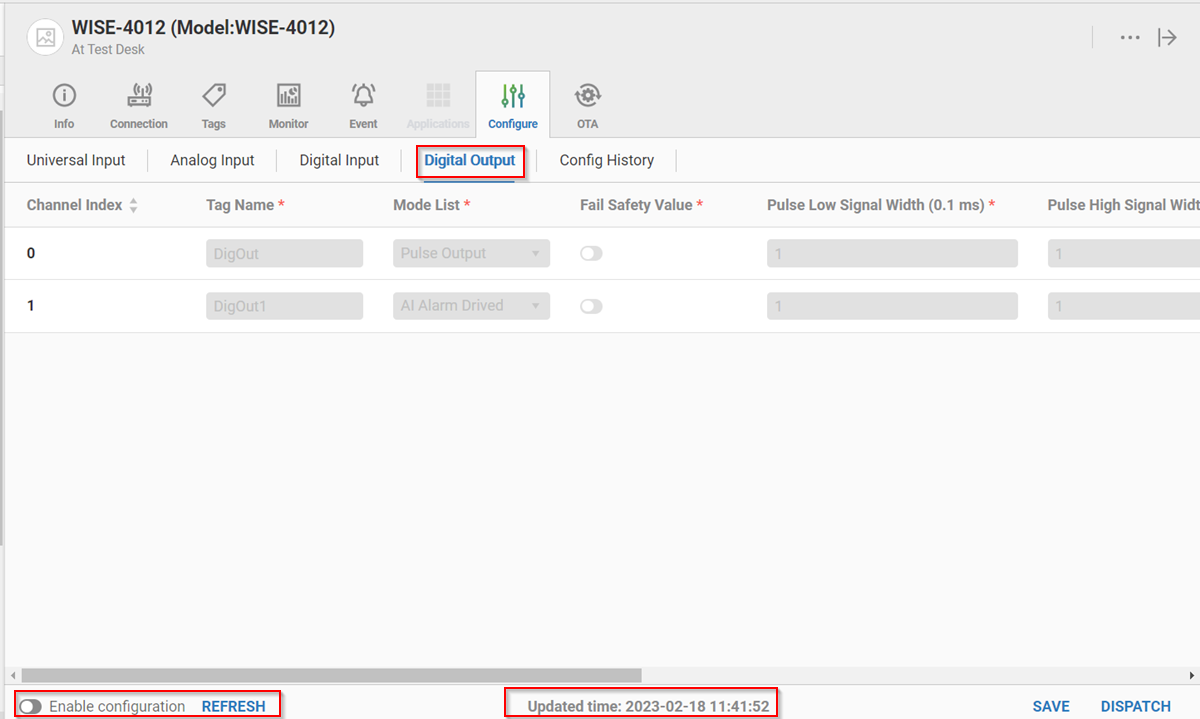
For ADAM/WISE devices, user could perform IO configurations from web prage. Please follow below steps:
-
In Configuration tab, user could select an IO type(ex: Digital Input) to see device's current configuration and its update time. Please click "Enable Configuration" to start to set IO channels.
-
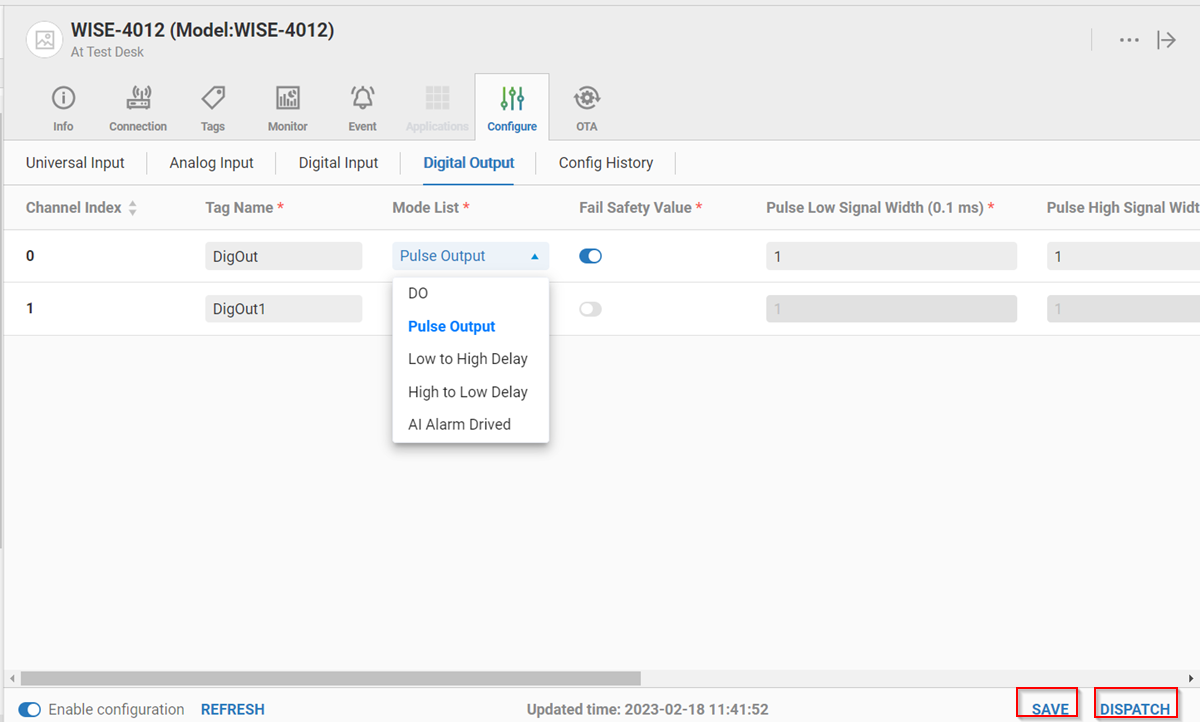
If user wants to change the mode of channel 0, user could select the desired mode.
-
If user finishes IO settings, there are two buttons to choose:
-
SAVE: Only store these configuration and not send to device. The saved configuation is stored in Config History Tab. User could click "..." to open menu and select Log to check the configuration or select Dispatch to send configurations to device.

-
DISPATCH: Start to send these IO configurations to device. User could check Configuration progress/result in Config History Tab.
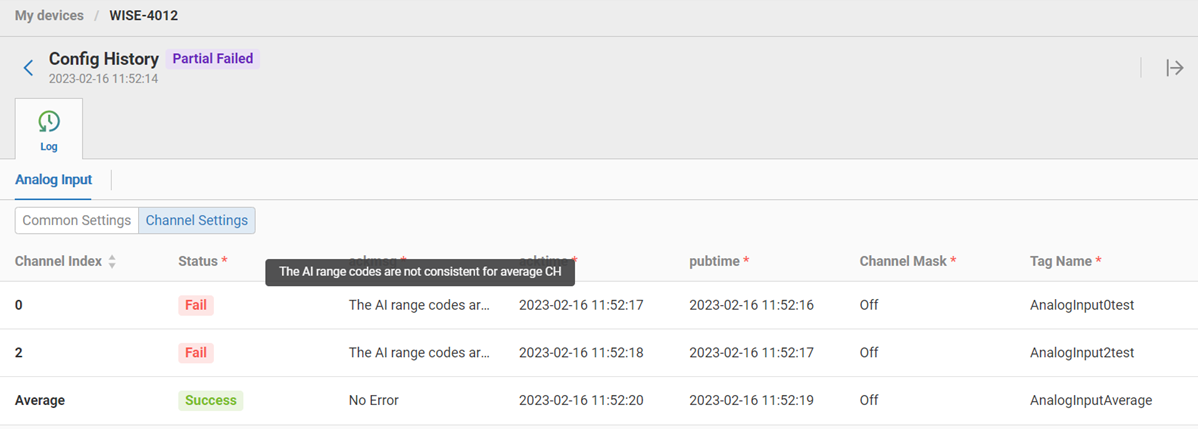
🔹 Config History
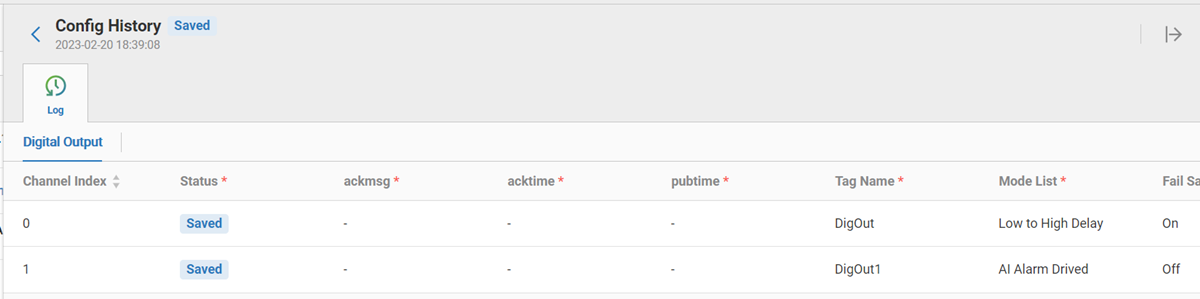
All configuration progress and results are displayed in Config History tab:
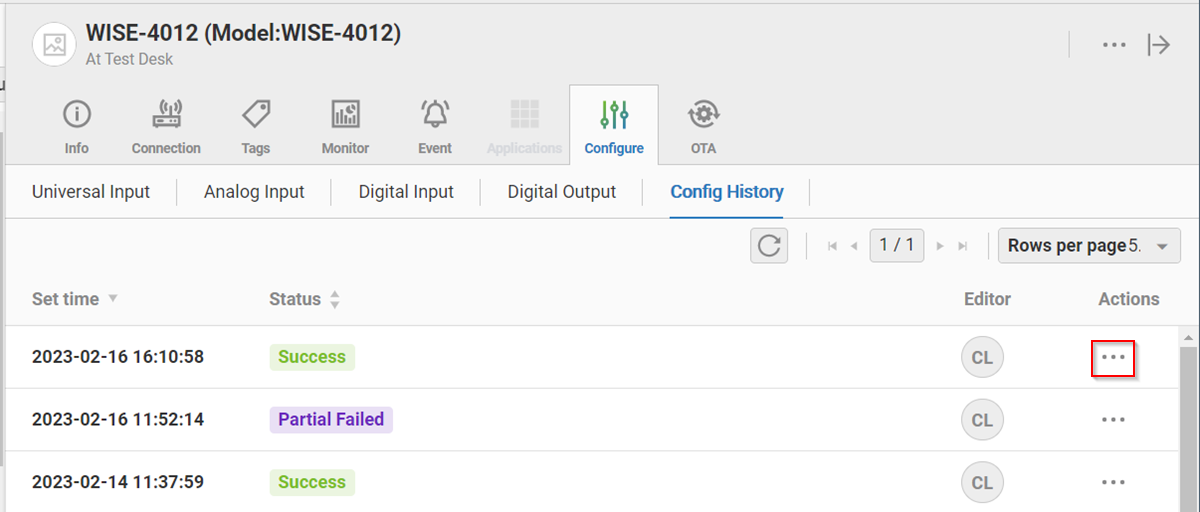
User could click Log in "..." to see detail configuration result: