Event & Actions
1. Introduction
In the previous chapters, we discussed how to set alarms for parameters. In this chapter, we will primarily explain how to configure actions when alarm events are triggered. Currently, EdgeHub supports configuring Event & Actions at the group level.
In the current version of EdgeHub, supported events include:
- Parameter alarms
In the current version of EdgeHub, supported actions include:
- Notification
Within each group, there is an Event & Actions page where you can configure the following:
- Alarm groups: Configure alarm groups by combining multiple parameter alarms.
- Alarm user groups: Set up user groups by grouping one or more users.
- Notification groups: Configure notification groups, bind them to one Alarm group and one Alarm user group, and specify the notification content. When an alarm occurs, it can send alarm messages to the users within the Alarm user group.
- Channel settings: Configure the sender for notifications.

Below, we will provide detailed explanations for these four functionalities.
2. Alarm Groups
In the Alarm Groups feature, users can group 1 to multiple parameter alarms within a group. In general, similar types of alarms are grouped together to notify users in the same user group when any of these alarms occur (as explained in the next section).
For example, within a group, you may have multiple objects, each with a temperature parameter. You can combine the alarms of 1 to multiple temperature parameters into a temperatureGroup. When any of these temperature values triggers an alarm, it will notify the configured Alarm user group.
The configuration process is as follows:
- Click the
Addbutton in the Alarm Groups page.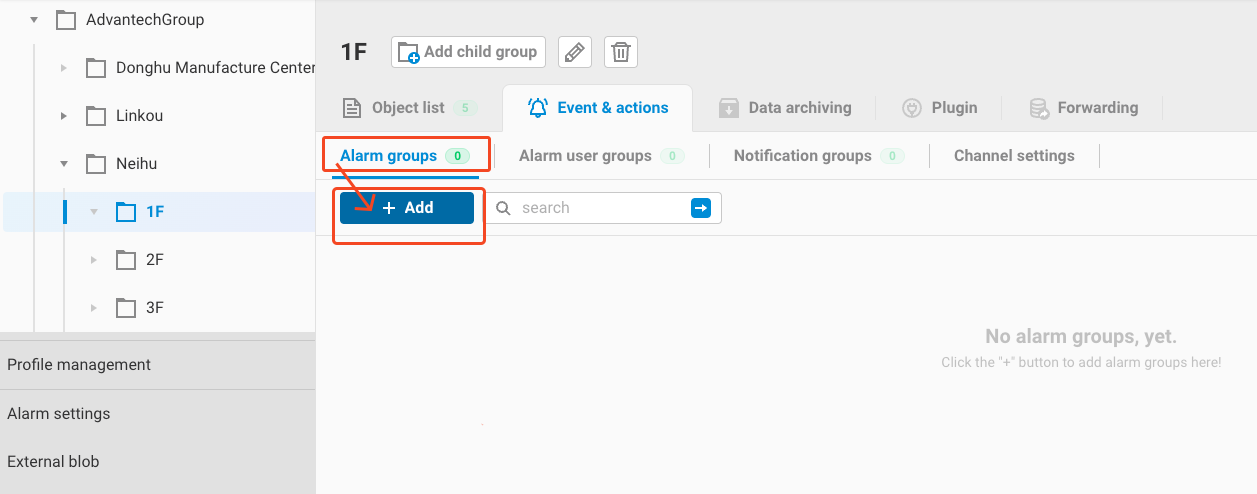
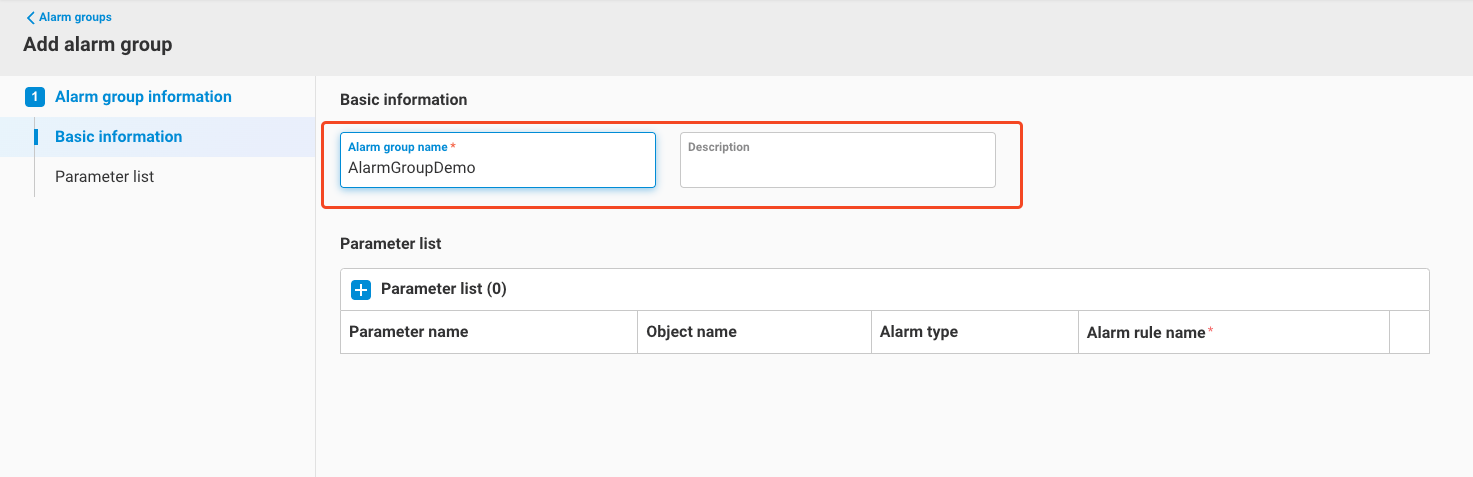
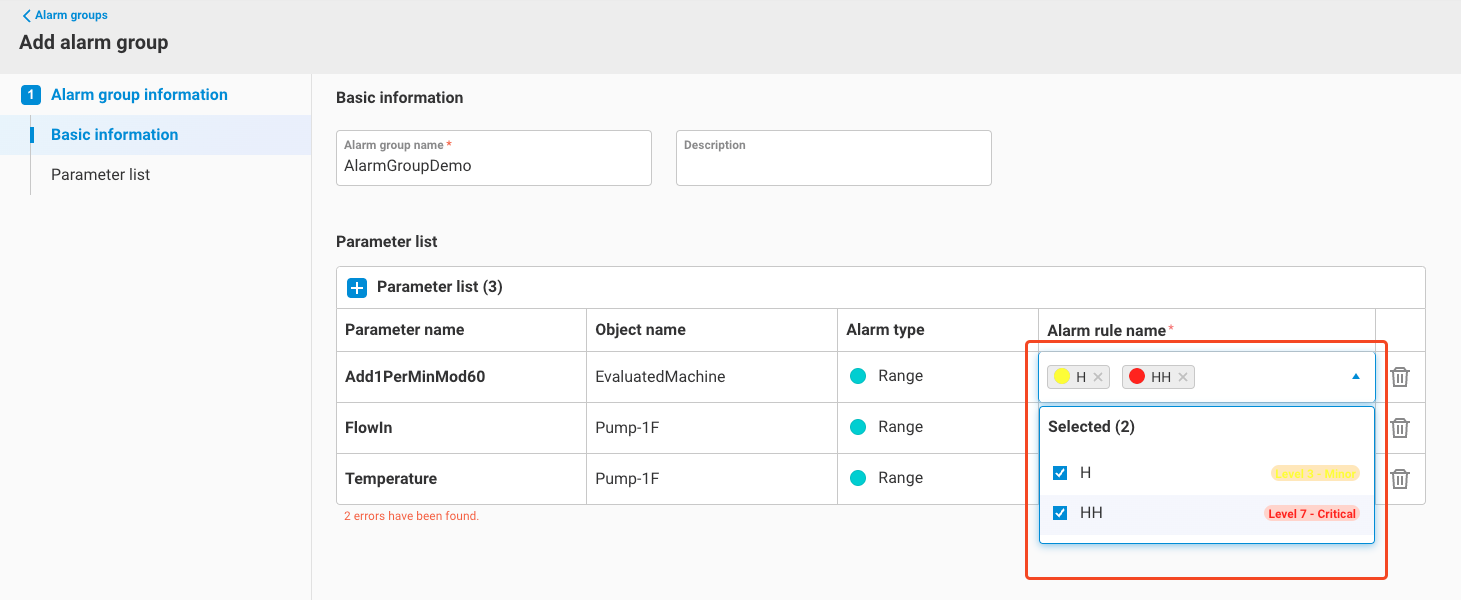
- Enter the Alarm group name and description in the Add Alarm group screen.
- Click the
+button, and the Parameter list will appear on the right side. It will list the parameters with configured alarms. Please select the parameters you want to add to this group from this list.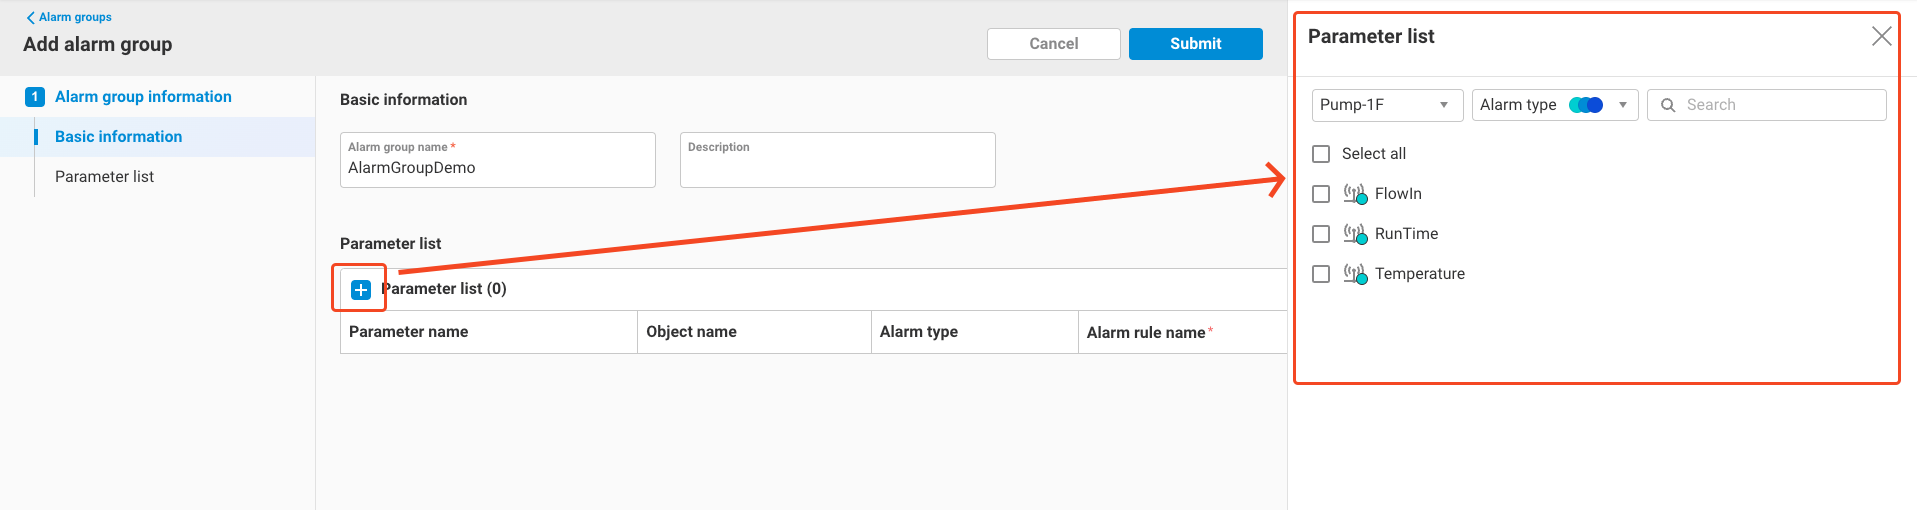
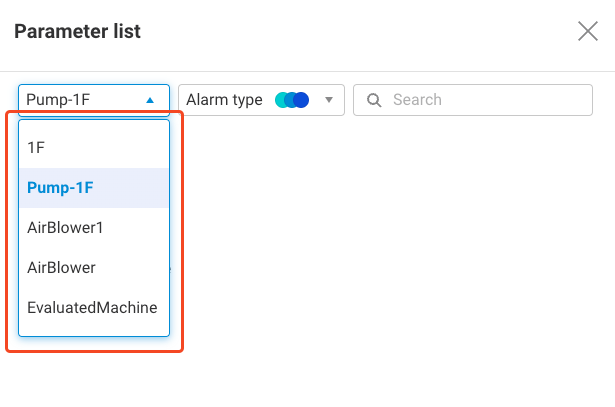
- Within the Parameter list, you can switch to different objects by using the Object dropdown list and select the parameters within them.
- After making your selections, click
Submit.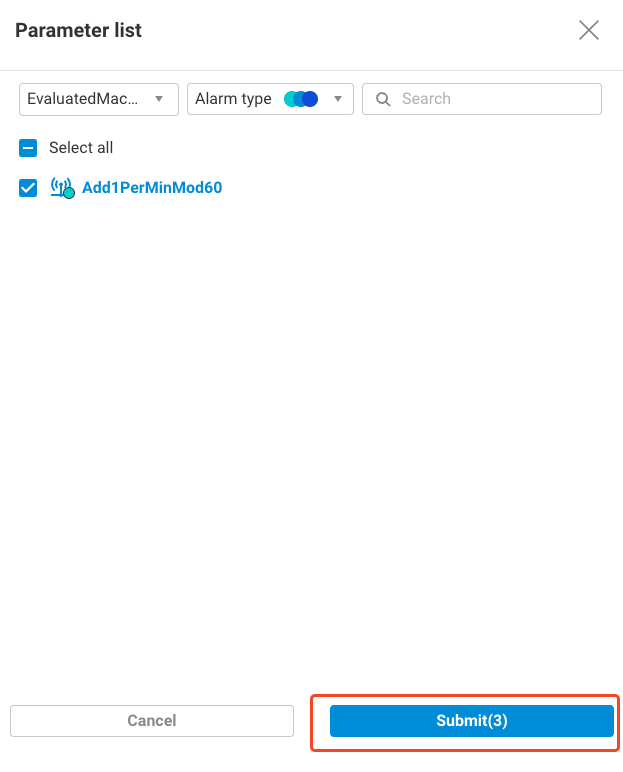
- You will see that the parameters have been added to the Alarm group's parameter list. Next, you need to select the alarm rules you want to monitor for each parameter. These rules will trigger notifications when they are met.
- Once all settings are complete, click
Submitto finish adding the Alarm group.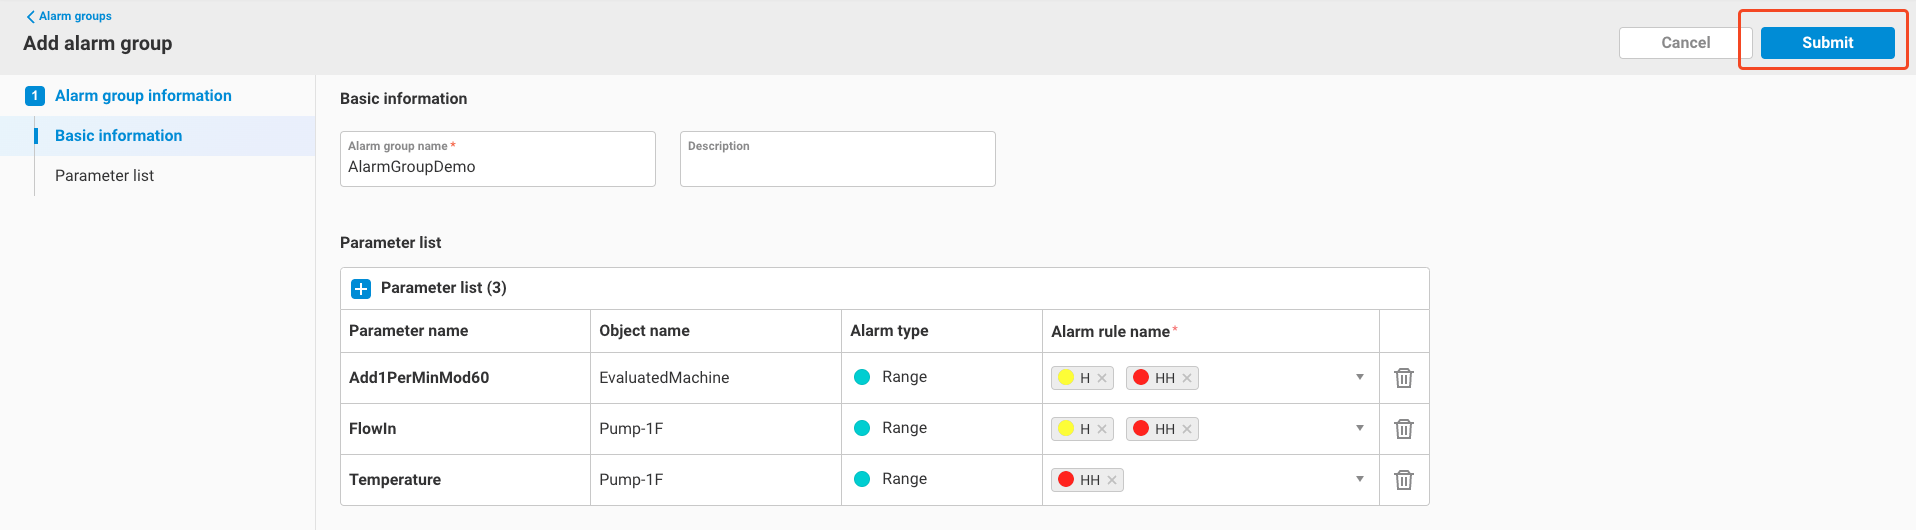
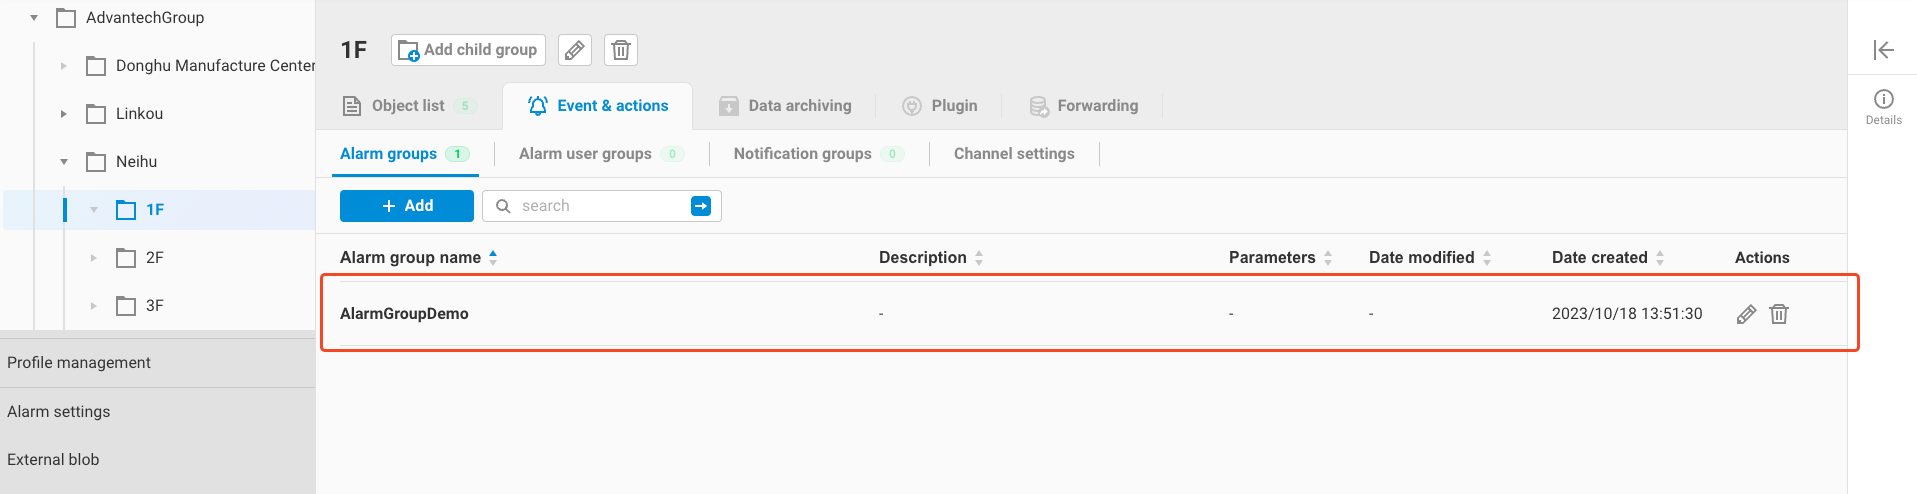
- You can see the newly added Alarm group in the alarm group list.
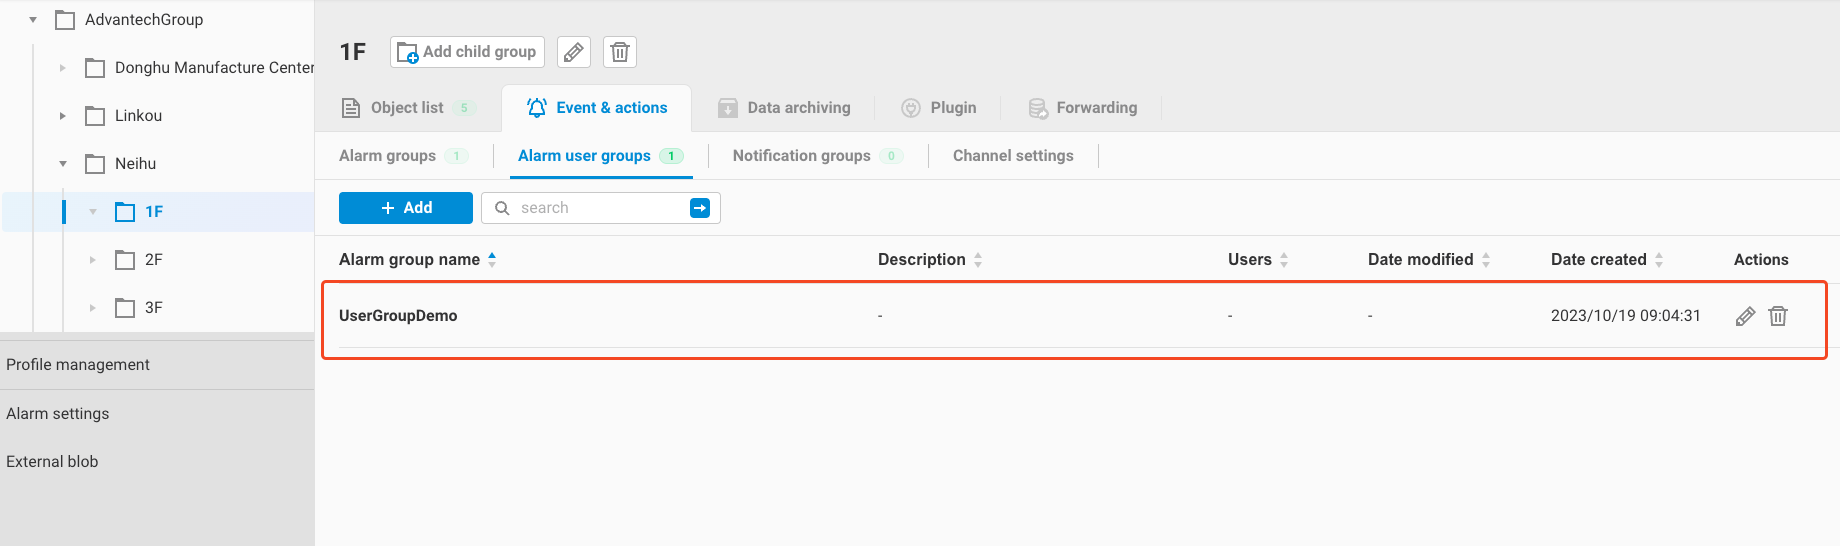
3. Alarm User Groups
This feature allows users to group 1 to multiple users. When any parameter alarm within the Alarm group is triggered, all users within the group will receive alarm notifications. Users within an Alarm User group can be either SSO users within this group or external users. For each user, you must configure their notification method. Currently, the following methods are supported:
- Line token
- WeChat Business (WeCom)
- Advantech WISE-PaaS/iMobile Services (EdgeHub is not yet open for this)
To set up Alarm User groups, follow these steps:
-
Click the
Addbutton in the Alarm User Groups page.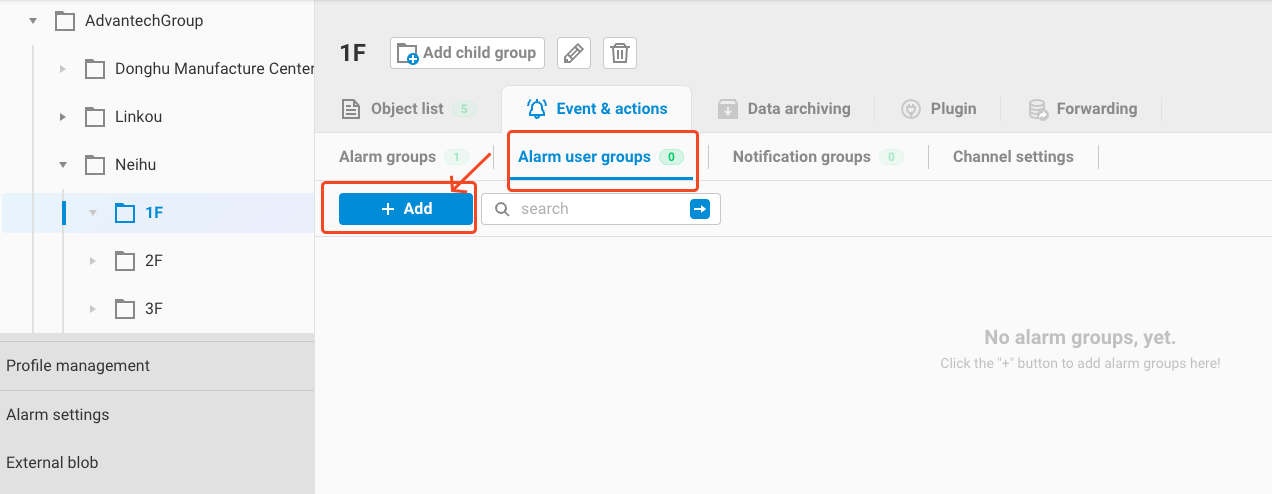
-
Fill in the Alarm User group name and description.
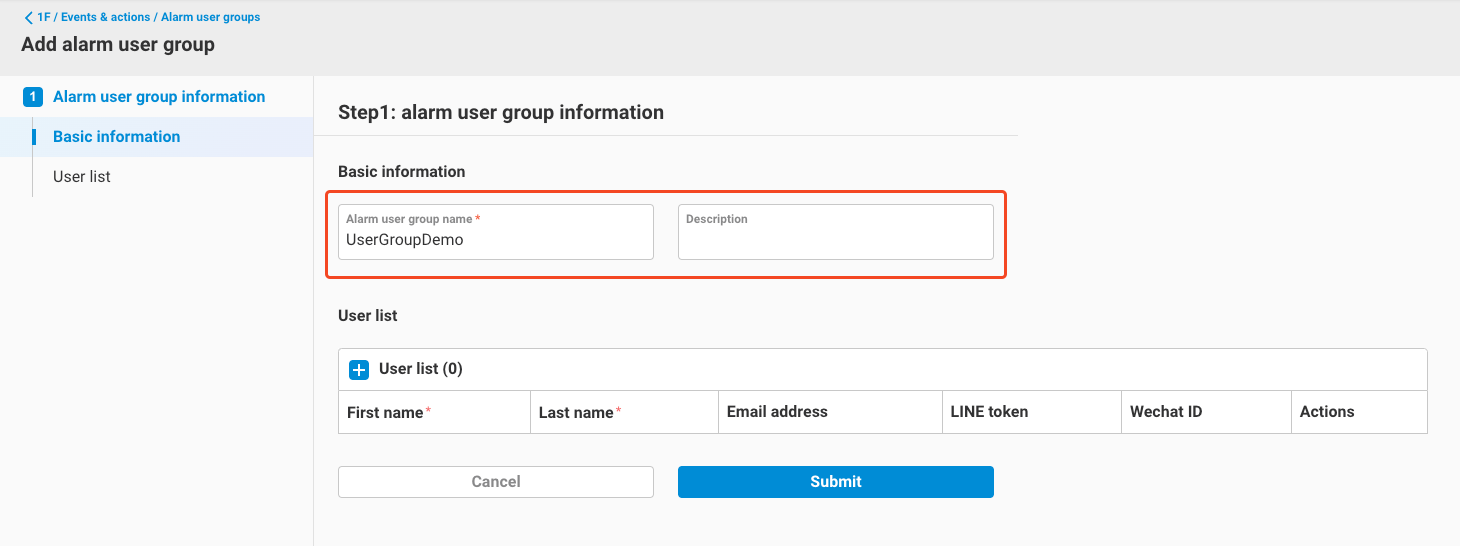
-
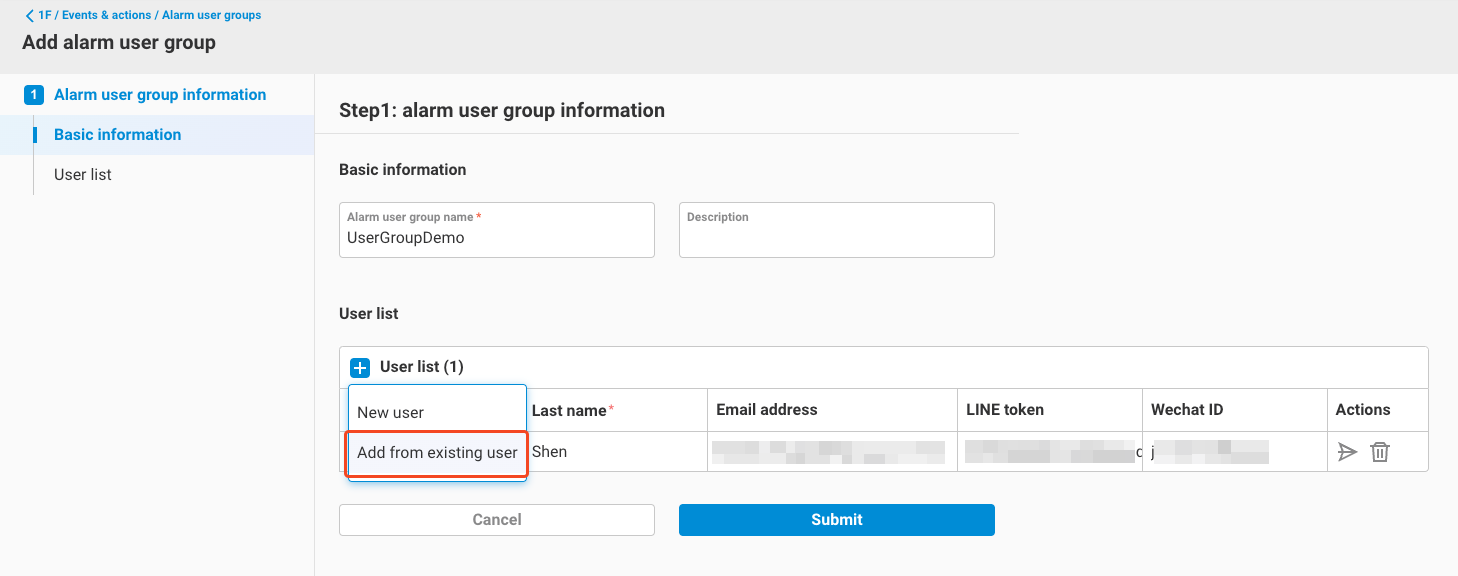
Click the
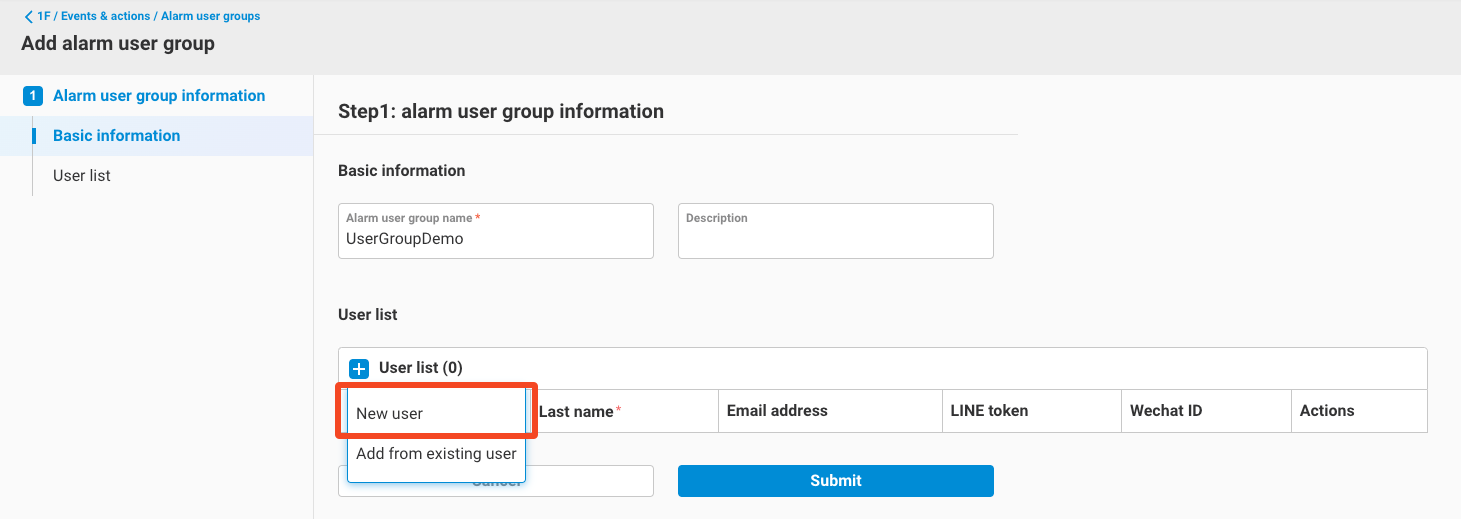
+button in the User list, where you have two options for adding users. The first option is to choose "New user."- Selecting "New user" indicates that you want to add an external user.
- Fill in the following information for this user. Please note that to set the user's Email address or WeChat ID, you must first configure the sender for sending messages in Channel Settings.
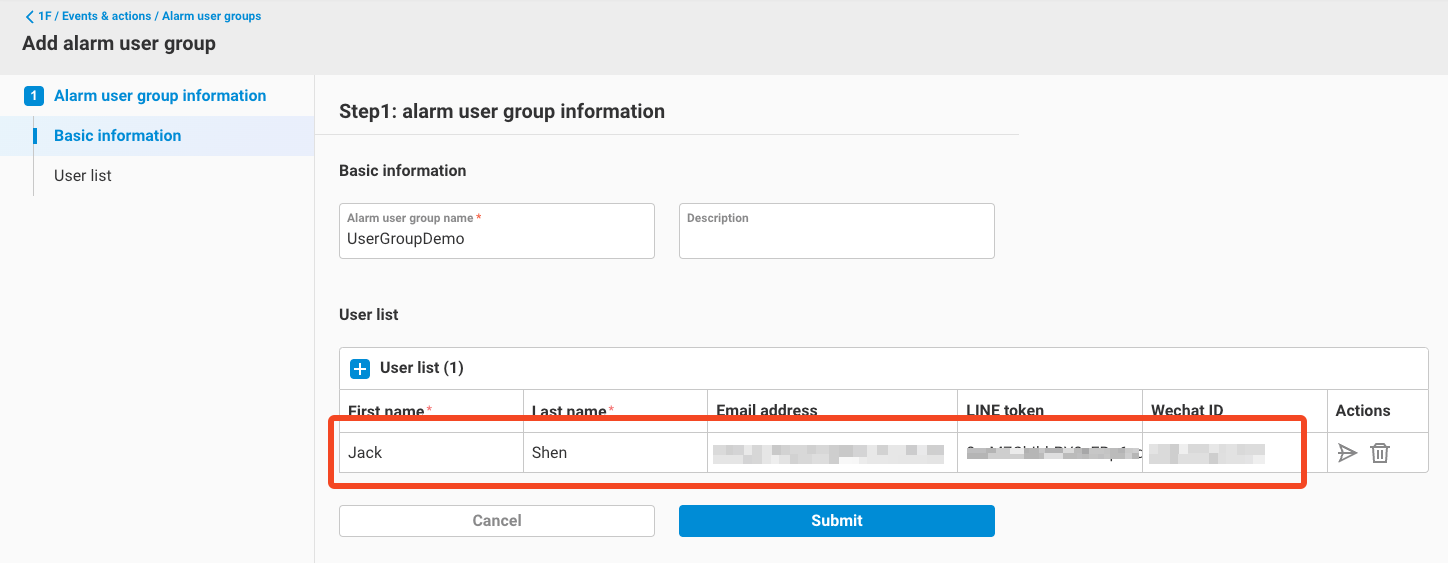
- First name (required)
- Last name (required)
- Email address (optional)
- Line token (optional): Fill in the Line token for receiving notifications. For information on obtaining a Line token, please refer to the official website.
- WeChat ID (for WeChat Business) (optional)
- Selecting "New user" indicates that you want to add an external user.
-
Click the
+button in the User list again, but this time select "Add from existing user."- Choosing "Add from existing user" means you want to select a user from the SSO users who have permissions within this group.
- After selecting, the user list for this group will appear on the right. Choose users from this list and click "Add."
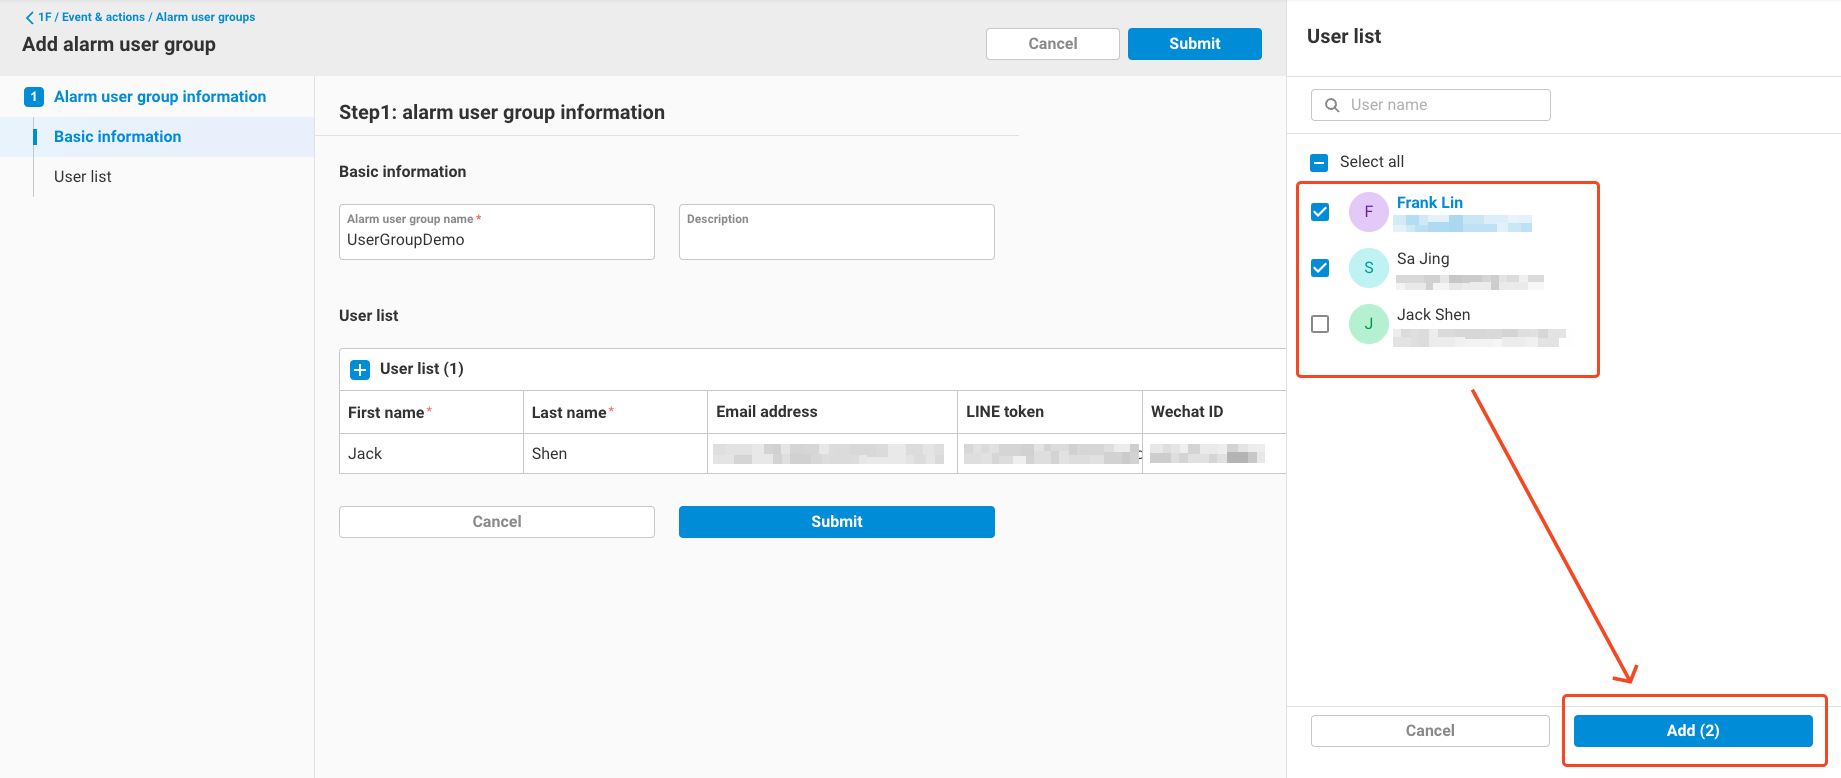
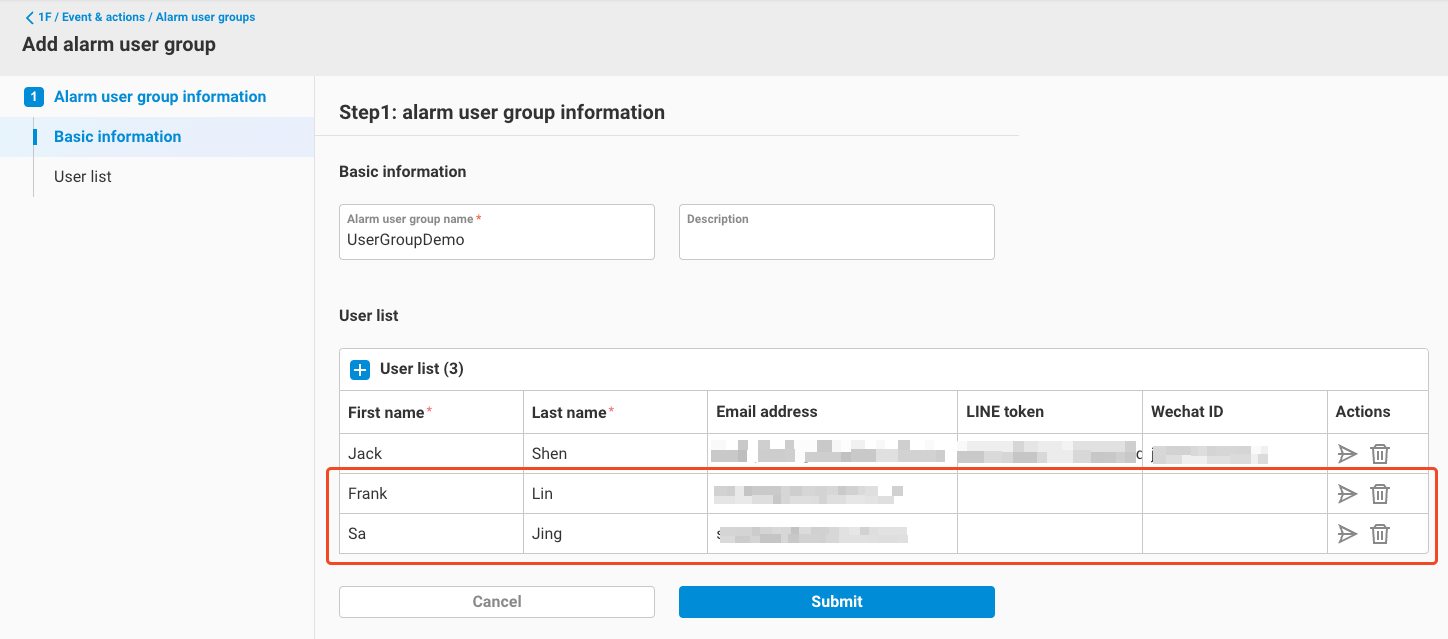
- This user will be added to the User group's user list and their email address will be automatically filled in the Email address field. You can proceed to configure the user's WeCom ID and Line Token.
- Choosing "Add from existing user" means you want to select a user from the SSO users who have permissions within this group.
-
You can click the "Send test" button in the Actions column for each user to test the configuration for each account.
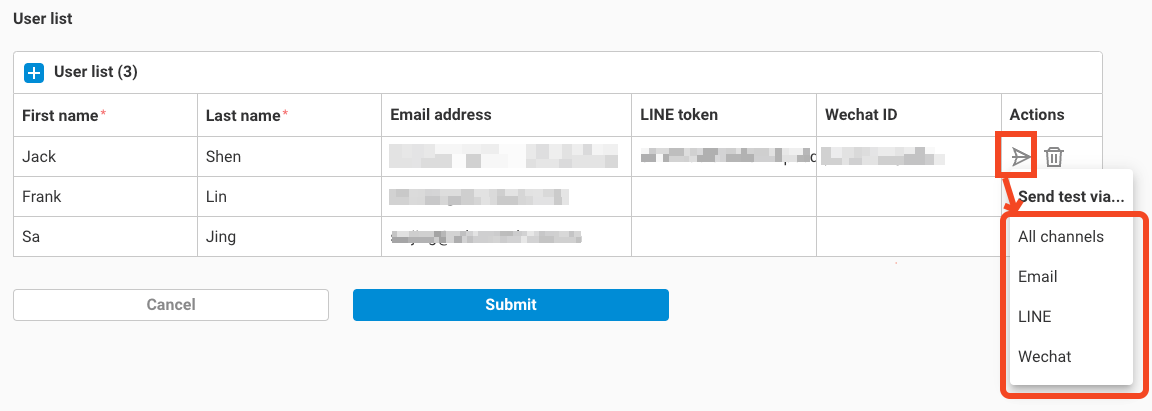
-
If the test is successful, you will receive test messages sent by EdgeHub in various notification types:
- Email
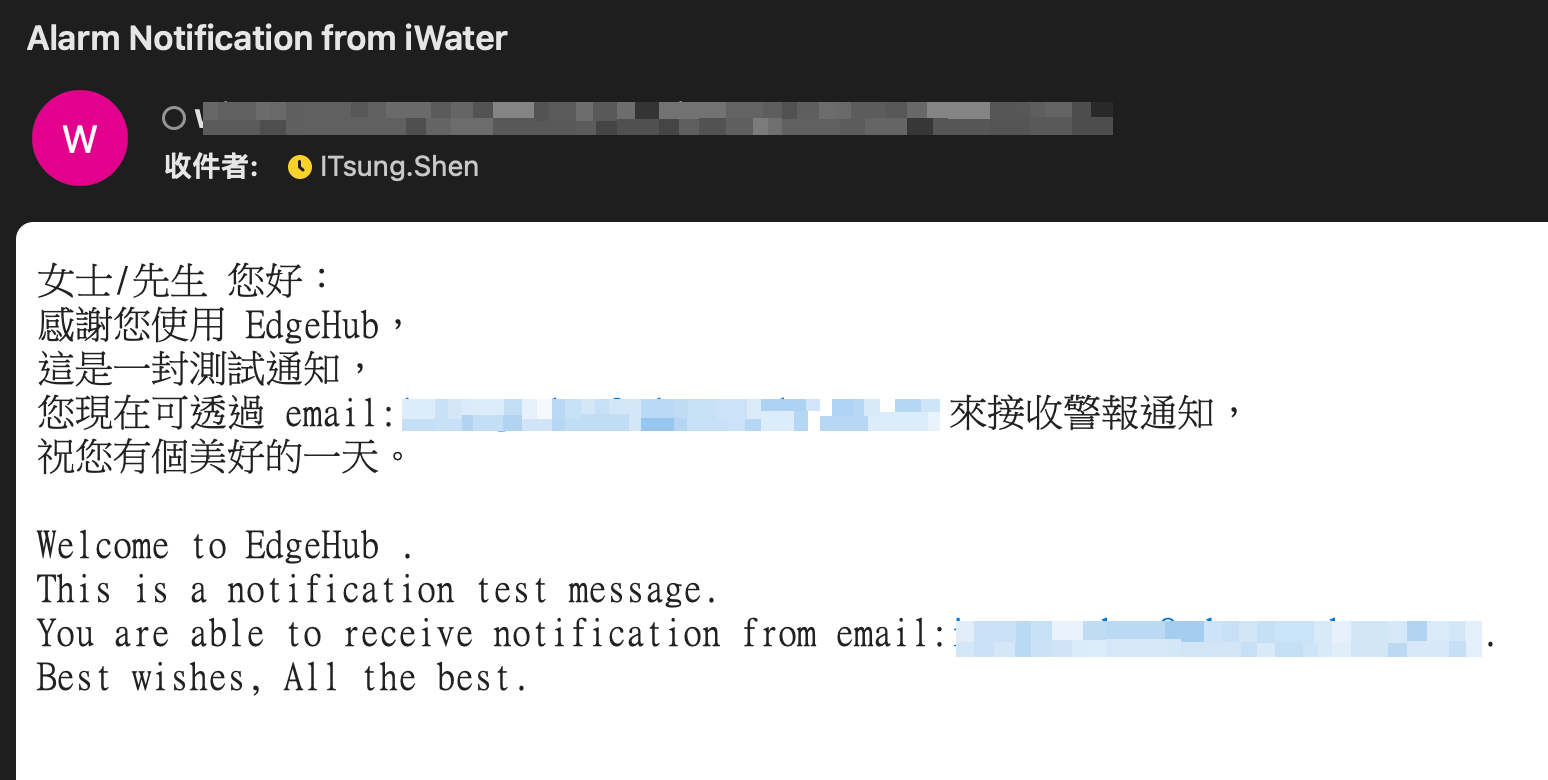
- Line
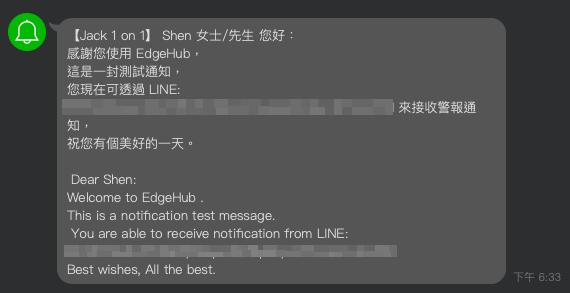
- WeCom
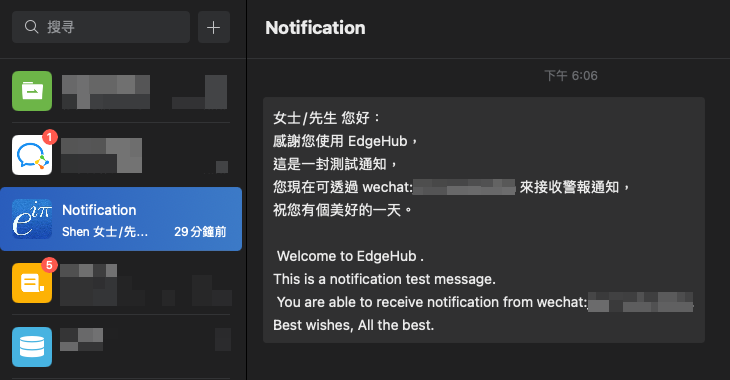
- Email
-
After completing the settings, click
Submitto finish adding the Alarm User group.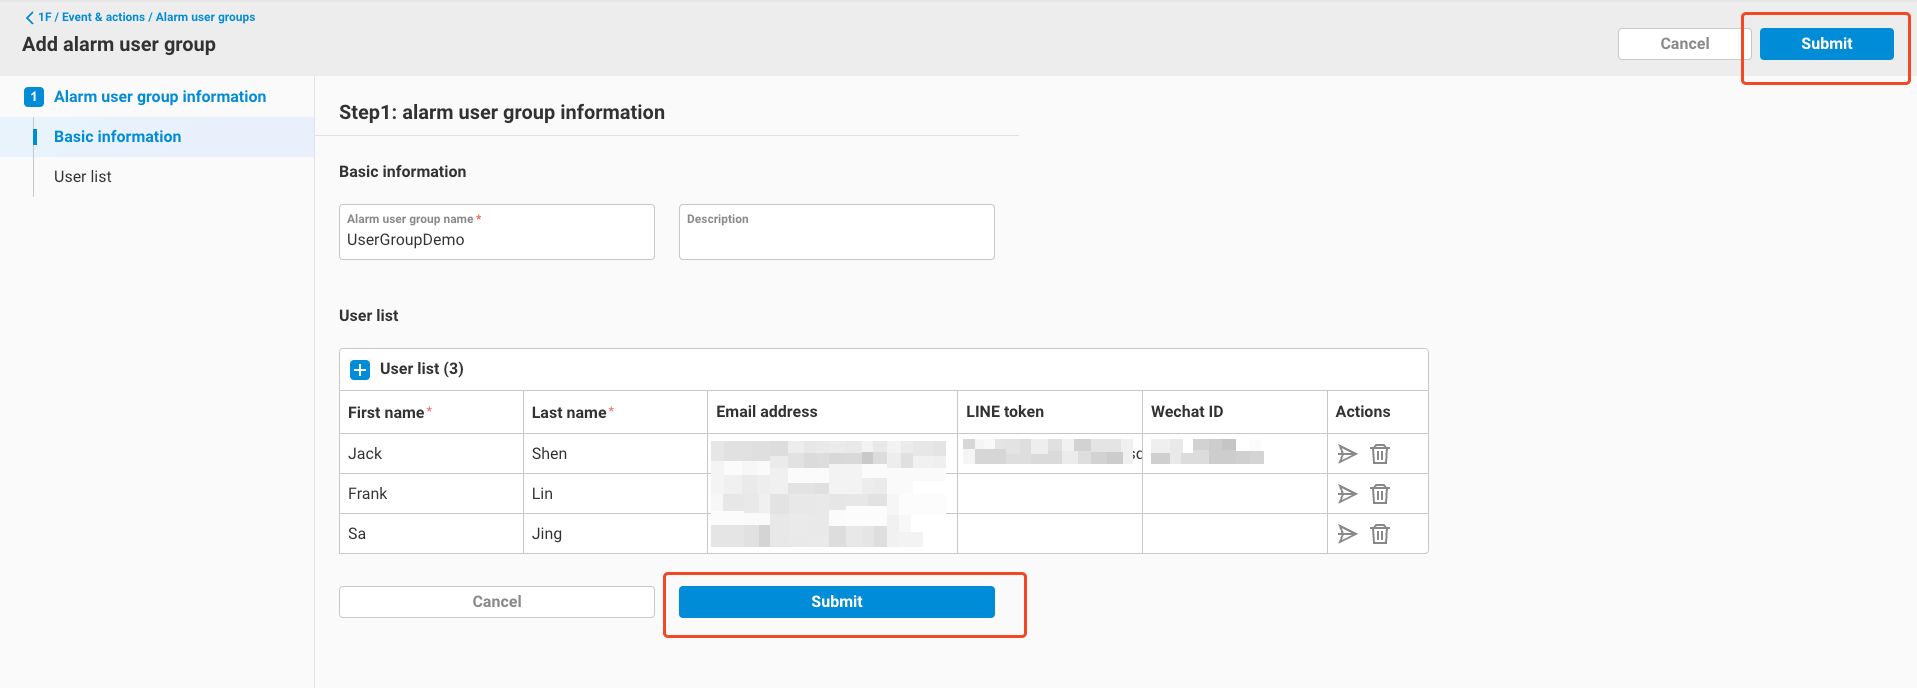
-
Return to the Alarm User Groups page to see the newly added user group.
4. Notification Groups
After configuring Alarm groups and Alarm User groups, you need to create Notification groups to handle the following tasks:
- Select one Alarm group and one Alarm User group.
- Configure Notification
message.
Once a Notification group is set up, whenever any alarm within the Alarm group is triggered, all users within the corresponding Alarm User group will receive the configured Notification message.
The setup process is as follows:
- Click the
Addbutton in the Notification Groups page.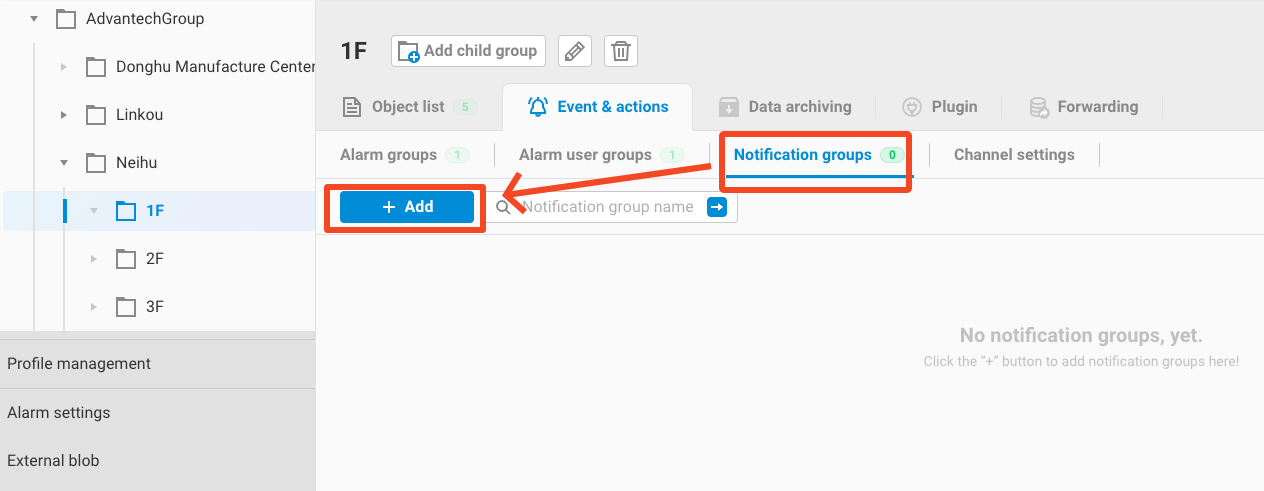
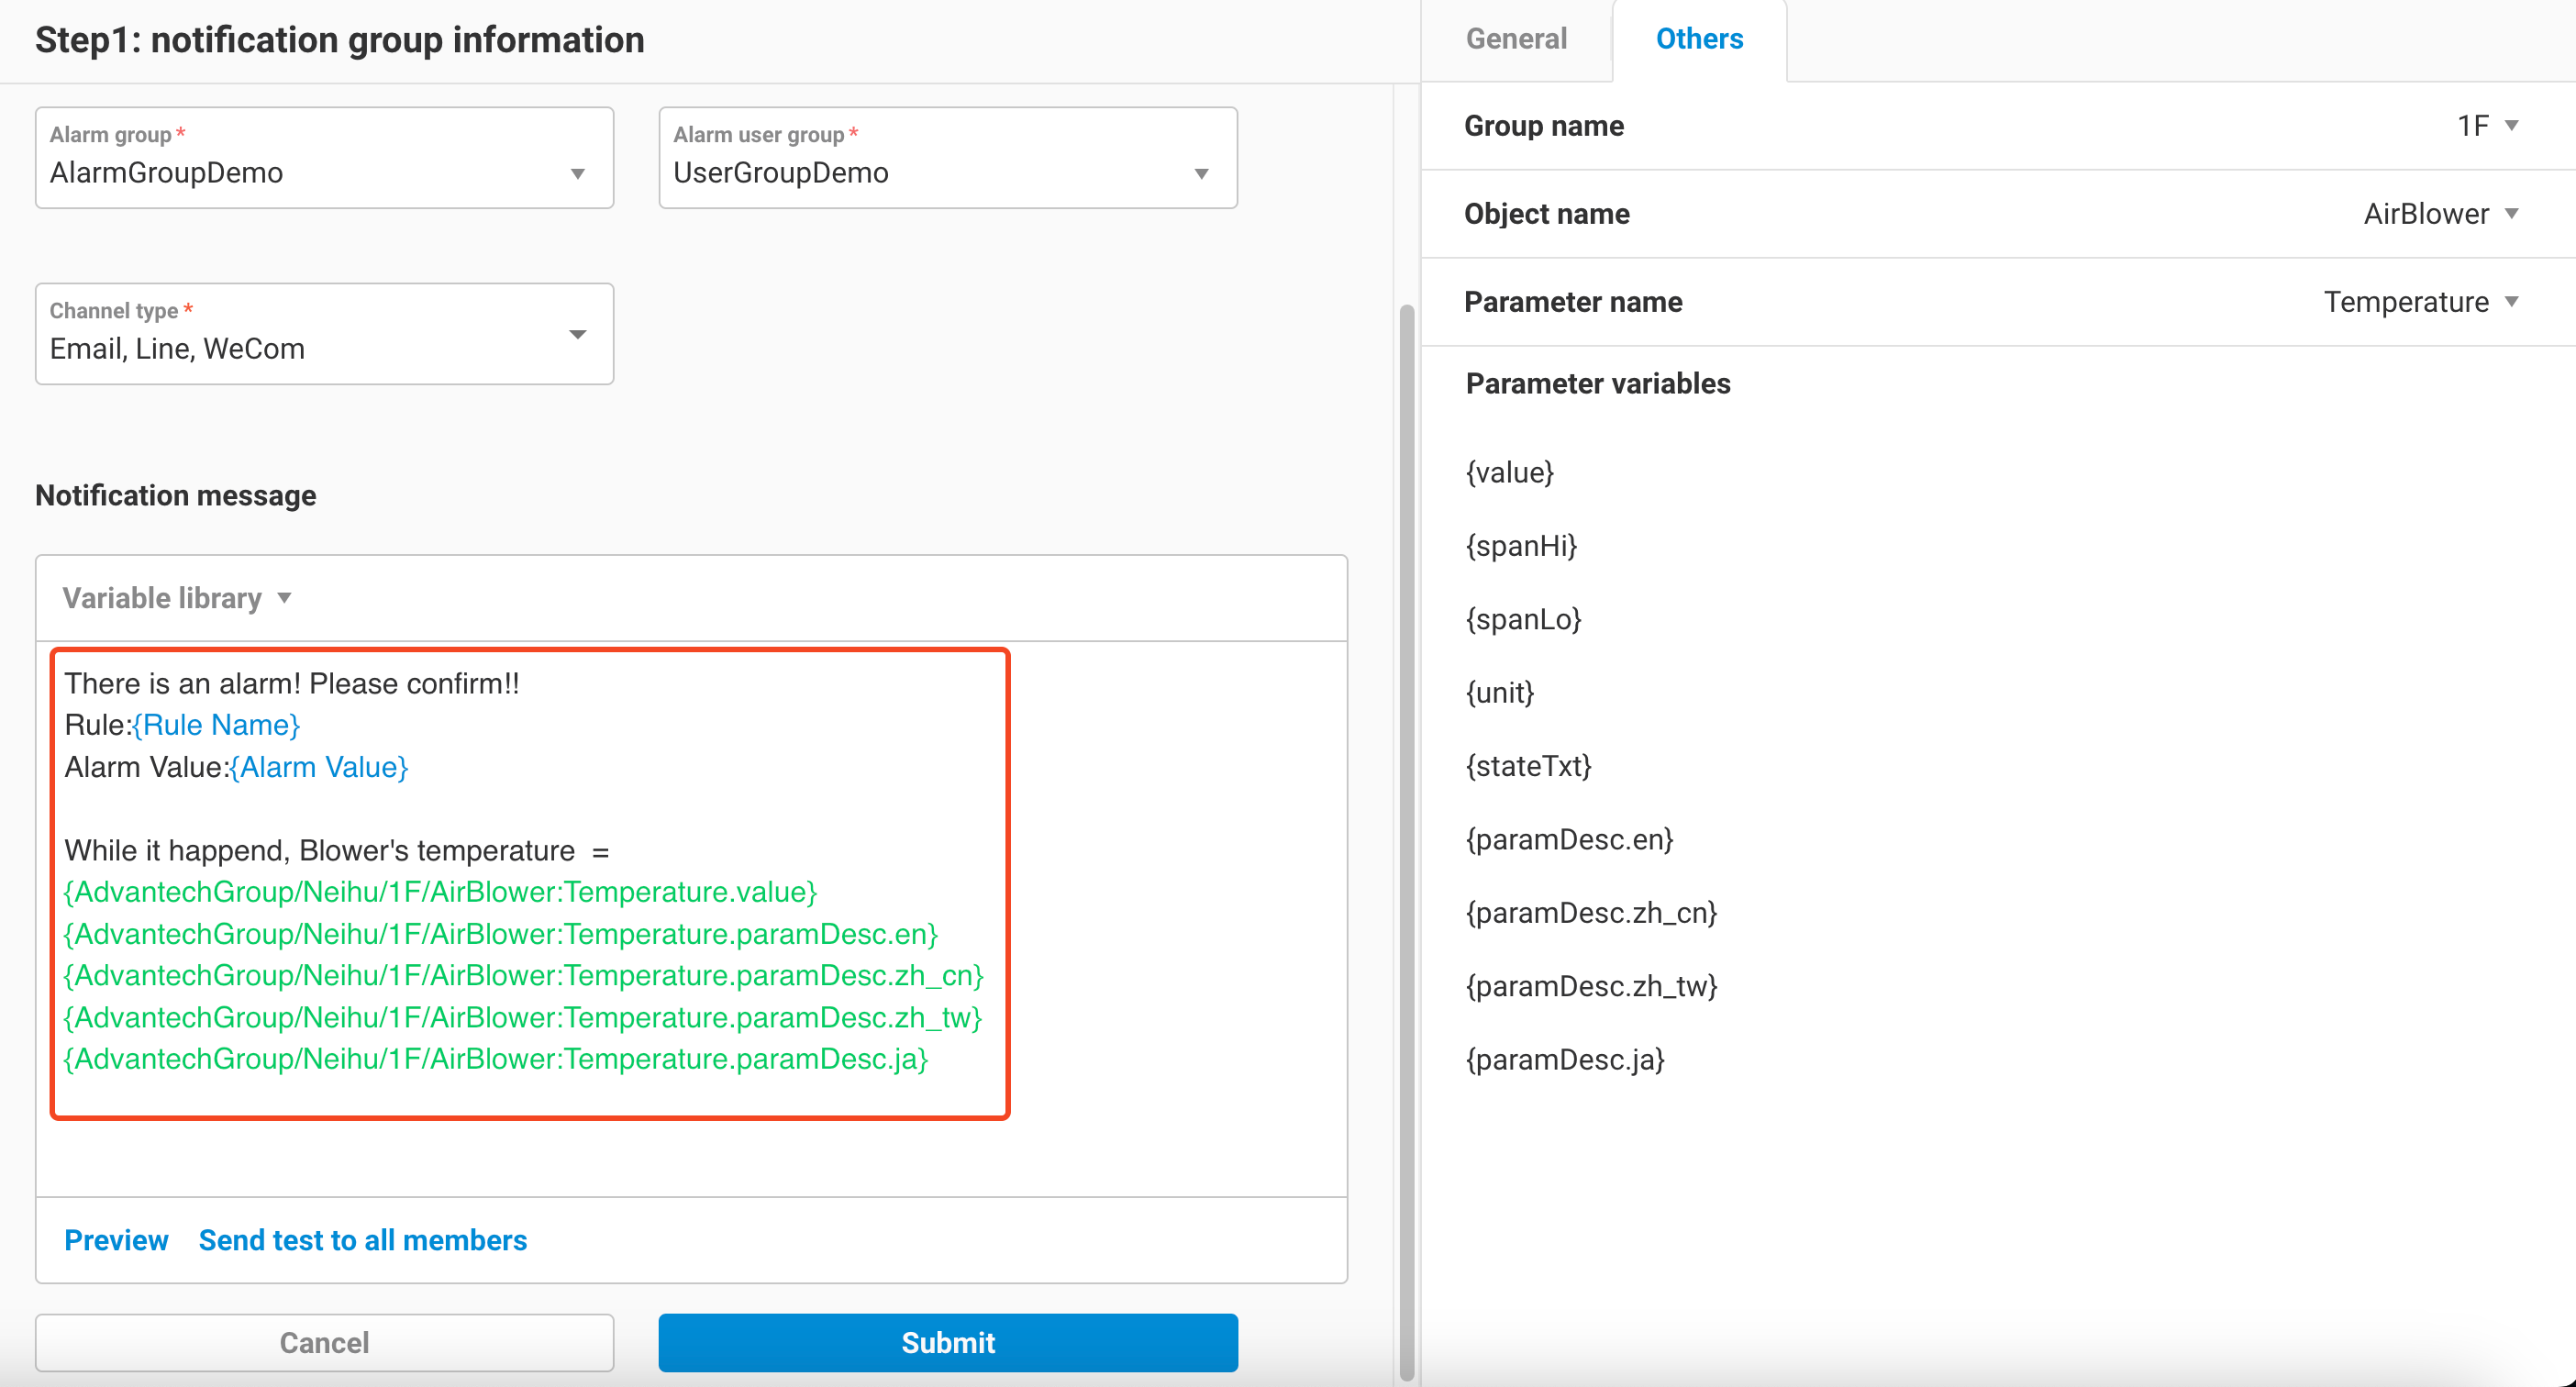
- Enter the following information in the Notification Group edit interface:
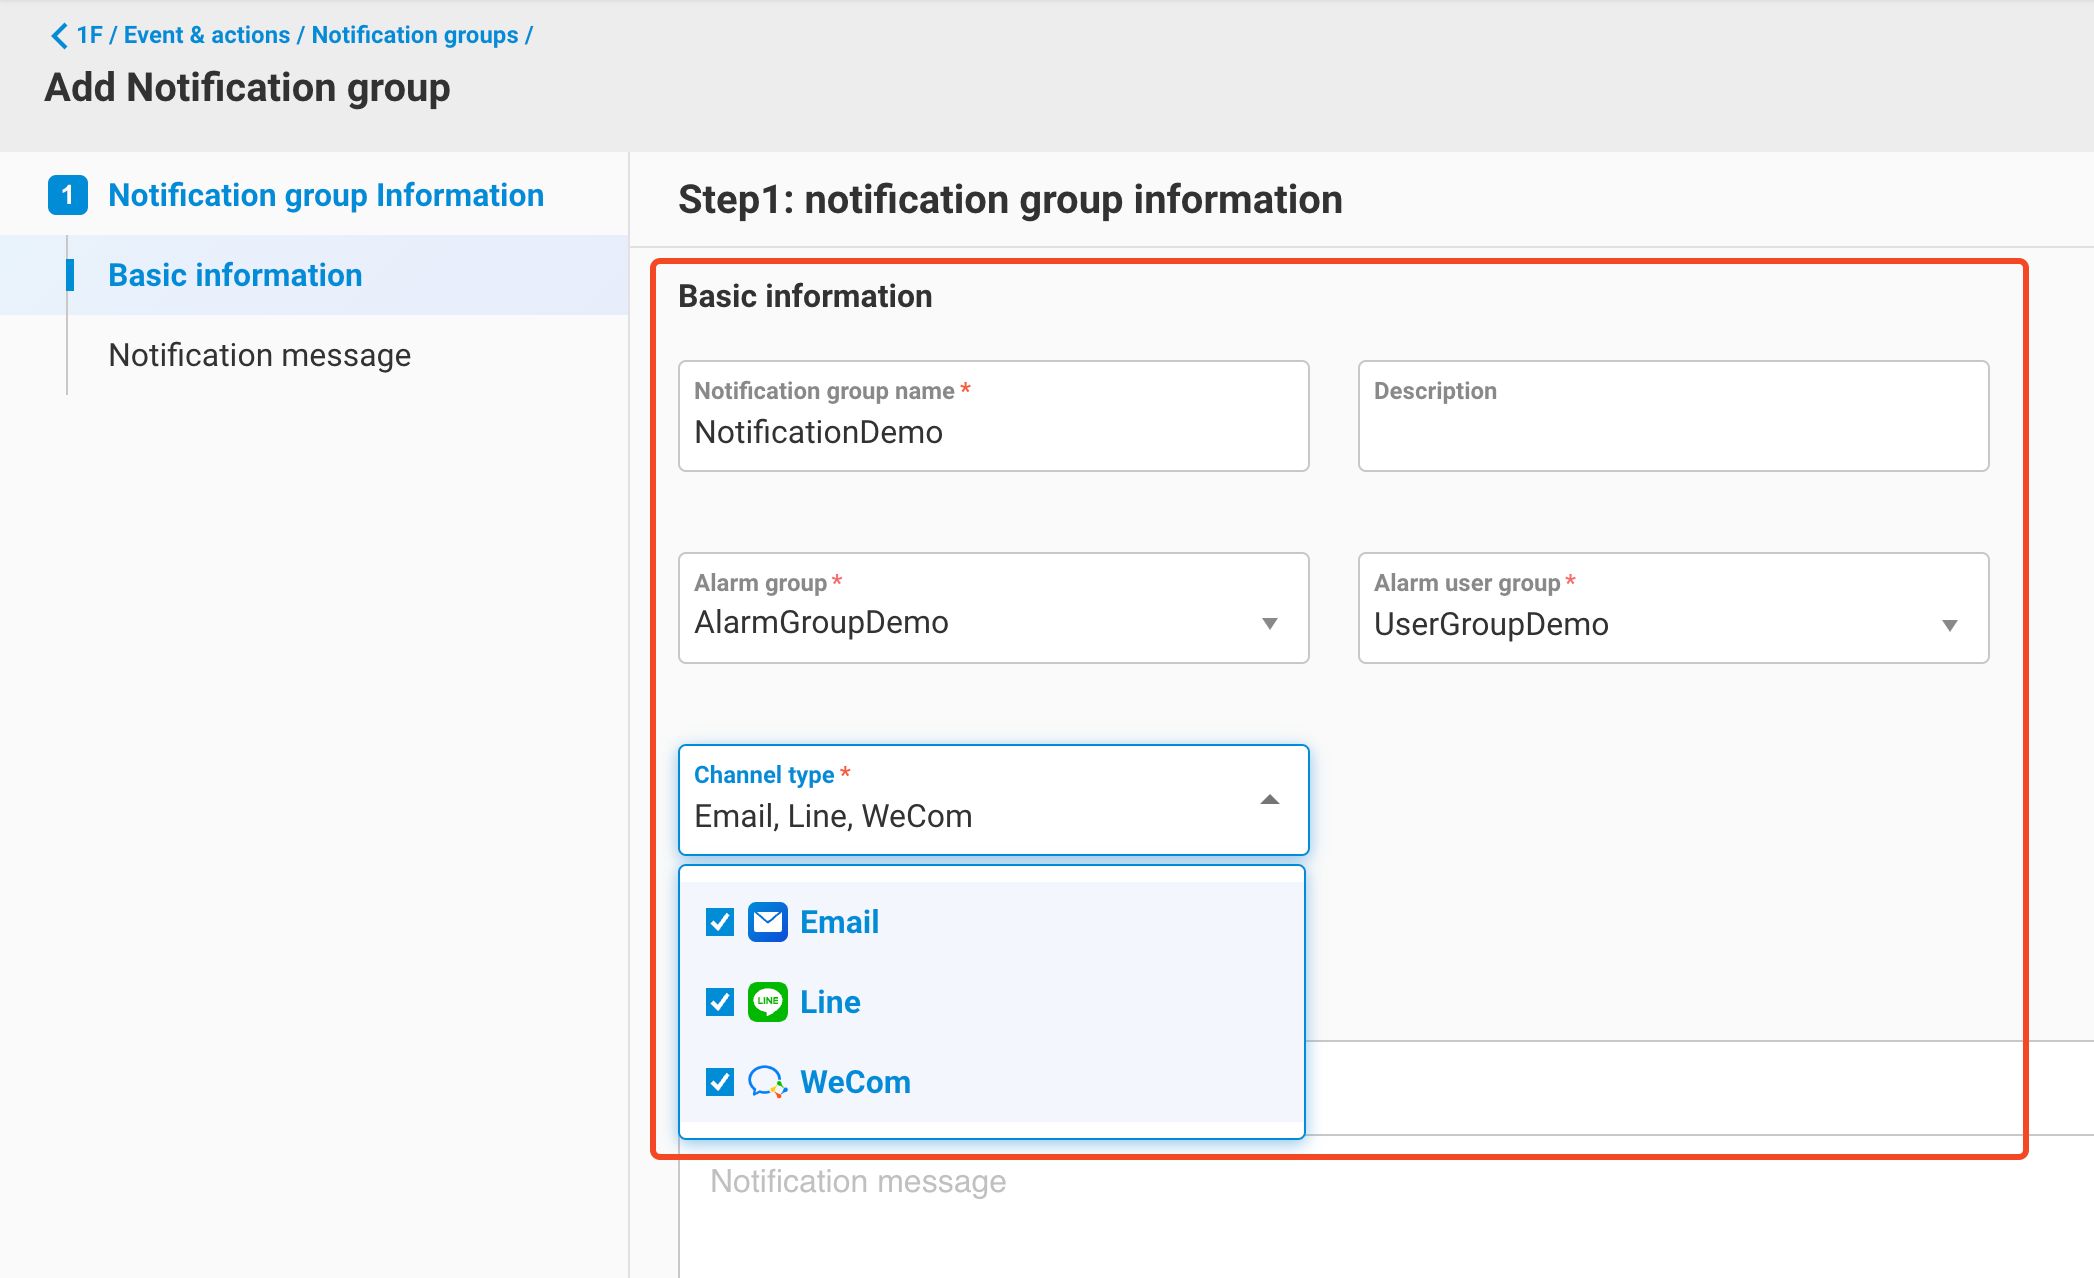
- Notification group name
- Description
- Alarm group
- Select one group from the 1 to multiple Alarm groups set up in Chapter 2.
- Alarm User group
- Select one group from the 1 to multiple Alarm User groups set up in Chapter 3.
- Channel type
- Choose the method through which this Notification will be sent (Email / Line / WeCom).
- Next, you need to configure the Notification message that will be sent when an alarm occurs.
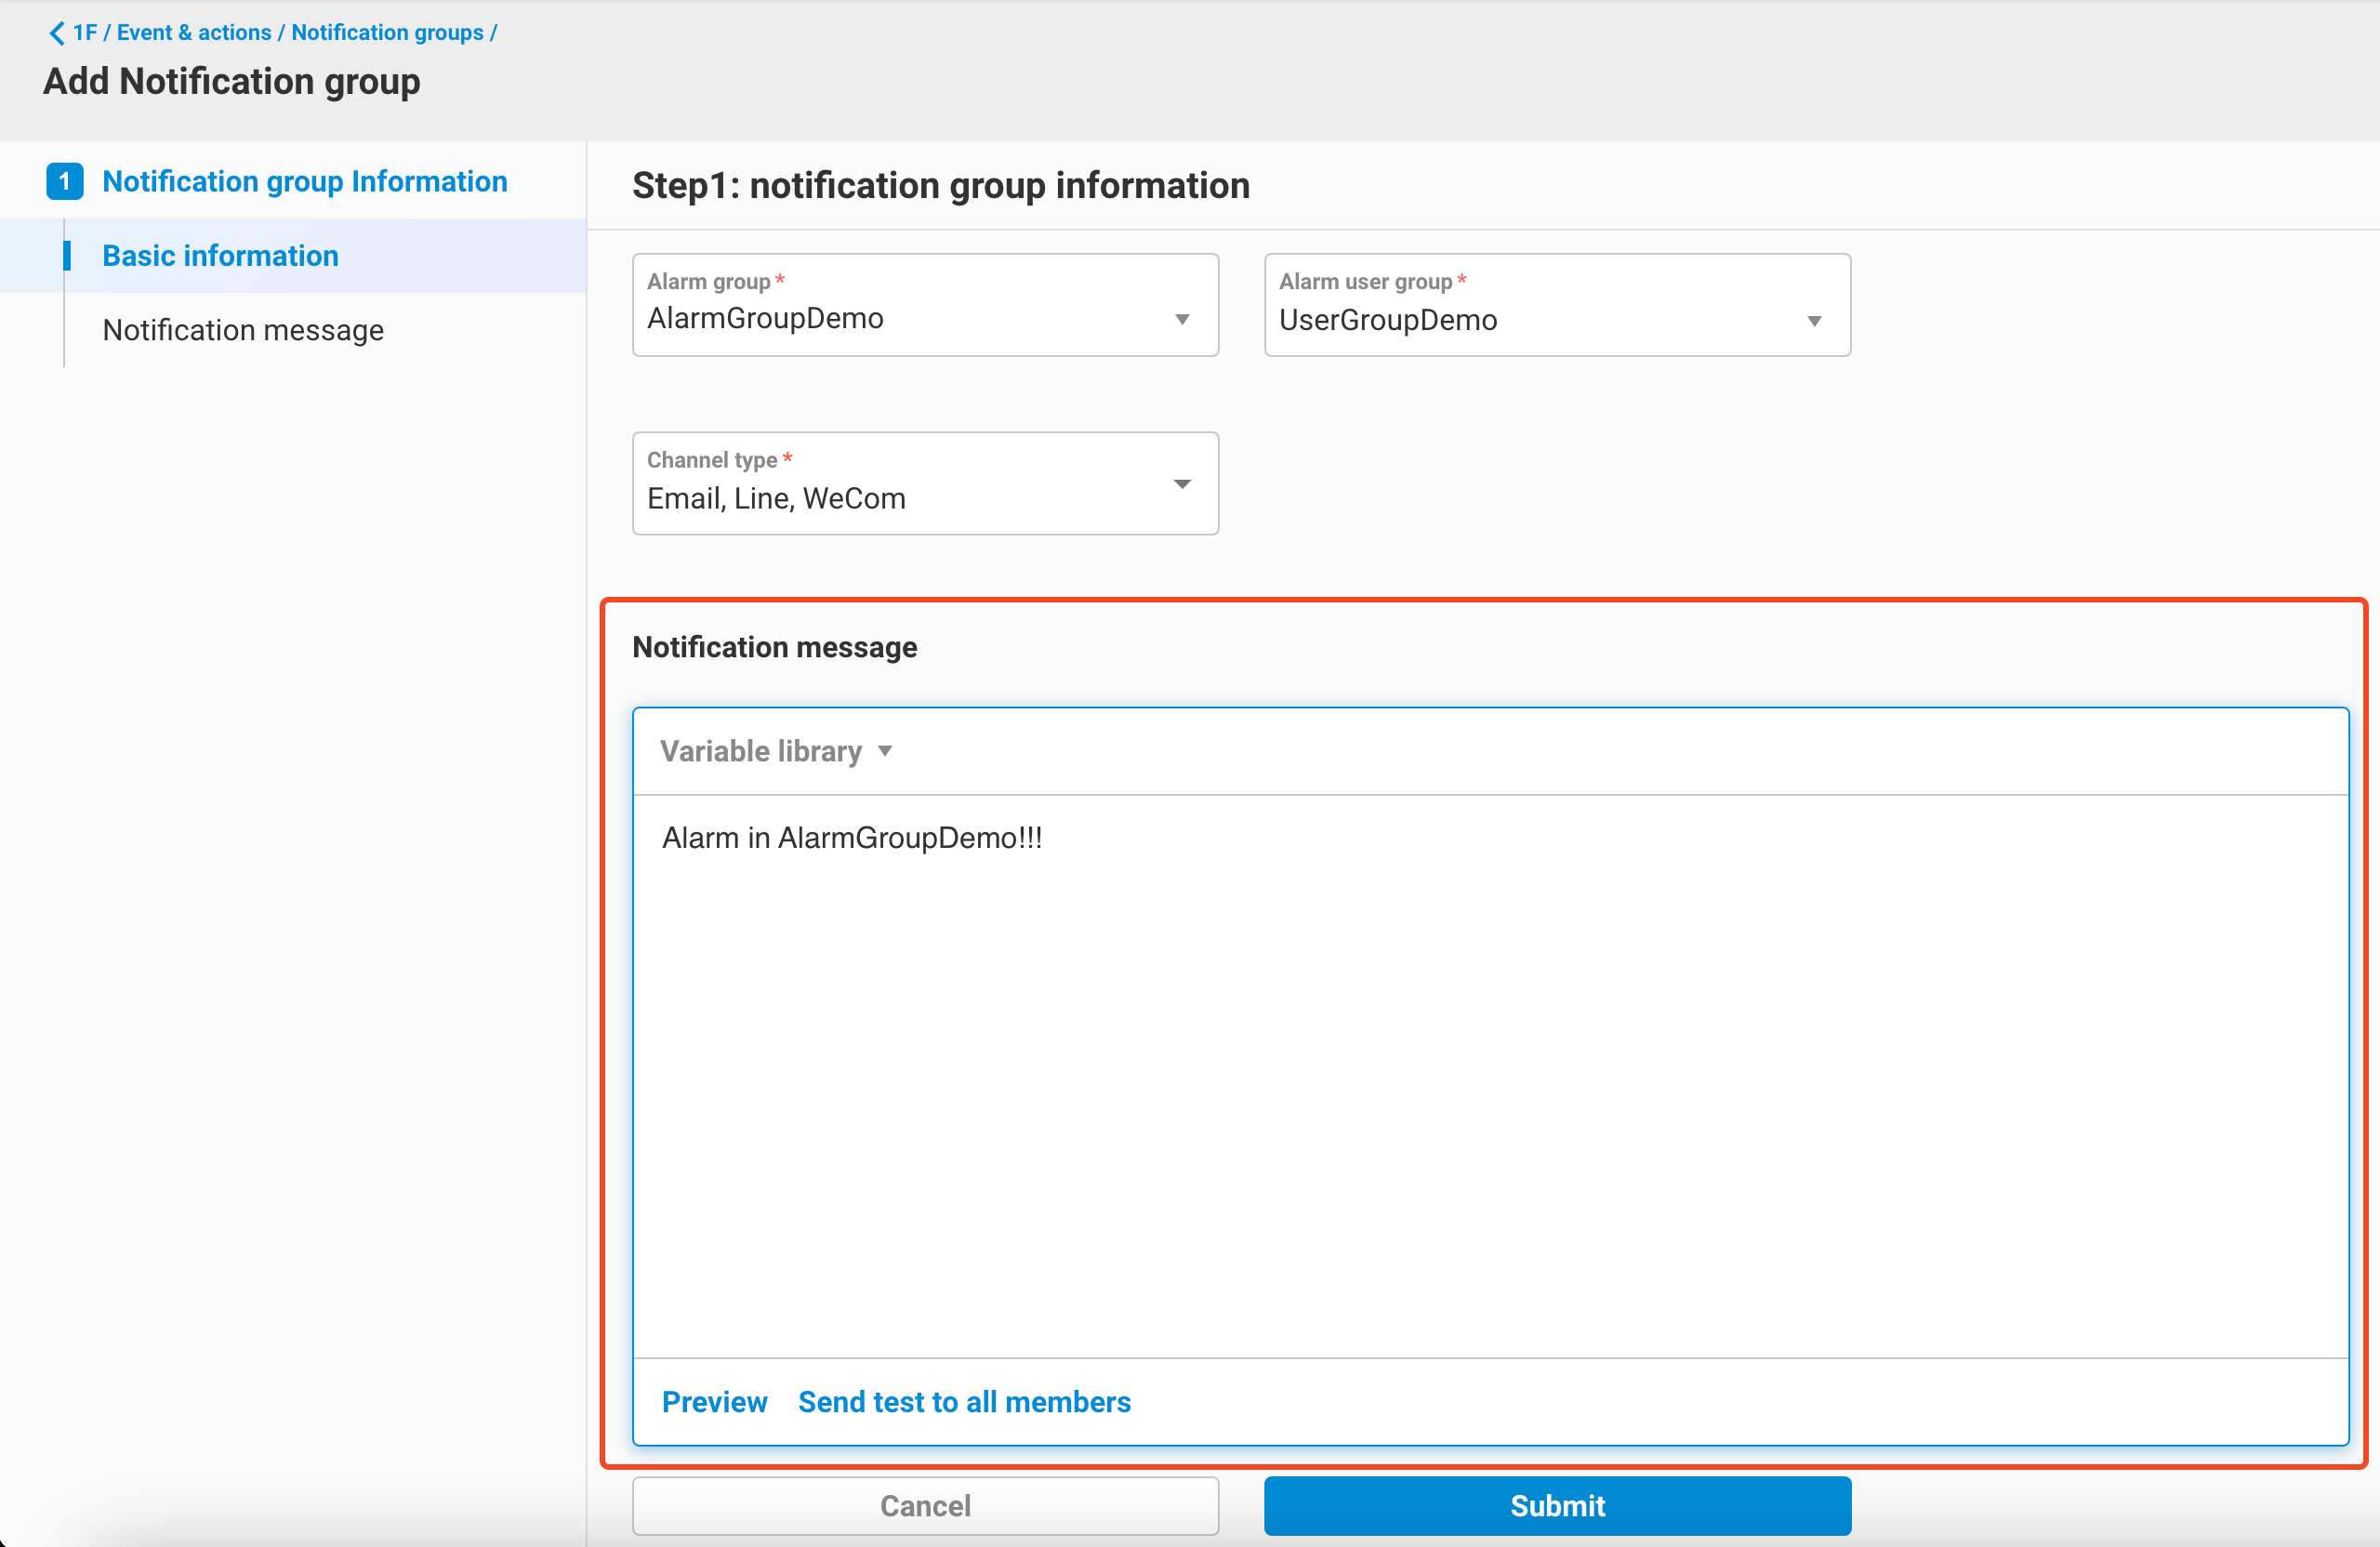
- When configuring the Notification message, EdgeHub provides the following variables that allow you to set values that will be substituted with the current alarm settings and real-time values when a notification is sent.
- Alarm variables:
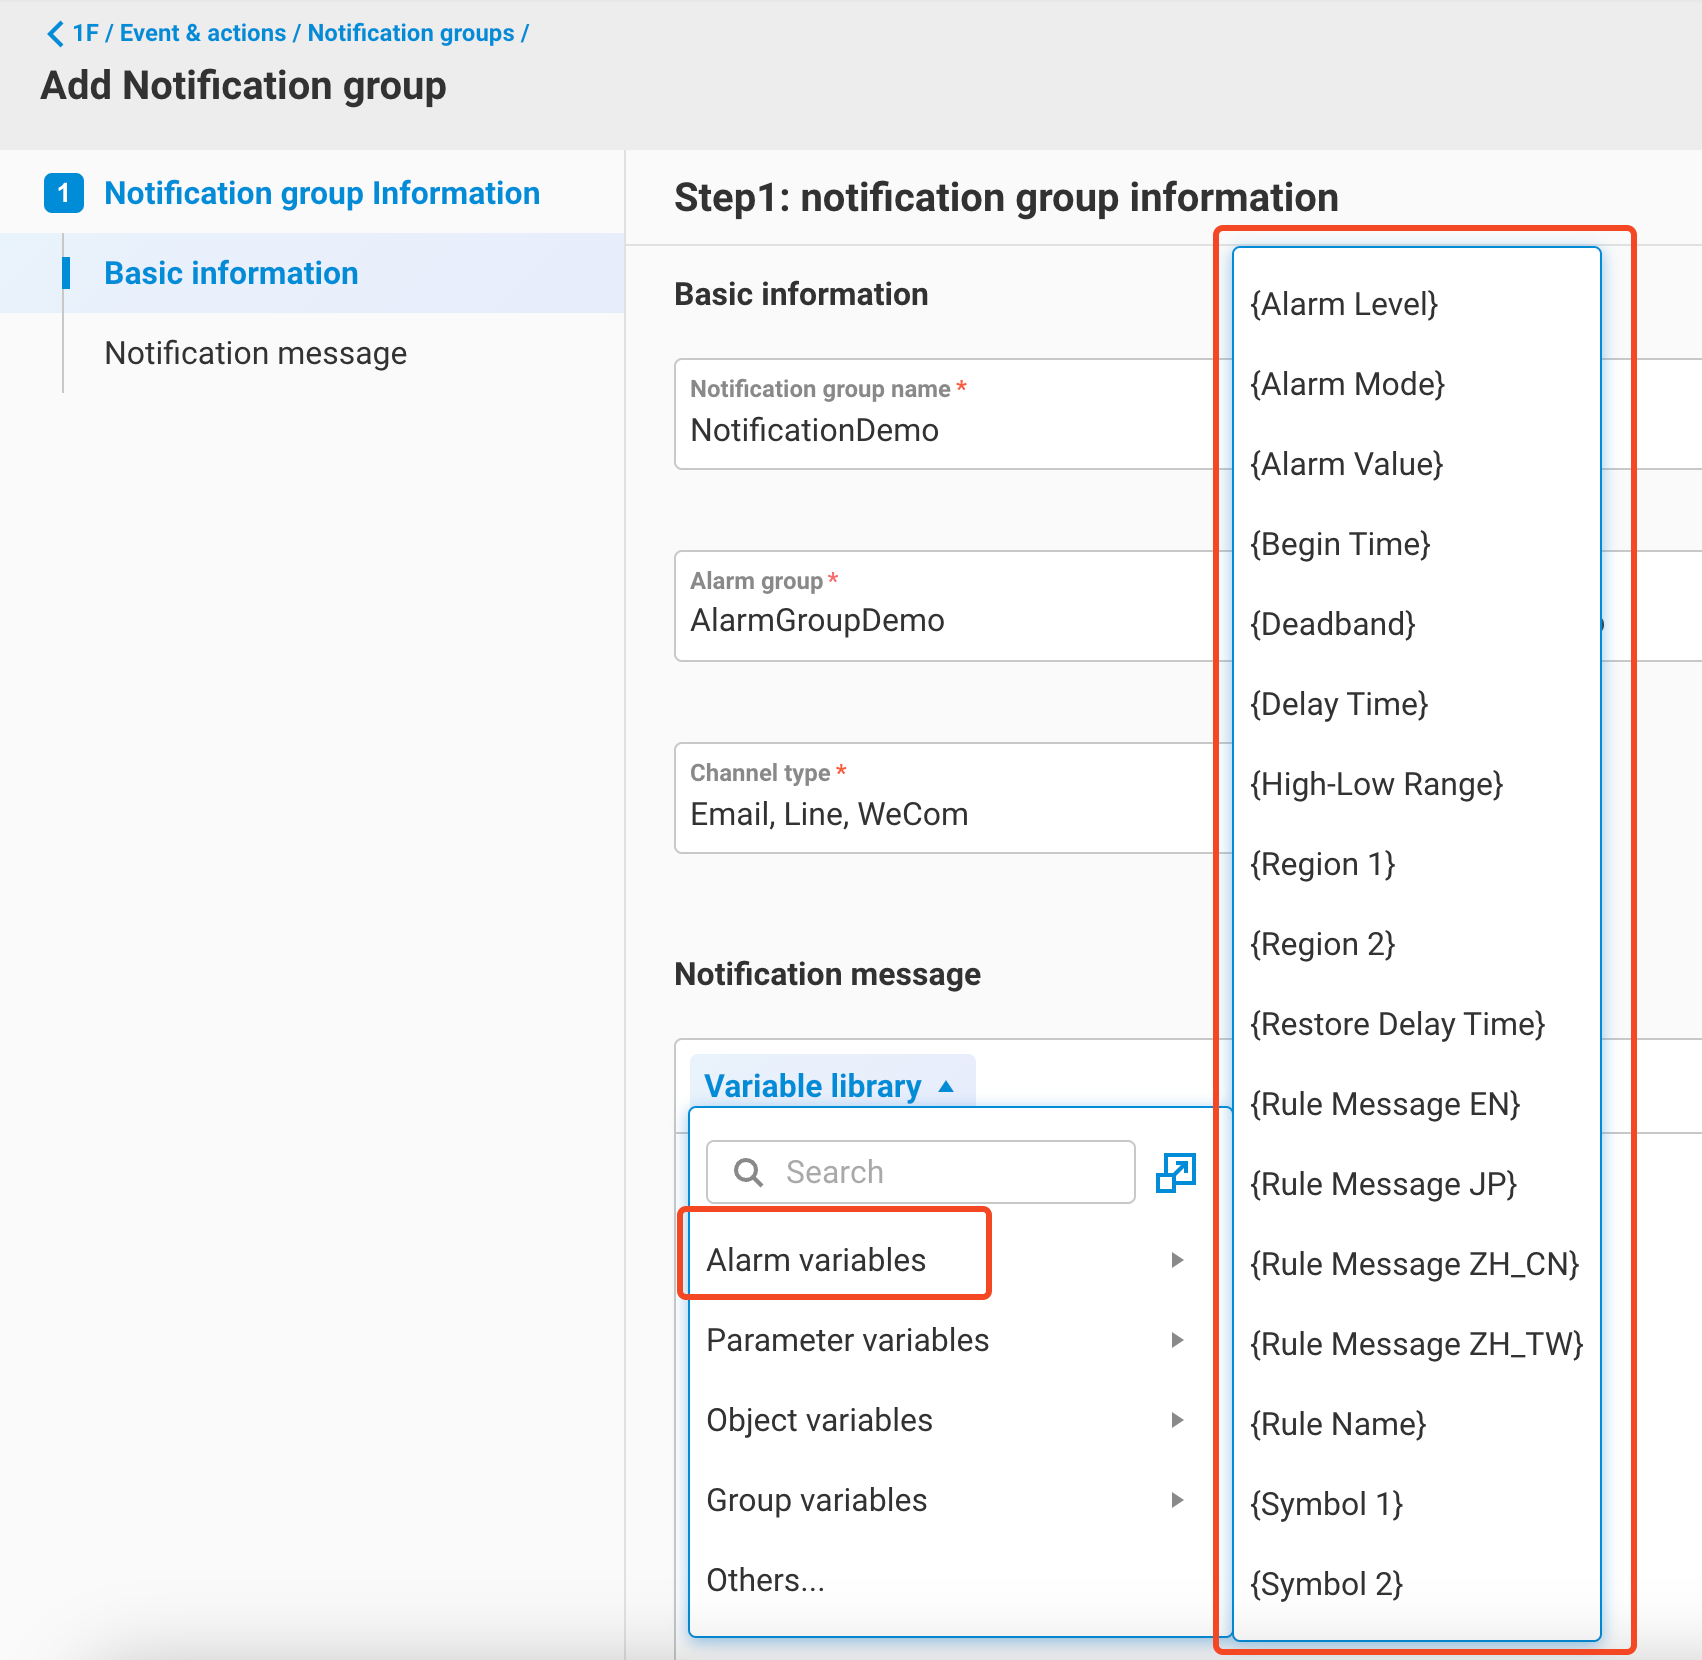
- {Alarm Level}: The alarm level of the triggered alarm rule.
- {Alarm Mode}: The type of the triggered alarm (Range, AlarmCode, Complex).
- {Alarm Value}: The parameter value at the time of the alarm trigger.
- {Begin Time}: The time when the alarm was triggered.
- {Deadband}: The Deadband setting value of the triggered alarm.
- {Delay Time}: The Delay Time setting value of the triggered alarm.
- {High-Low Range}: If the triggered alarm is a Range Alarm, it displays the HH/H/L/LL text of the triggered alarm.
- {Region 1}: The threshold value (rule value) of the triggered alarm rule.
- {Region 2}: The second threshold value (rule value) of the triggered alarm rule, only applicable to complex alarms.
- {Restore Delay Time}: The Restore Delay Time setting value of the triggered alarm.
- {Rule Message EN}: The alarm message of the triggered alarm rule (English).
- {Rule Message JP}: The alarm message of the triggered alarm rule (Japanese) (currently not available, the value will be the same as in English).
- {Rule Message ZH_CN}: The alarm message of the triggered alarm rule (Simplified Chinese) (currently not available, the value will be the same as in English).
- {Rule Message ZH_TW}: The alarm message of the triggered alarm rule (Traditional Chinese) (currently not available, the value will be the same as in English).
- {Rule Name}: The rule name of the triggered alarm rule.
- {Symbol 1}: The rule symbol (>=, >, =, =, >, =, <, <=) of the triggered alarm rule, only applicable to complex alarms.
- Parameter variables:
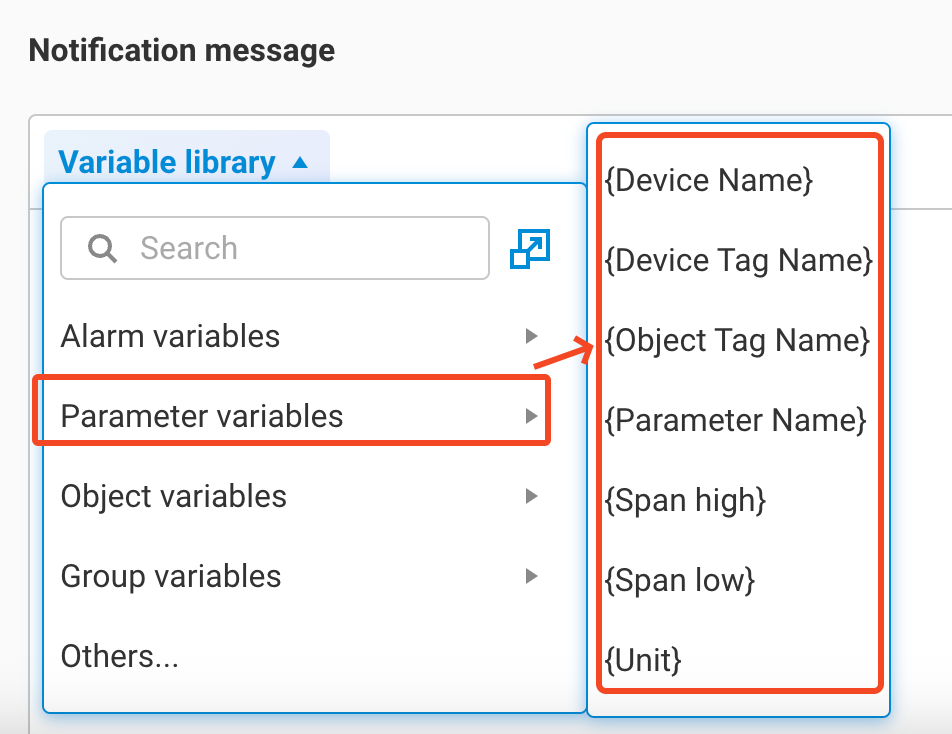
- {Device Name}: The name of the device to which the Parameter, and its associated tag, belongs.
- {Device Tag Name}: The tag name associated with the Parameter that triggered the alarm.
- {Object Tag Name}: The name of the Object to which the Parameter belongs, combined with its Parameter name in the form
ObjectName:ParameterName. - {Parameter Name}: The name of the Parameter that triggered the alarm.
- {Span high}: The Span high setting of the Parameter that triggered the alarm.
- {Span low}: The Span low setting of the Parameter that triggered the alarm.
- {Unit}: The unit setting of the Parameter that triggered the alarm.
- Object variables:
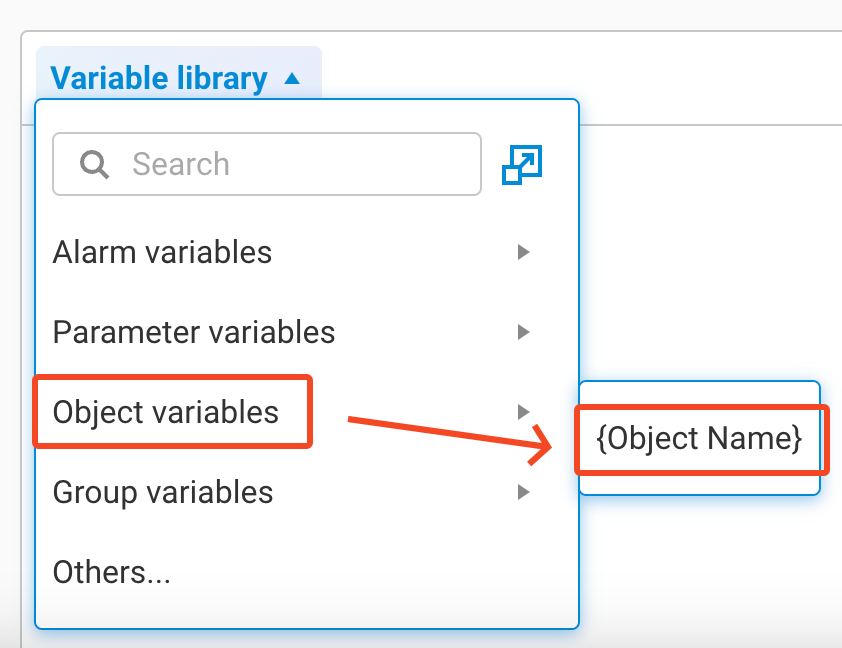
- {Object Name}: The name of the Object to which the Parameter that triggered the alarm belongs.
- Group variables:
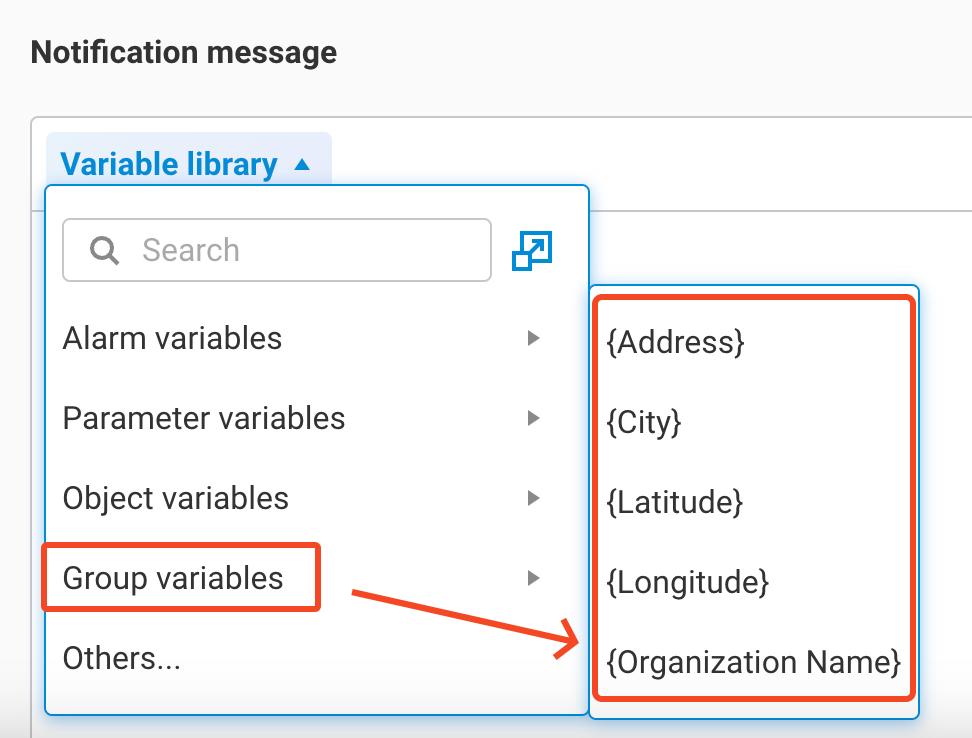
- {Address}: The combined string of 'Addr1 + Addr2' for the Group to which the Parameter that triggered the alarm belongs.
- {City}: The City setting of the Group to which the Parameter that triggered the alarm belongs.
- {Latitude}: The latitude setting of the Group to which the Parameter that triggered the alarm belongs.
- {Longitude}: The longitude setting of the Group to which the Parameter that triggered the alarm belongs.
- {Organization Name}: The name of the Group to which the Parameter that triggered the alarm belongs.
- Others: You can also specify the display of the following attributes for 1 to multiple parameters within the Message.
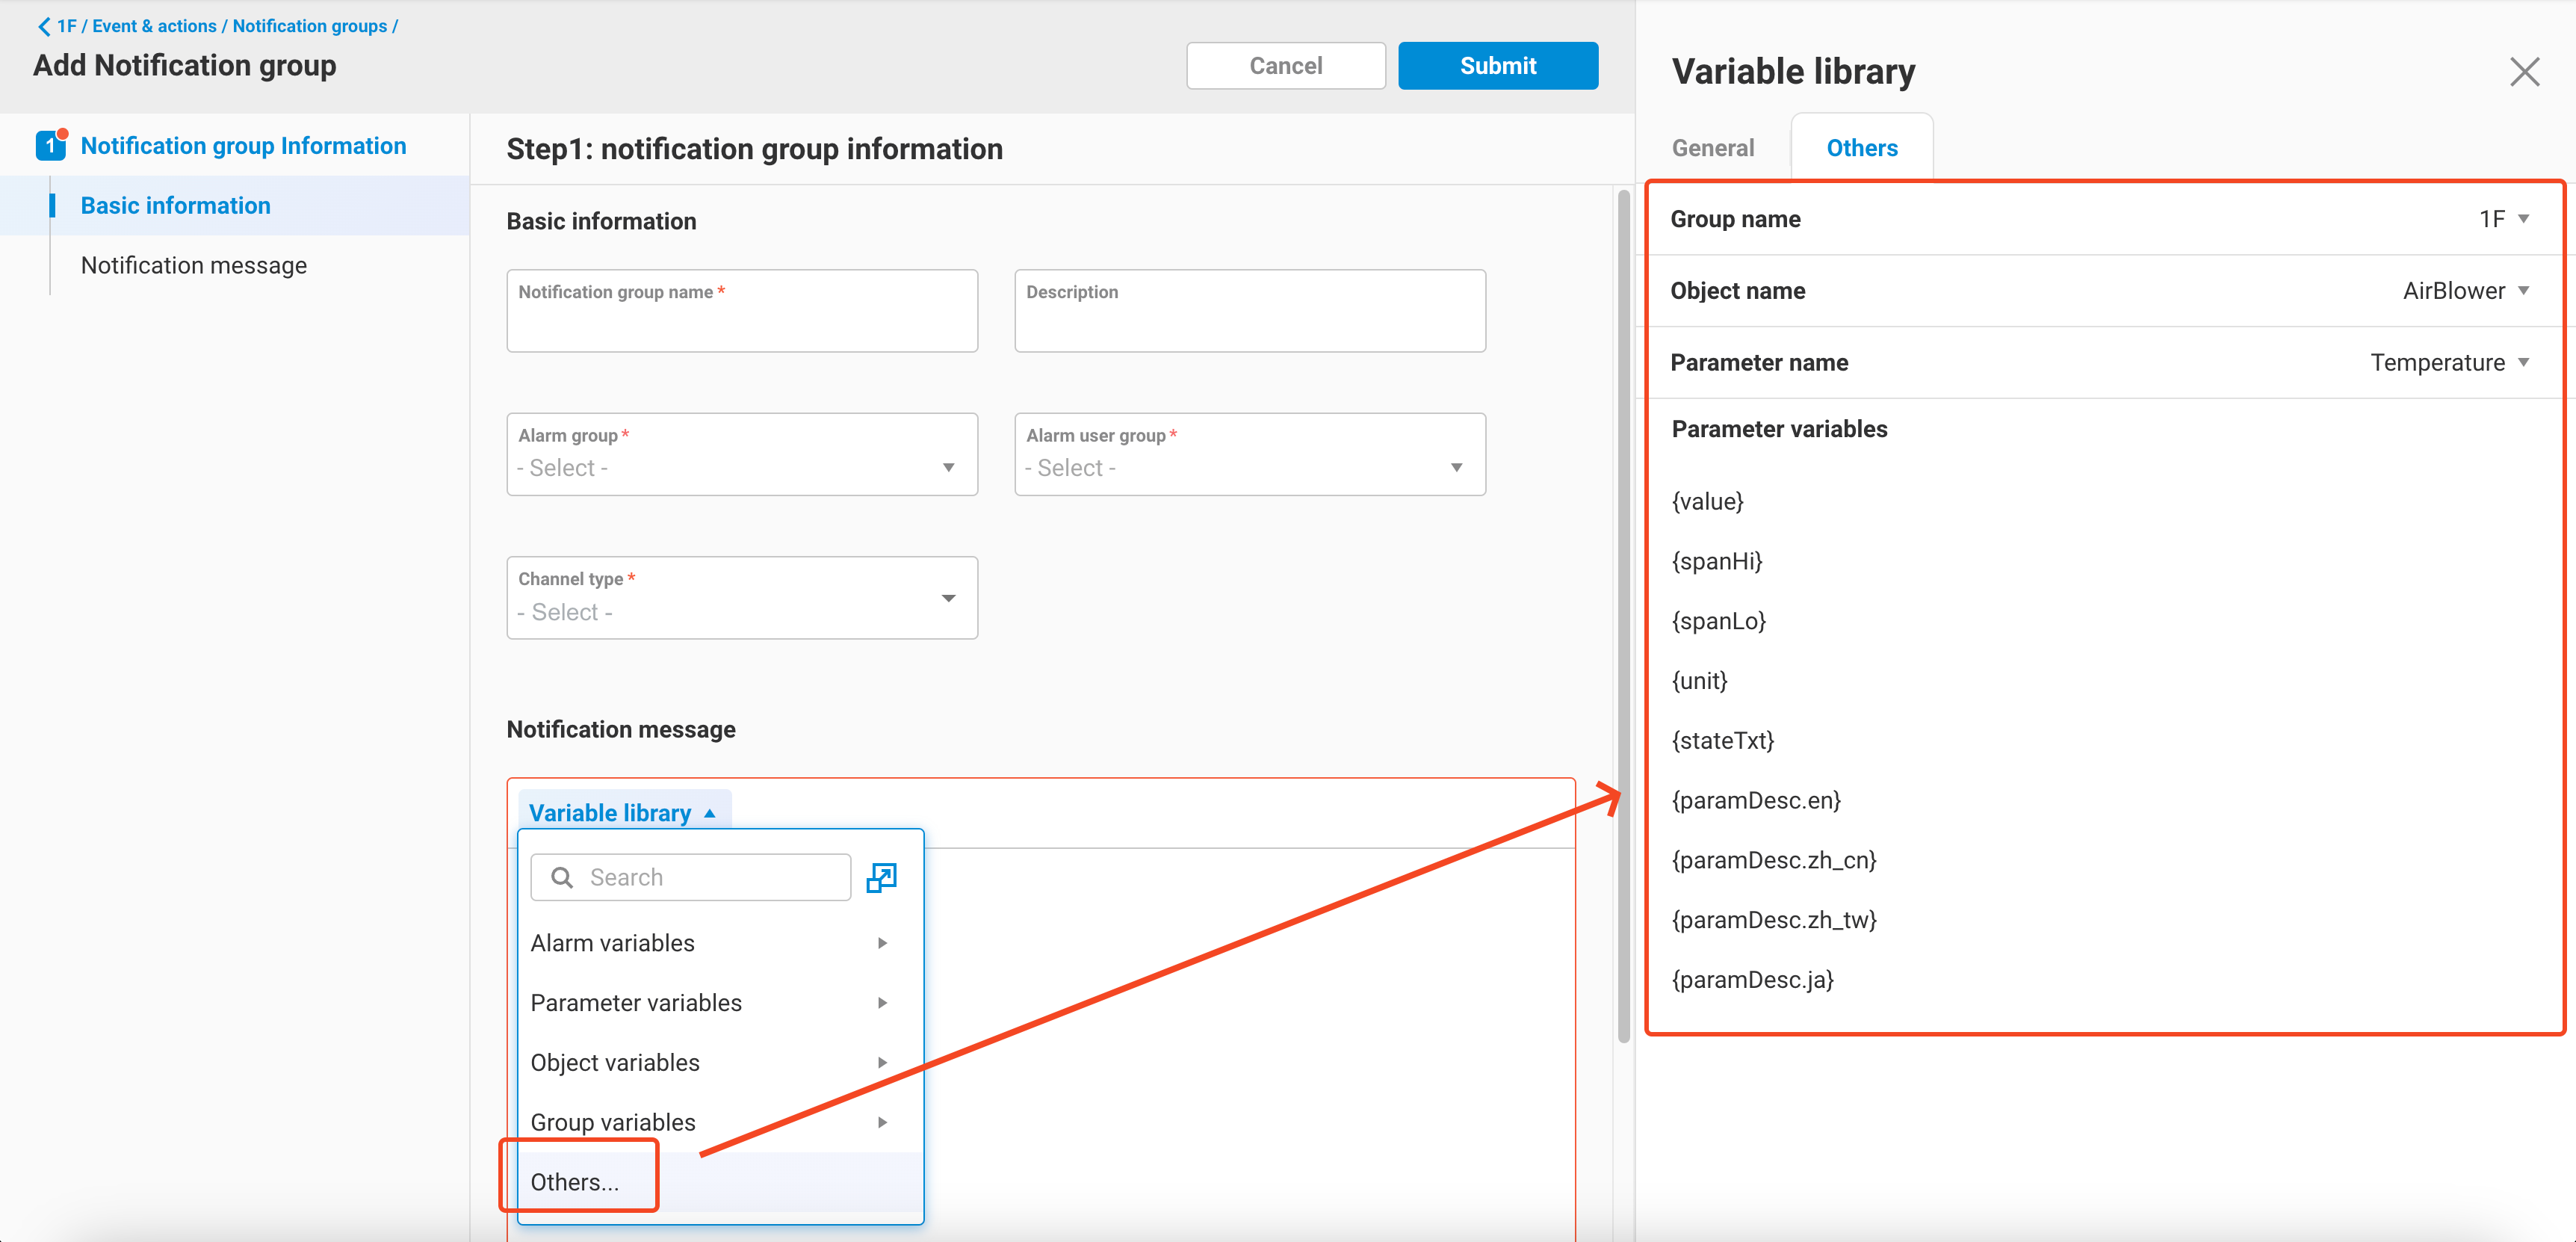
- value: The real-time value of this parameter when the alarm occurs.
- spanHi: The Span high setting of this parameter when the alarm occurs.
- spanLo: The Span Low setting of this parameter when the alarm occurs.
- unit: The unit setting of this parameter when the alarm occurs.
- stateTxt: The status text setting of this parameter when the alarm occurs (only applicable to Discrete parameters).
- paramDesc.en: The description of this parameter when the alarm occurs (English).
- paramDesc.zh_cn: The description of this parameter when the alarm occurs (Simplified Chinese) (currently not available, the value will be the same as in English).
- paramDesc.zh_tw: The description of this parameter when the alarm occurs (Traditional Chinese) (currently not available, the value will be the same as in English).
- paramDesc.ja: The description of this parameter when the alarm occurs (Japanese) (currently not available, the value will be the same as in English).
- Alarm variables:
- When editing the Message, if you use variables, the text will change color to indicate the use of variables.
- After confirming that the edit is correct, click
Submitto complete the setup.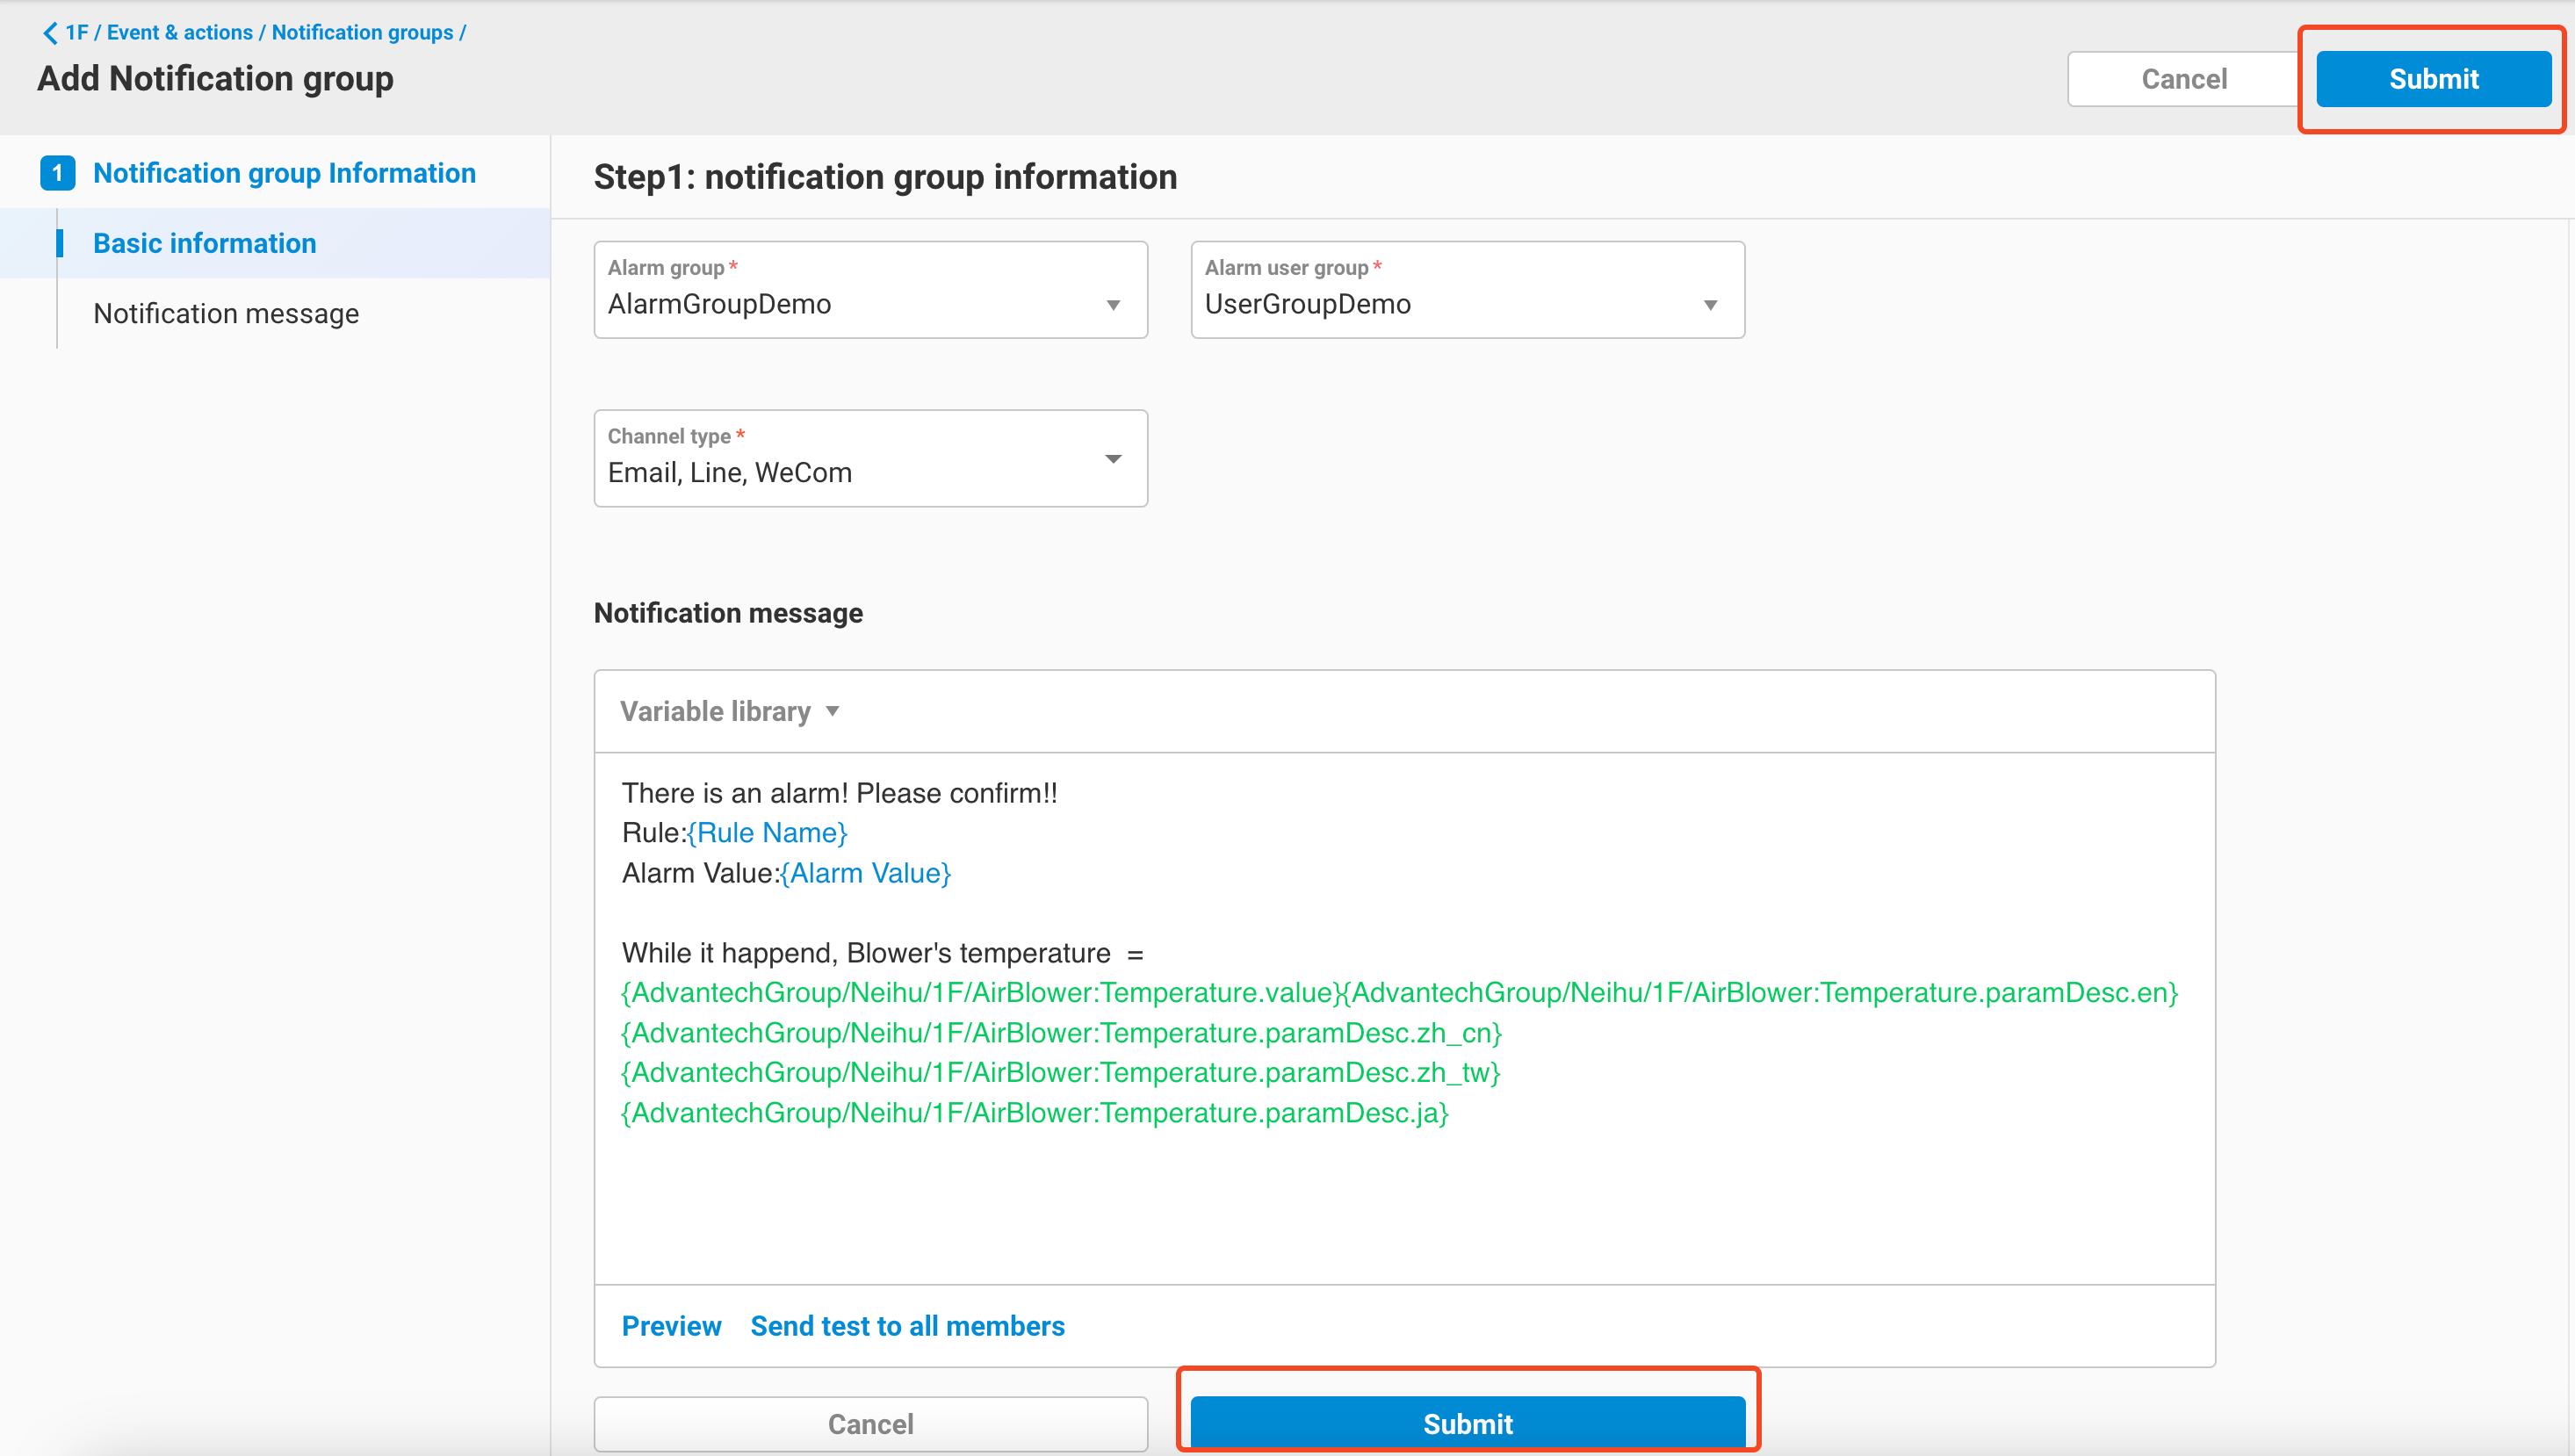
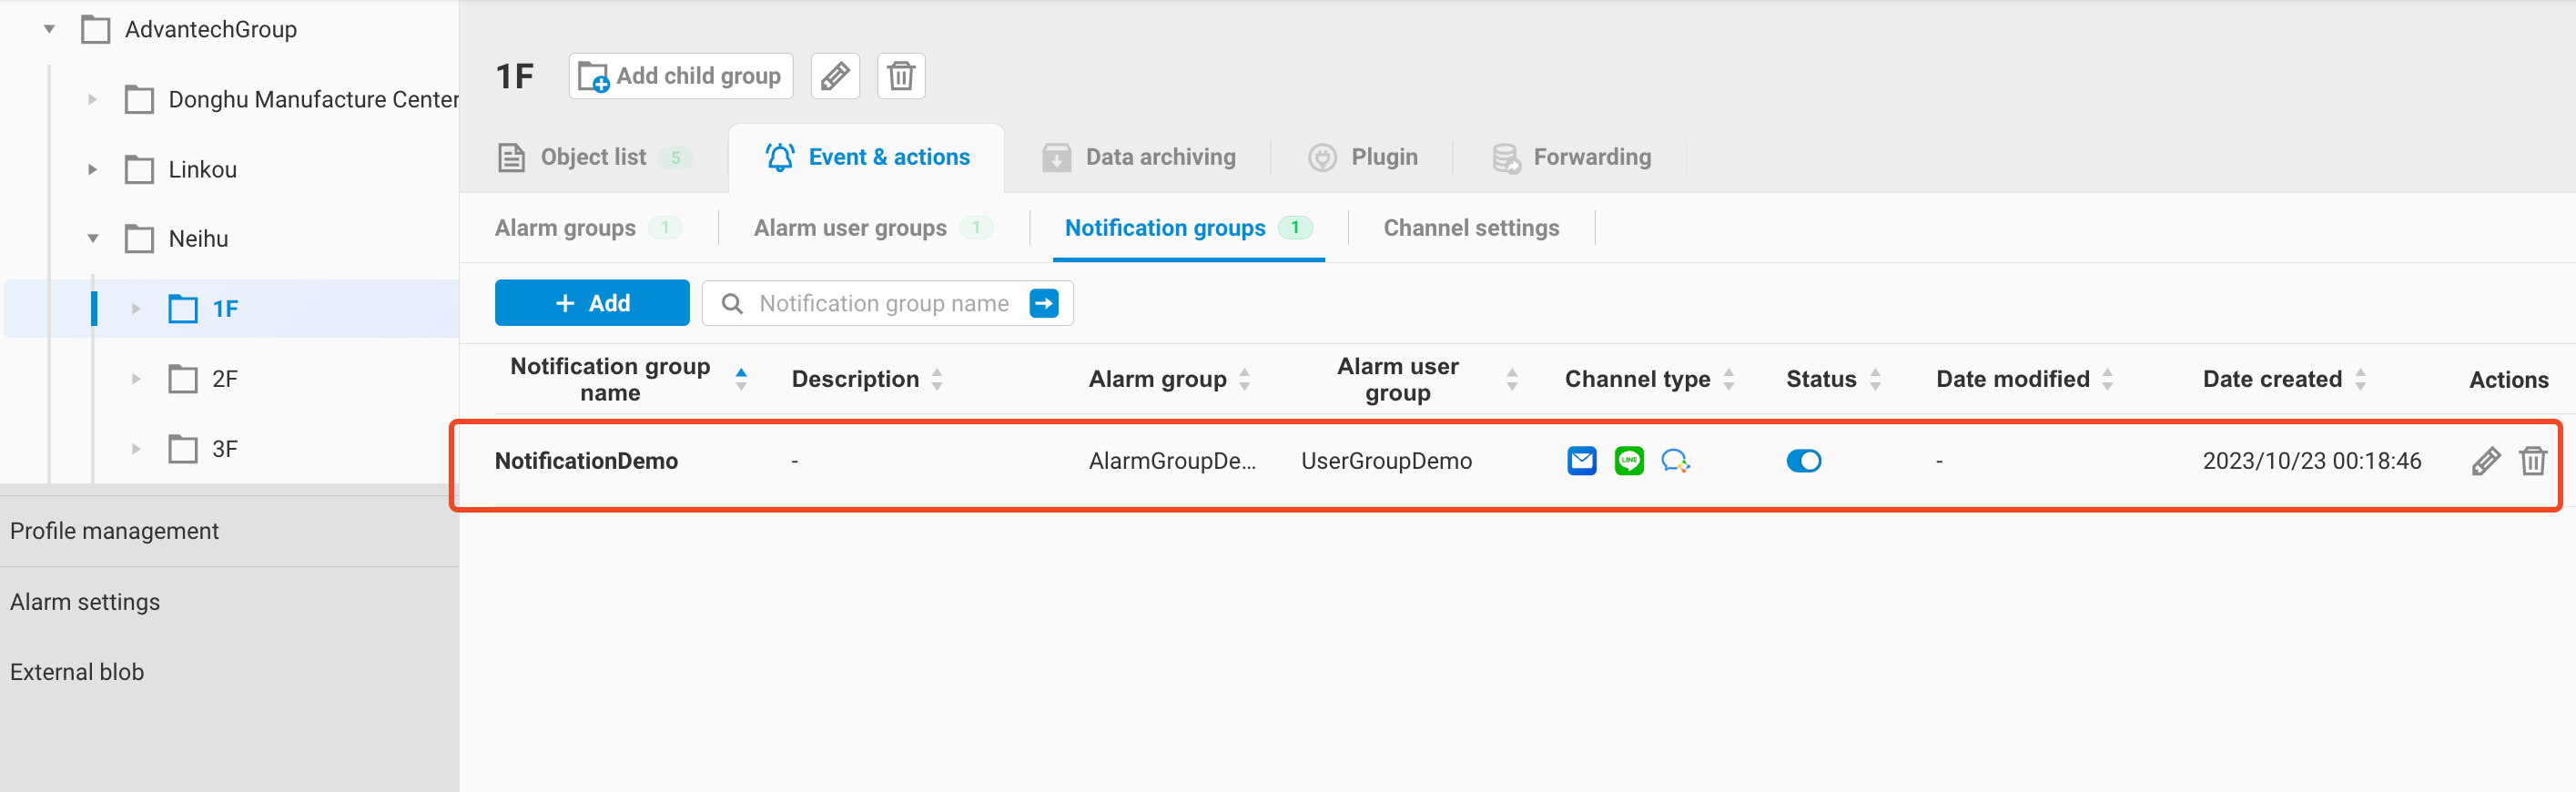
- You can see the newly added Notification group in the Notification group list, indicating that the setup is complete.
5. Channel Settings
If you need to send Notification messages to user email or WeCom IDs, you must first configure the sender for these two notification methods in the Channel Settings. This is necessary to send messages using this sender. The setup process is as follows:
- Email
- In the Channel Settings page, click the edit button for Email.
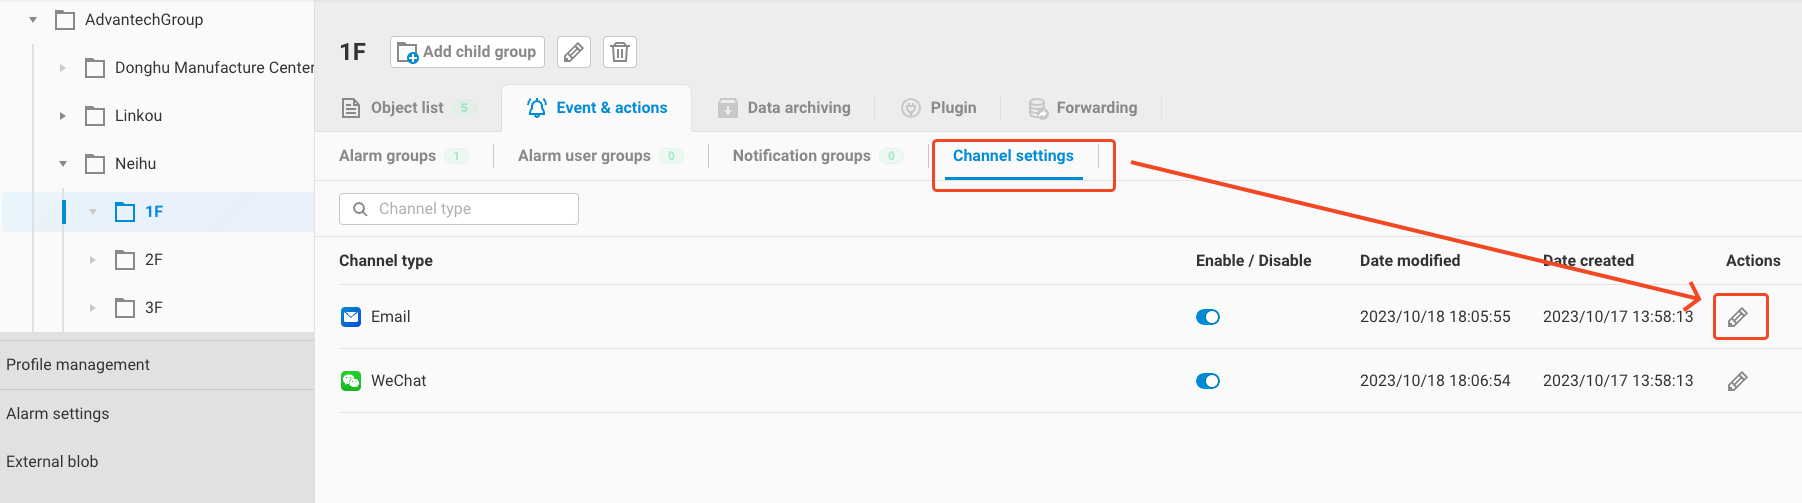
- In the Email edit, fill in the following information based on the settings provided by the
- In the Channel Settings page, click the edit button for Email.
sender's email:
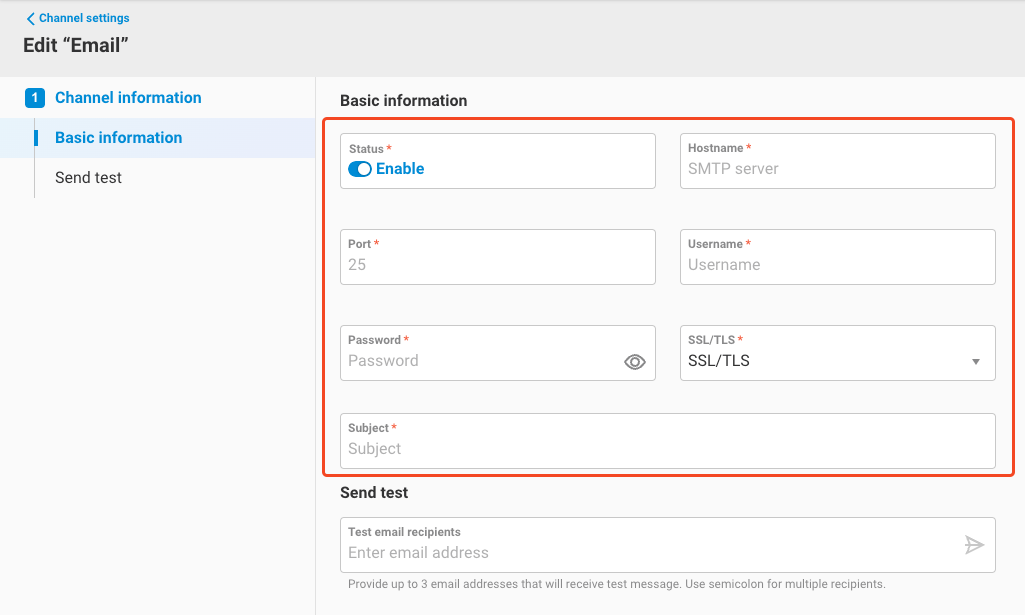
- Hostname (SMTP server address)
- Port (SMTP port)
- Username (email address of the sender)
- Password (email password of the sender)
- SSL/TLS (supporting none, SSL/TLS, STARTTLS modes)
- Subject (email subject)
- After filling in the Email sender information, you can use the Send test function to test if the configured sender is working correctly.
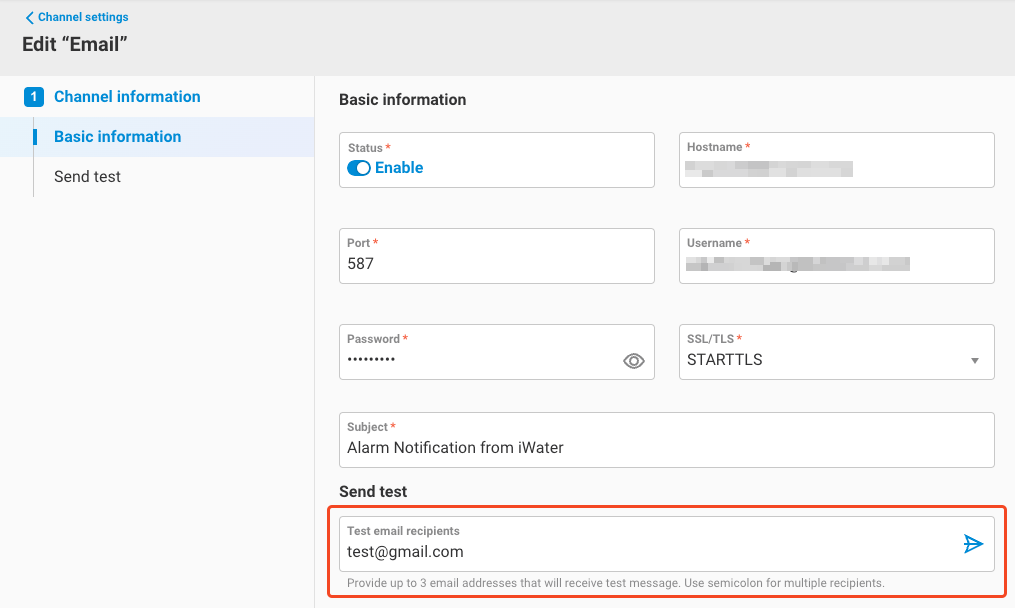
- After confirming that it's working correctly, click
Submitto complete the Email sender setup. - WeChat (WeCom)
- In the Channel Settings page, click the edit button for WeChat (WeCom).
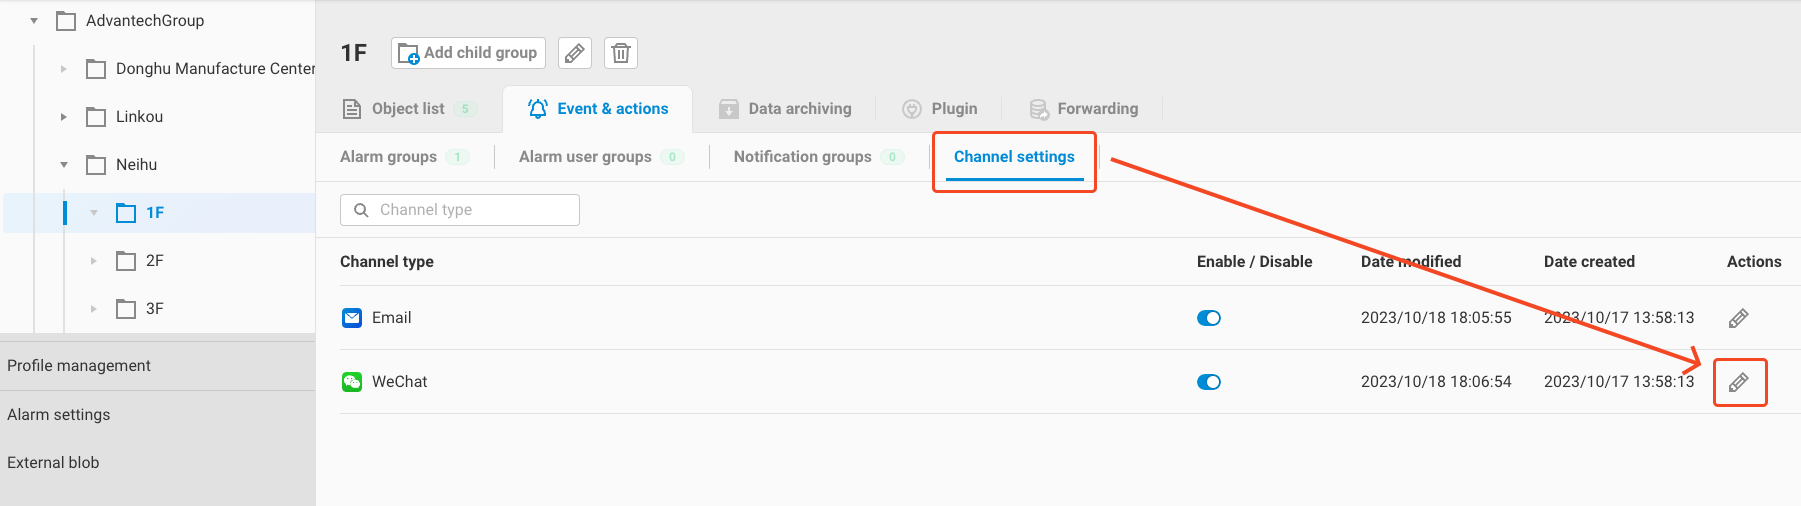
- In the WeChat (WeCom) edit, fill in the following information based on the information provided by your company for WeCom:
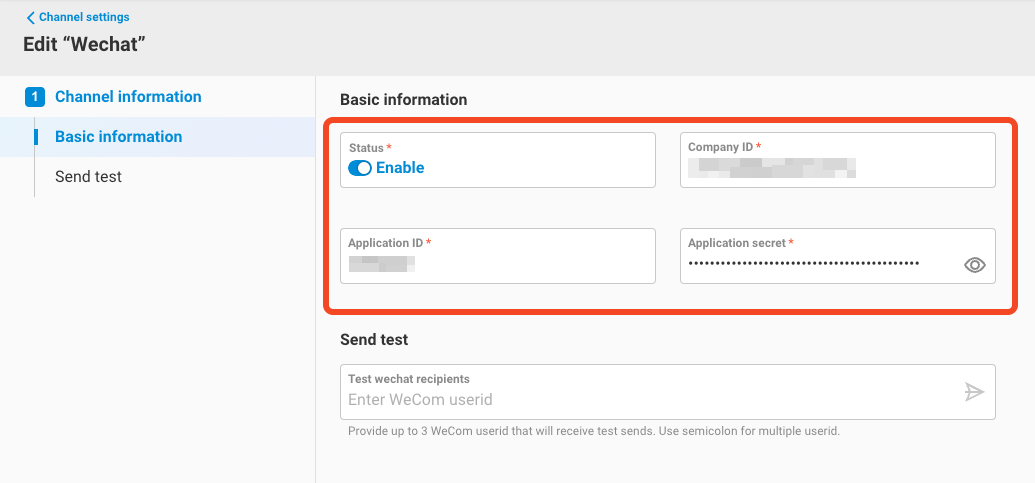
- Company ID
- Application ID
- Application secret
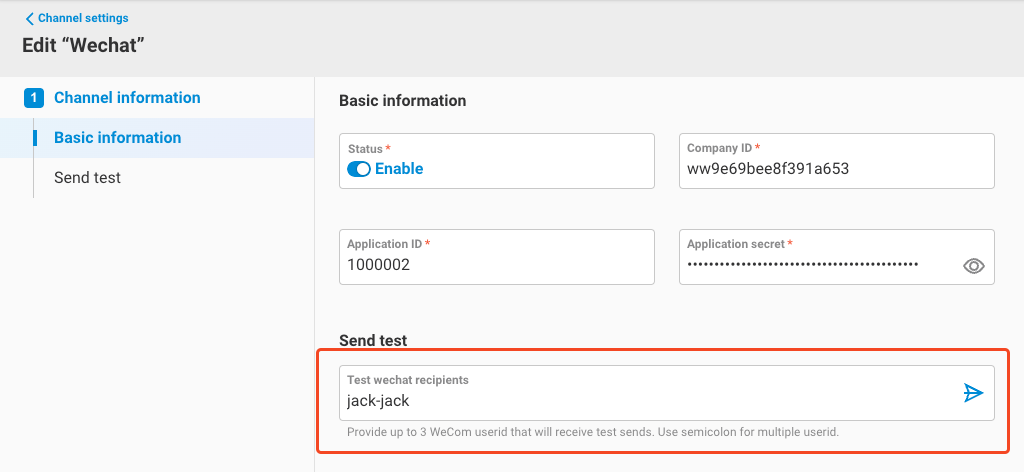
- After filling it in, you can use the Send test function to confirm that it can be sent correctly to the WeCom user ID.
- After confirming that it's working correctly, click
Submitto complete the WeChat (WeCom) sender setup.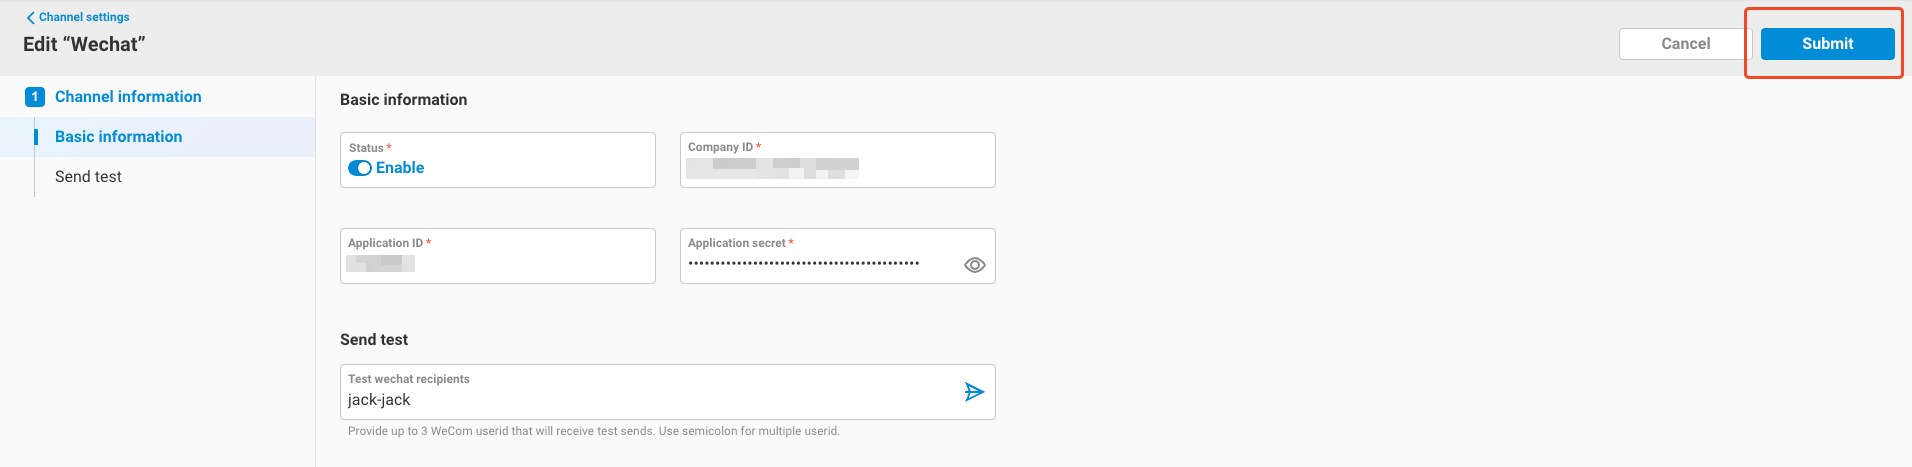
- In the Channel Settings page, click the edit button for WeChat (WeCom).
#EdgeHub