Data plugin
Changelog
| Version | Author | Update date | Comment |
|---|---|---|---|
| 1.0.0 | ITsung.Shen | 2023/10/01 | First Version |
| 1.0.1 | ITsung.Shen | 2023/11/30 | First released |
| 2.3.0 | ITsung.Shen | 2025/02/11 | Plugin migrate to tenant level, made the following updates:- Update 1.1 description- Add section 2.1- Update images in section 2.2/2.3 |
1. Introduction
1.1 Functional Requirement
The EdgeHub Data Plugin Service allows users to create plugin functions to import third-party API data into EdgeHub.
- A plugin function supports OAuth2 / Bearer / Basic Authentication / User-defined account credentials for API invocation.
- A plugin function defines an API call.
- A plugin function supports defining input data sources.
- Can bind parameter values.
- Can enter fixed strings.
- A plugin function supports defining one or multiple output values from the returned JSON.
- A plugin is bound to a tenant for isolation between different tenants.
- Plugin can define its own query frequency (0 to 1440 minutes, in minutes, with 0 representing the calculation frequency of the calculation parameter).
The newly added plugin function must be used by a calculation parameter.
- When the calculation frequency is reached, the calculation parameter retrieves data from the plugin, and the plugin directly returns the result of the most recent API call to the calculation parameter.
1.2 User scenario
Use Case
When customers need to import data from existing information systems into EdgeHub, including:
- MES / ERP
- AI Inference Engine
- Public Open data (weather, water resources, etc.)
- Customer's proprietary information system
and the above information systems provide the following external interfaces for accessing data:
- API (OAuth2 / Basic Authentication / Bearer Token / User-Defined Authorization string)
then the EdgeHub Data Plugin Service can be used.
By combining the data from the above information systems with the object data managed by EdgeHub, EdgeHub can serve as an integrated data platform to develop comprehensive data presentation solutions for different industries.
Use Cases
-
Open Data Platform for Weather Information

Integration Scenario:
- API (User-Defined Authorization string)
- After obtaining the authorization code from the website, fill it in the Authorization field to obtain weather information for various locations in Taiwan.
-
National Meteorological Science Data Center

Integration Scenario:
- API (No Auth)
- After obtaining the authorization code from the website, fill it in the API URL query string to obtain weather information for various locations in mainland China.
-
Water Resources Internet of Things

Integration Scenario:
- API (OAuth2)
- Use the Water Resources IoT API to obtain physical values from sensor devices.
2. Manual
2.1 Basic Info
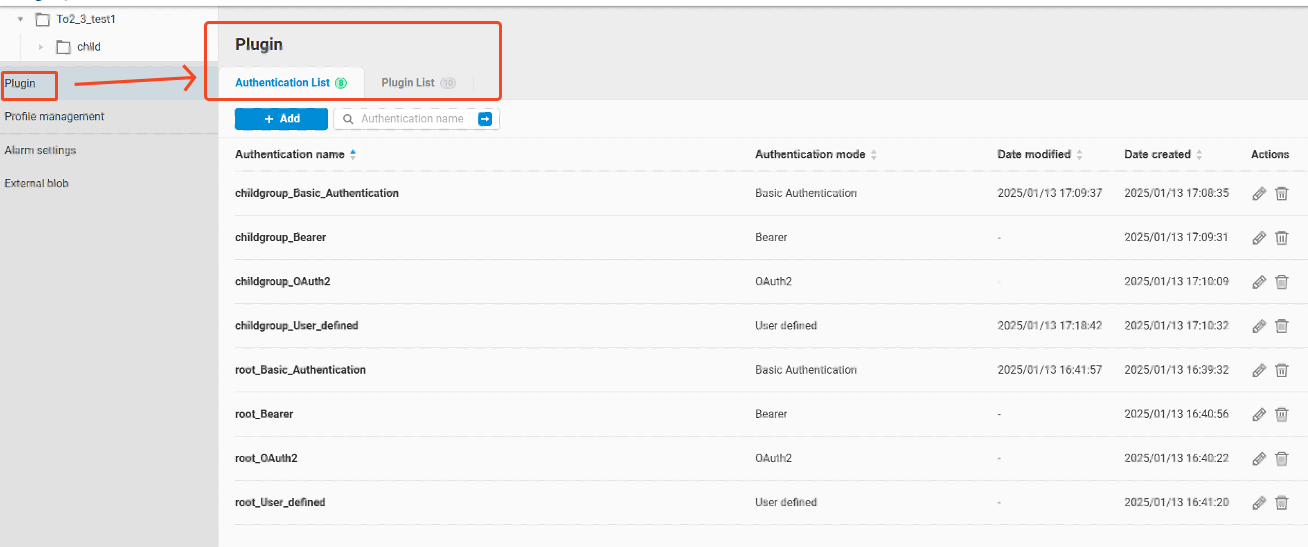
Starting from EdgeHub version 2.3, the Plugin functionality has been migrated from having a separate Authentication list / Plugin list for each Group to a single Authentication list / Plugin list for each Tenant.
- Before EdgeHub version 2.2, each Group had its own Plugin functionality, which included an Authentication list and a Plugin list.
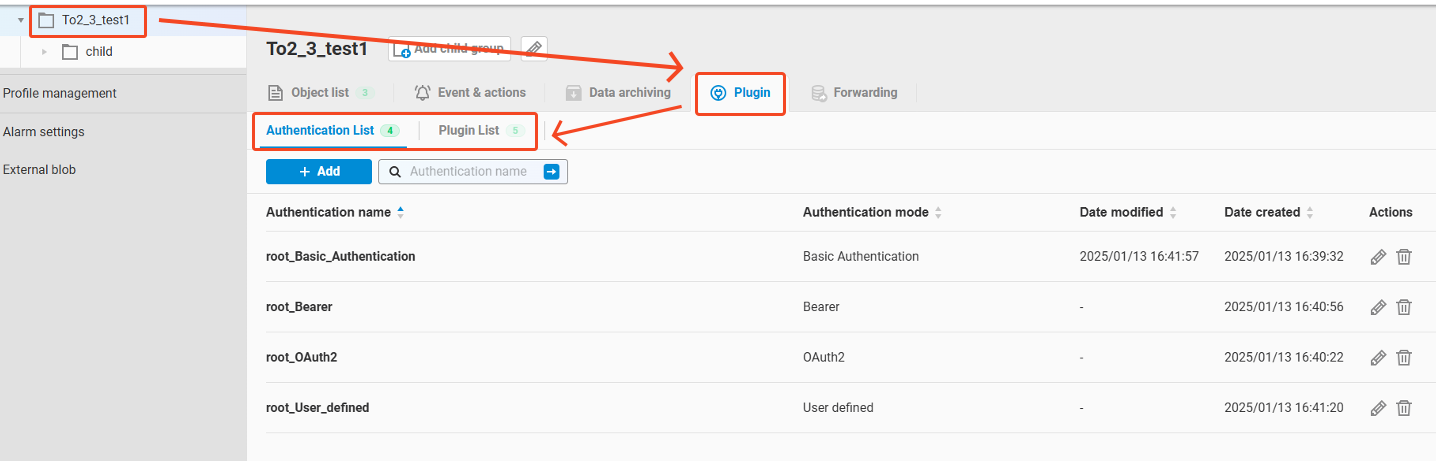
- From EdgeHub version 2.3 onwards, all Plugins within the Groups under the same Tenant are consolidated into the
Pluginfunction on the left panel. This ensures that each Tenant has only one Authentication list and one Plugin list.
When upgrading from EdgeHub 2.2 to 2.3, the system will automatically complete the Plugin migration process without affecting the existing configured calculation parameters. The method of using Plugins remains the same as before. The steps are as follows:
-
Configure Authentication (refer to Section 2.2)
-
Configure Plugins (refer to Section 2.3)
-
Set up calculation parameter to use Plugins (refer to Section 2.4)
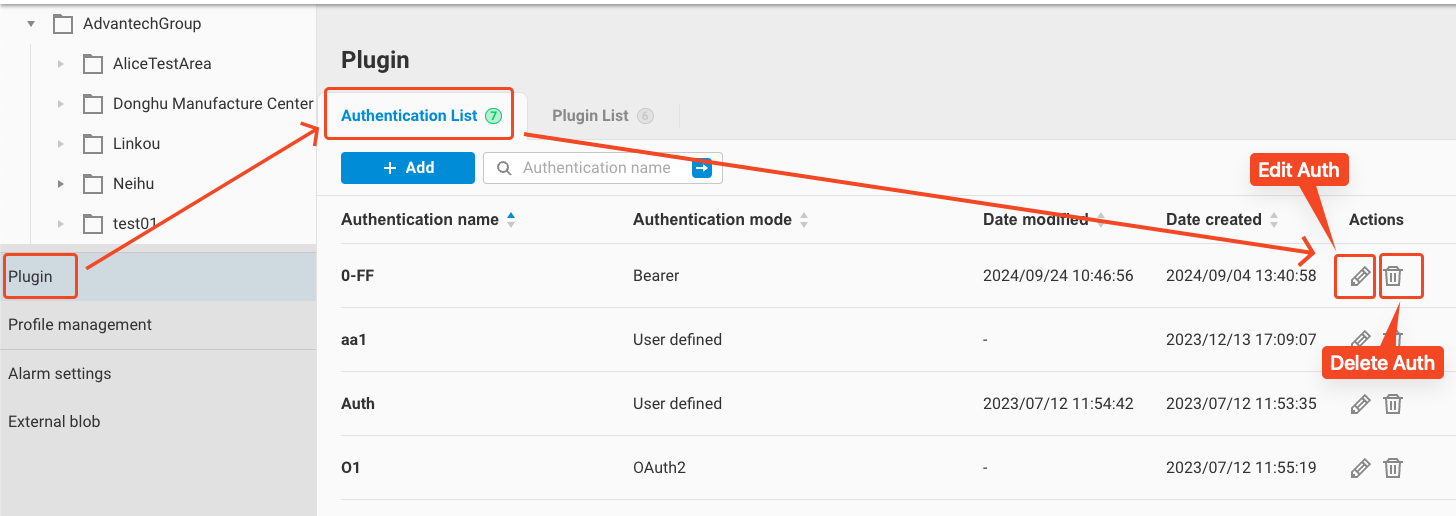
2.2 Authentication List
To create an authentication method, first select the authentication method according to the requirements of the third-party API. The following authentication methods are currently supported:
-
OAuth2
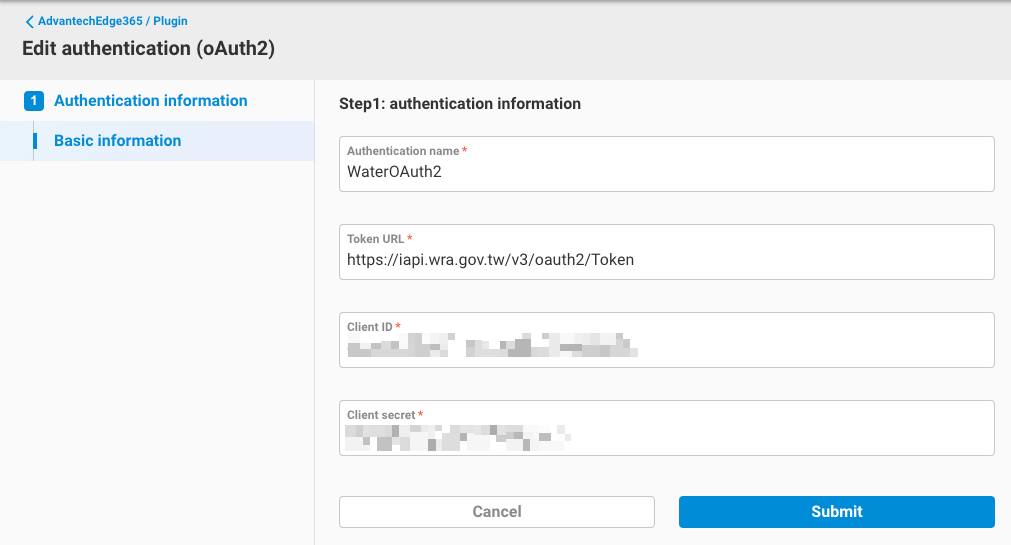
-
Basic Authentication

-
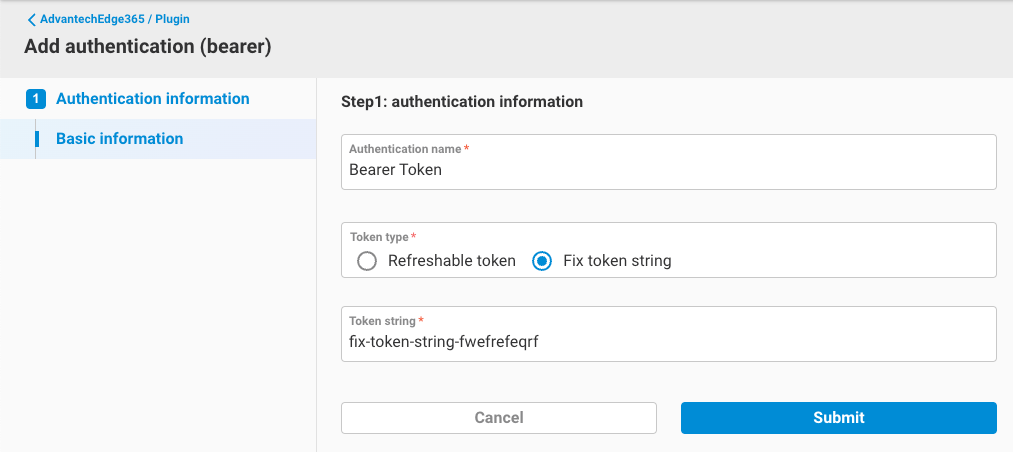
Bearer
- Refreshable token
Enter:
- Token API URL
- API body
- Token key: If the API response is a JSON file, provide a key to parse and obtain the token. If the API response is a token string directly, this value is not required.
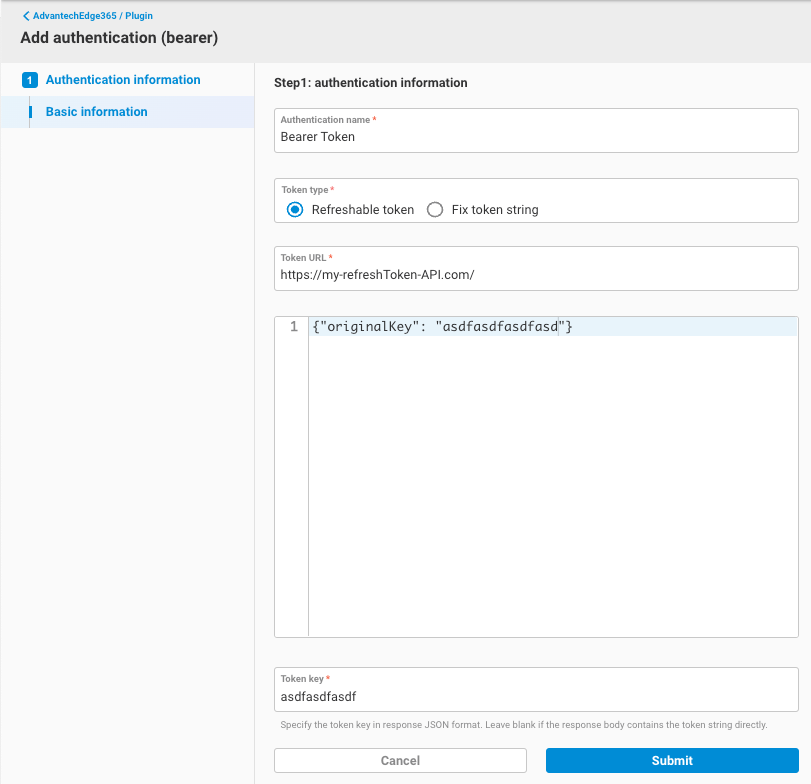
- Refreshable token
Enter:
-
Fix token
-
User-defined authentication string
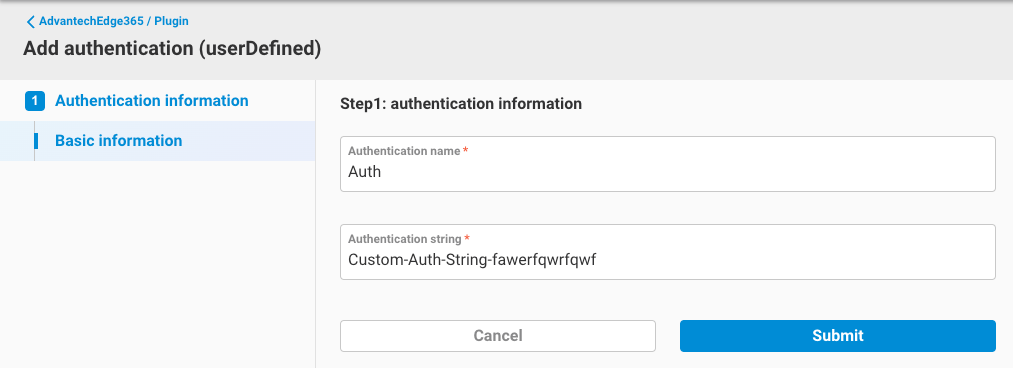
After saving the above settings, a set of authentications will be displayed in the list, and you can perform editing and deletion operations as shown in the following figure:
2.3 Plugin List
Follow the steps in the following figure to create a plugin:
-
Click
Addto add a new plugin function.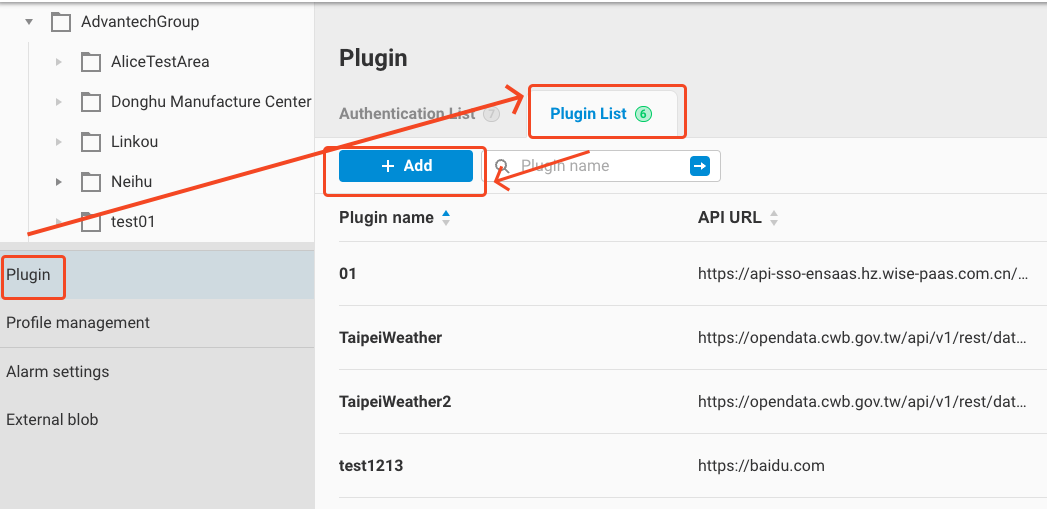
-
On the "Add Plugin" page, enter the following API information:
-
Basic information
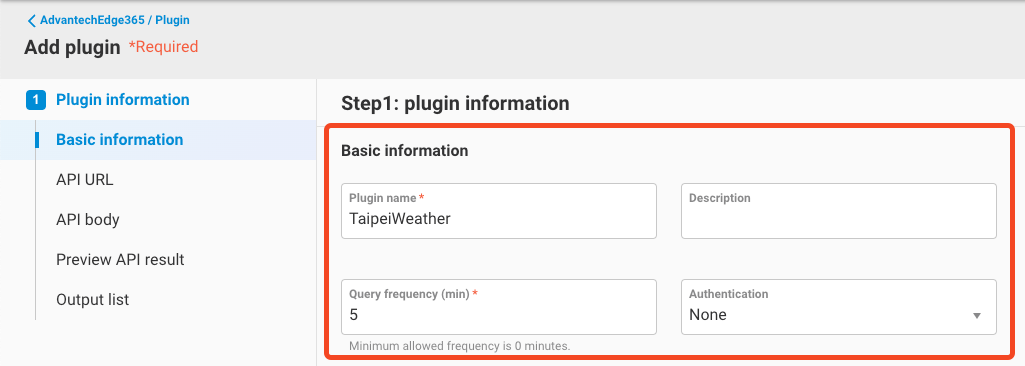
- Plugin name
- Description (optional)
- Query frequency: The query frequency allows for 0 to 1440 minutes. If set to 0, the API will be called according to the calculation frequency of the calculation parameter that uses this plugin.
- Authentication (optional): Select the API authentication method set up in the previous step.
-
API URL
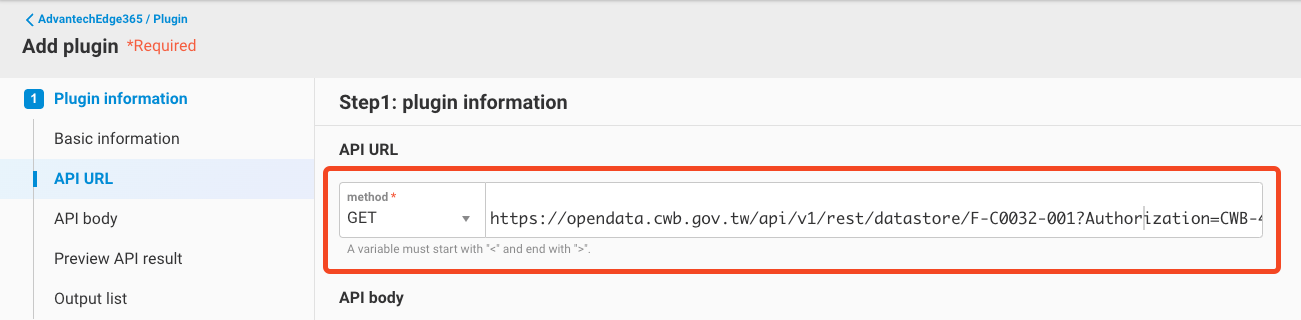
- Method: The API method to be called. Currently supports GET/POST.
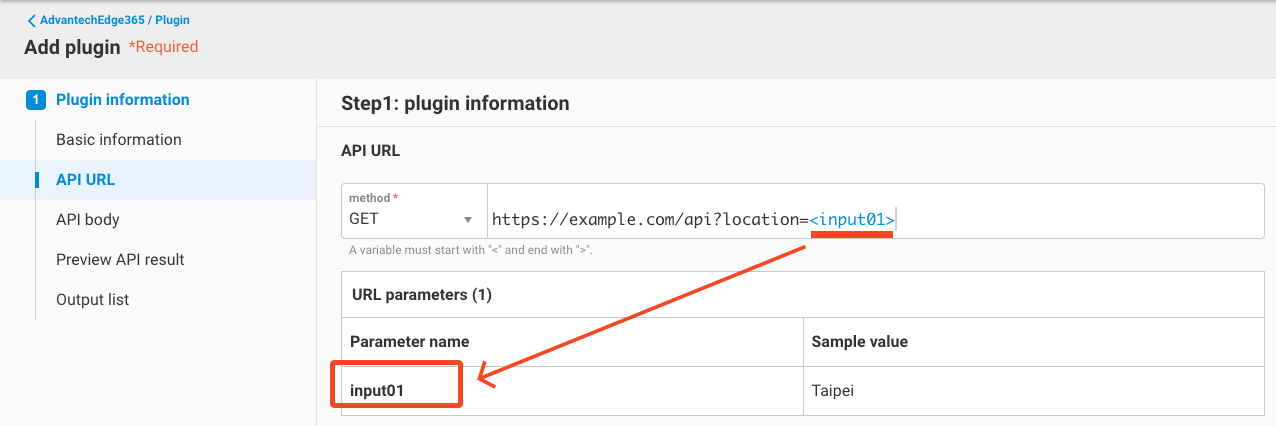
- URL: Enter the API URL to be called. The URL can use symbols as input variables. For example:
https://example.com/api?location=- After entering, you will notice that the UI automatically recognizes the input01 variable and prompts you to enter a sample value for the next step, which is used to call the "Preview API result".
-
API Body
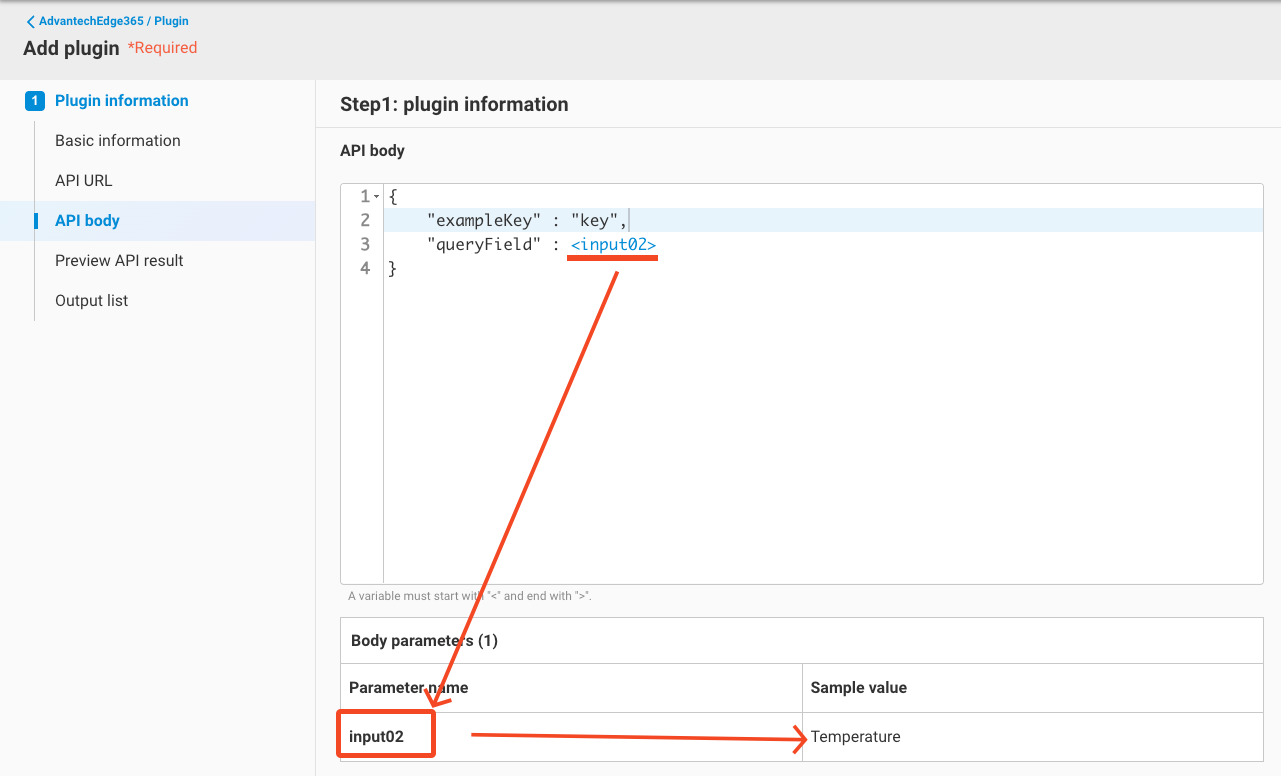
- Enter the required request body for the API (if needed). Currently, the request body only supports valid JSON format.
- Similar to the URL, the API body can also use symbols as input variables. Using the example in the previous figure:
- Enter ``
- You will see that the UI automatically recognizes the input02 variable and prompts you to enter a sample value for the next step, which is used to call the "Preview API result".
-
Preview API result
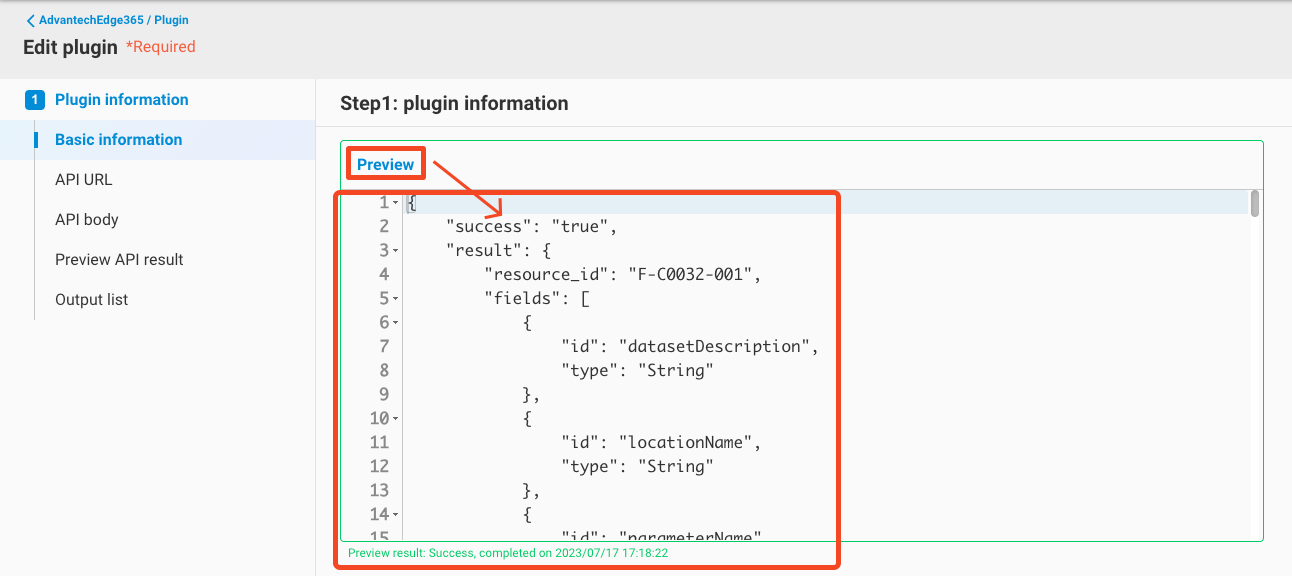
- This step must be performed when adding a new plugin to ensure that the API you entered can be used correctly and returns a result. After correctly entering the API URL and API body, click
Preview. - If the API is correct, you will see the correct API response.
- Please note that currently only JSON format API responses are supported.
- This step must be performed when adding a new plugin to ensure that the API you entered can be used correctly and returns a result. After correctly entering the API URL and API body, click
-
Output list
- Click
+ Outputto add an output for the plugin. - Enter the Output name.
- Click the
+symbol in the JSON mapping field to expand the fields on the right side, where you can see the API response for this call.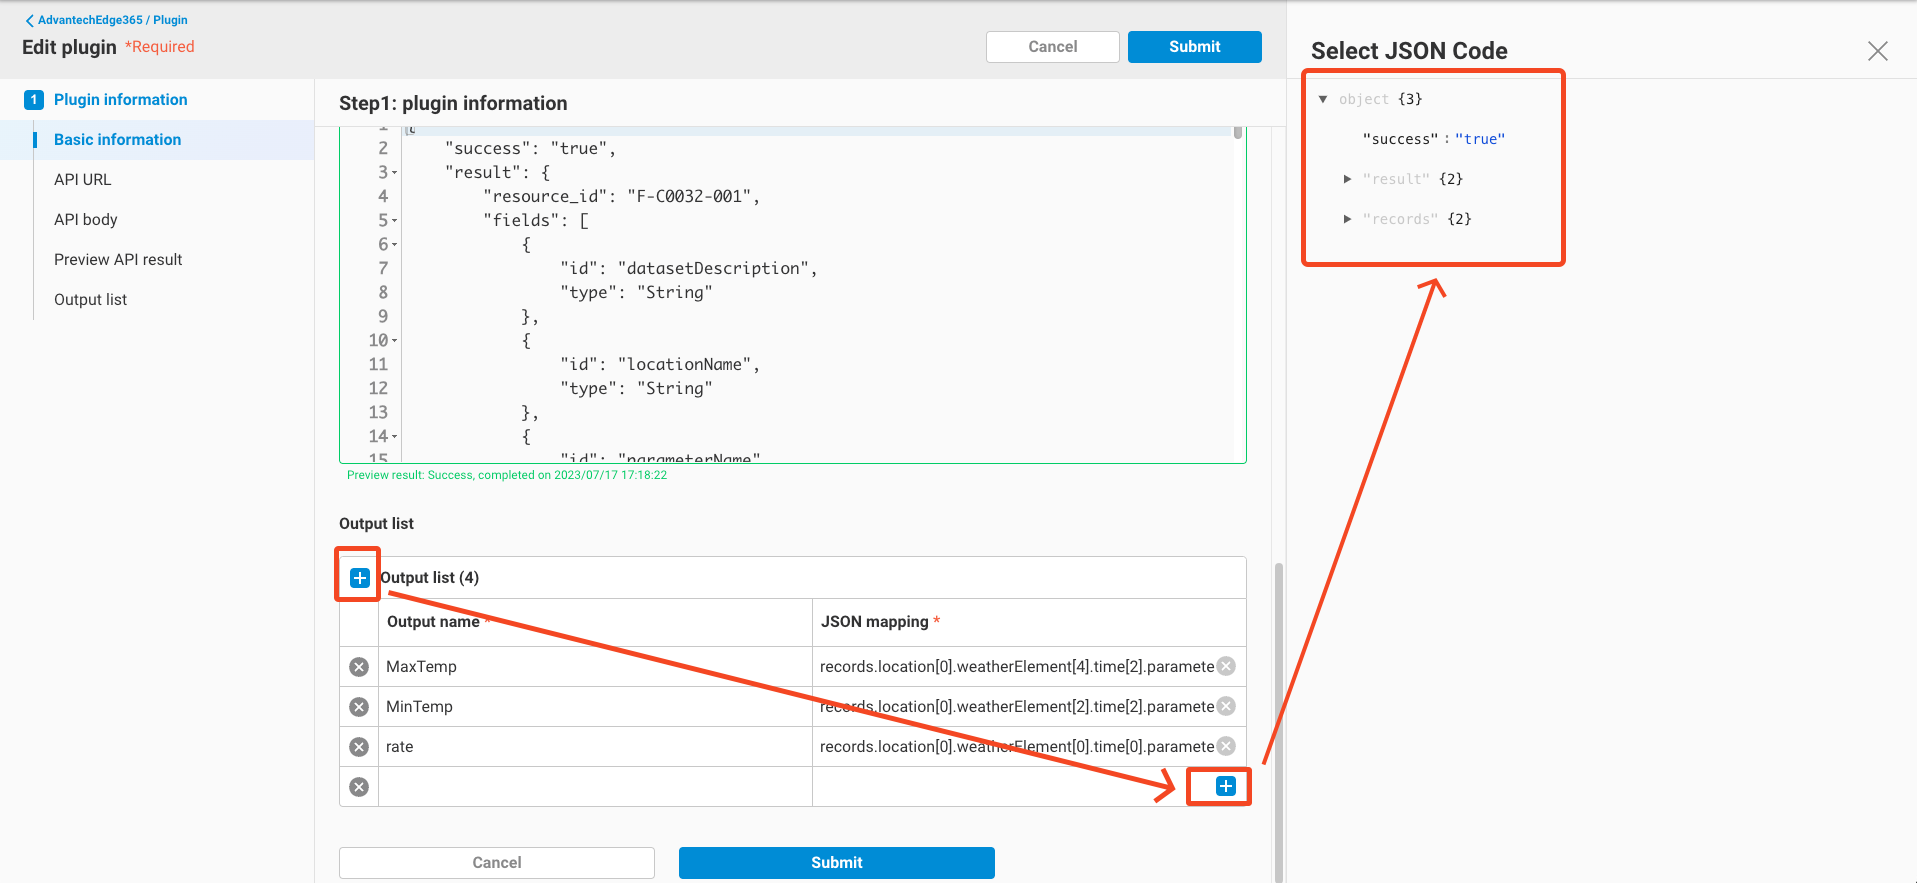
- In the JSON code structure on the right, select a key to map to this output. For each subsequent call, the backend will consistently retrieve the value of this key from the response as the value of this output.
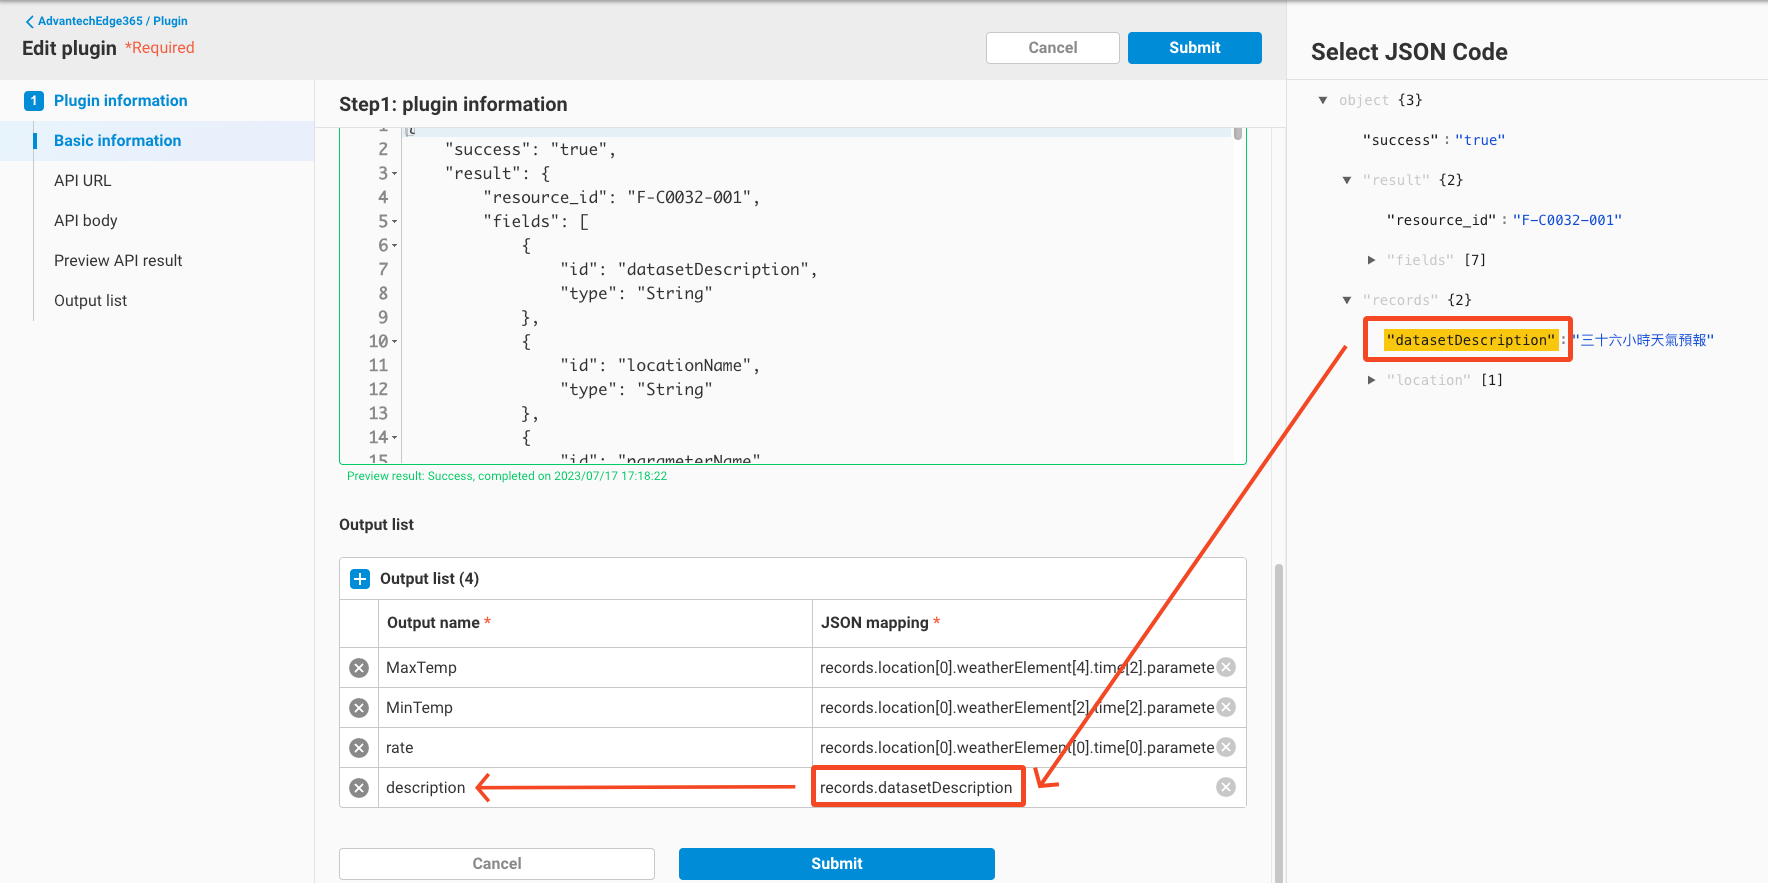
- In the example above, set an Output =
descriptionand map it to thedatasetDescriptionfield in the JSON code as the return value.
- Click
-
-
Click
Submitto add this plugin. The newly added plugin will be displayed in the Plugin list.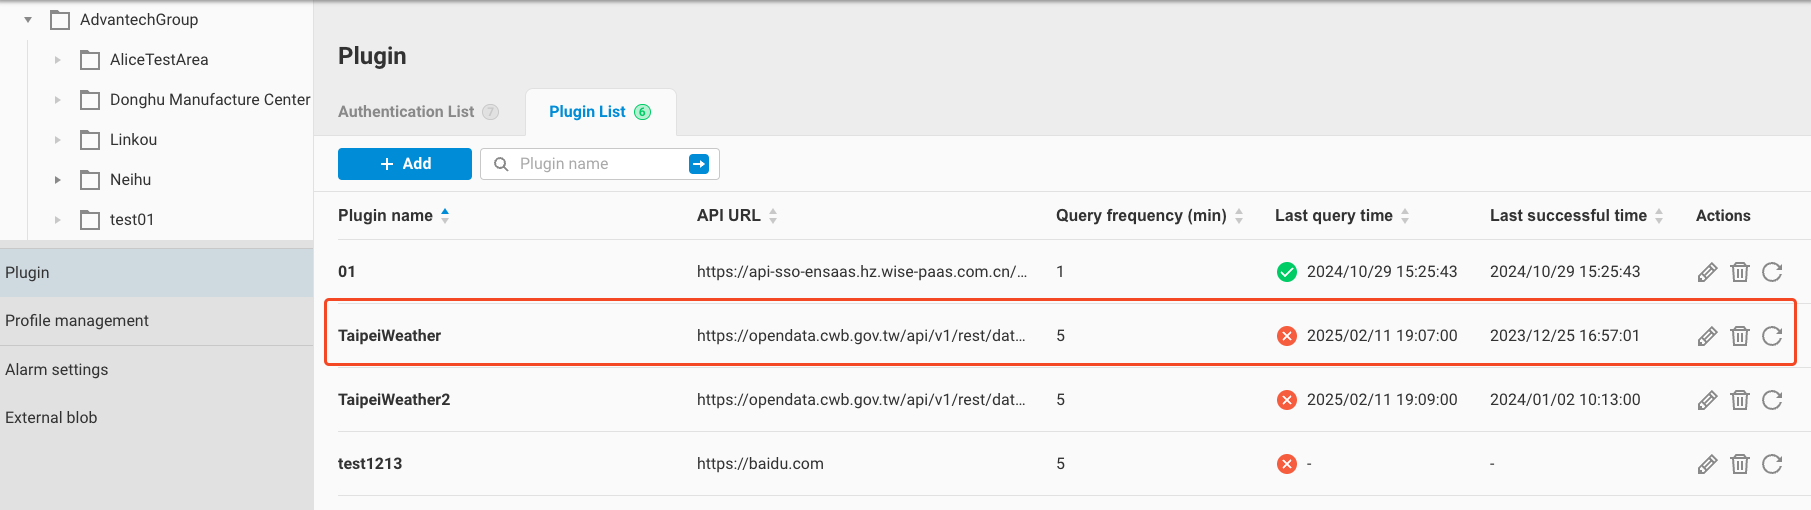
-
In the Plugin list, each plugin can be edited, deleted, or refreshed.
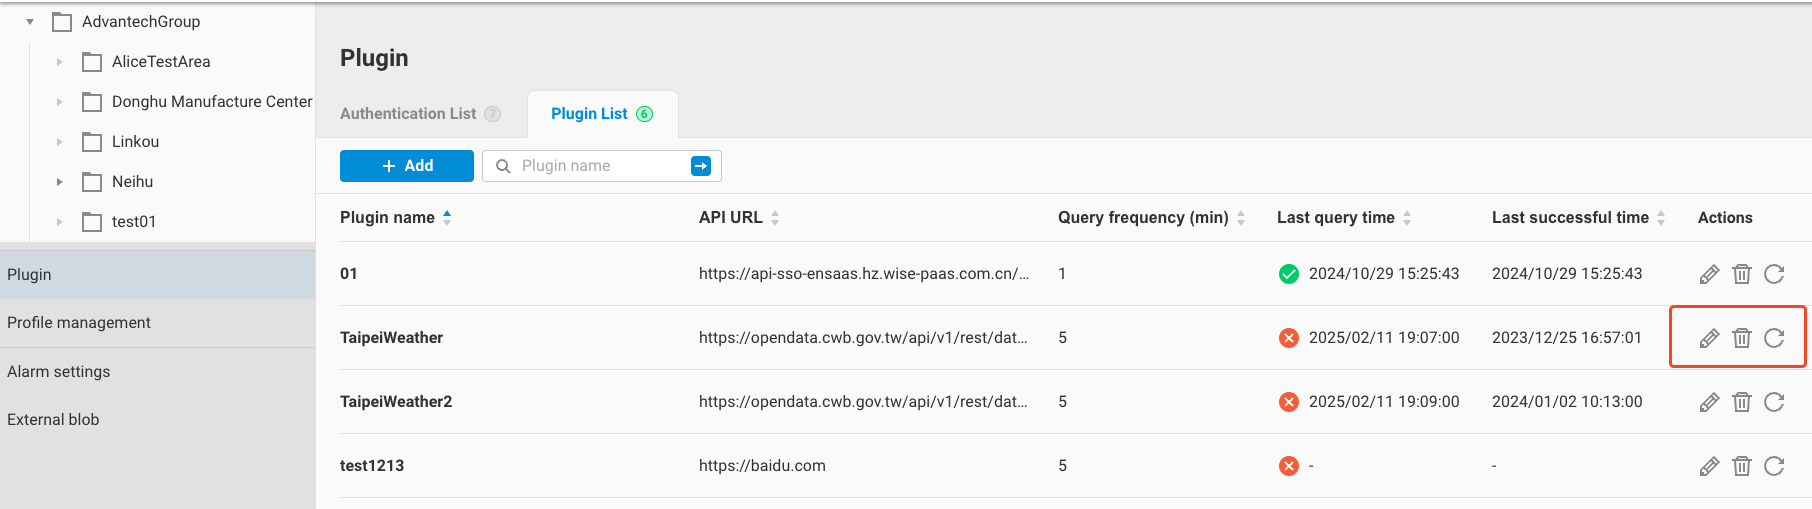
- Refresh: For all different inputs referencing this plugin (configured in the calculation parameter settings, explained in section 2.4), it queries the API one by one. If the plugin has not been referenced, the API is queried using the plugin's sample value.
2.4 Use Plugin Function in Calculation Parameter
The newly added plugin function must be invoked by a calculation parameter. Here's how to use it:
-
Create a new calculation parameter and select the desired plugin from the Formula library. Choose one of the plugin's outputs.
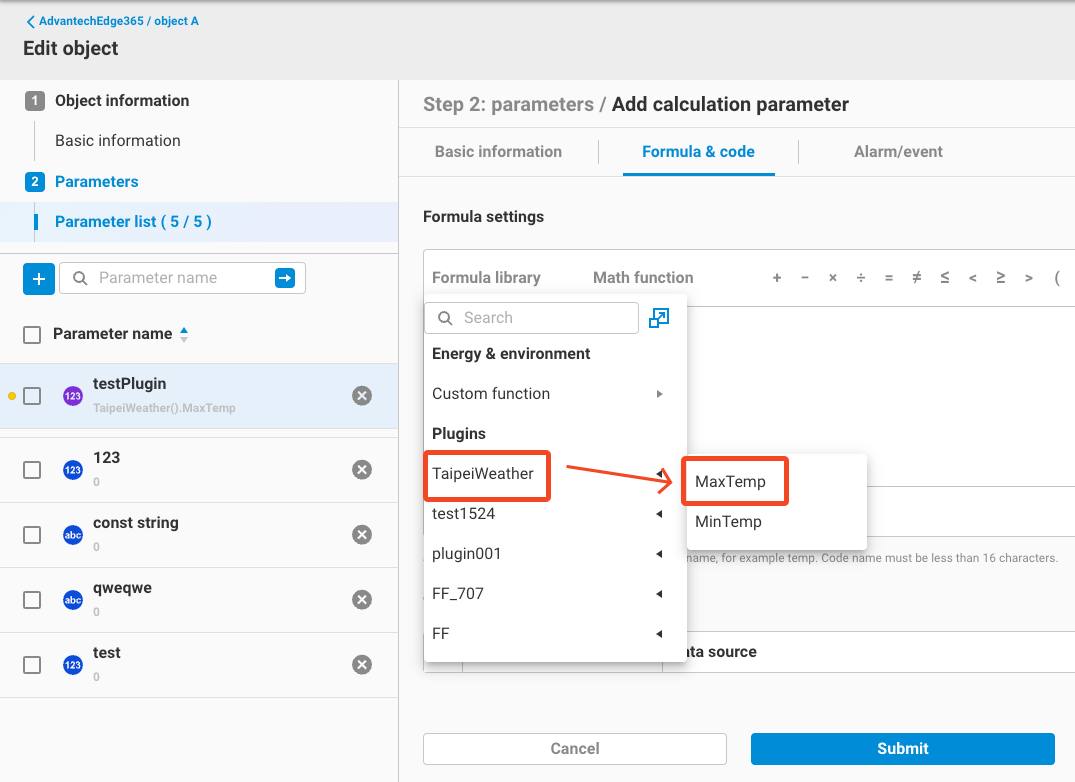
-
You will see that the formula automatically includes the plugin formula in the following format:
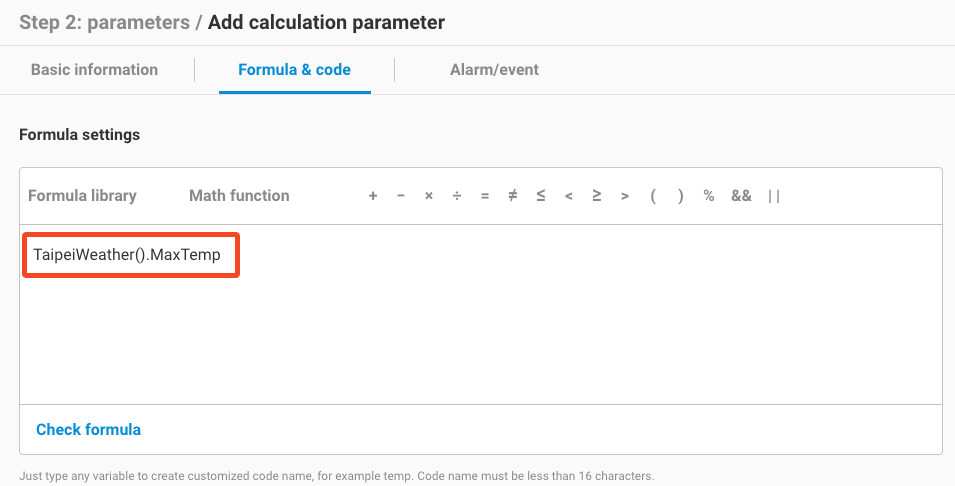
(, , ...).- Example:
- TaipeiWeather().MaxTemp
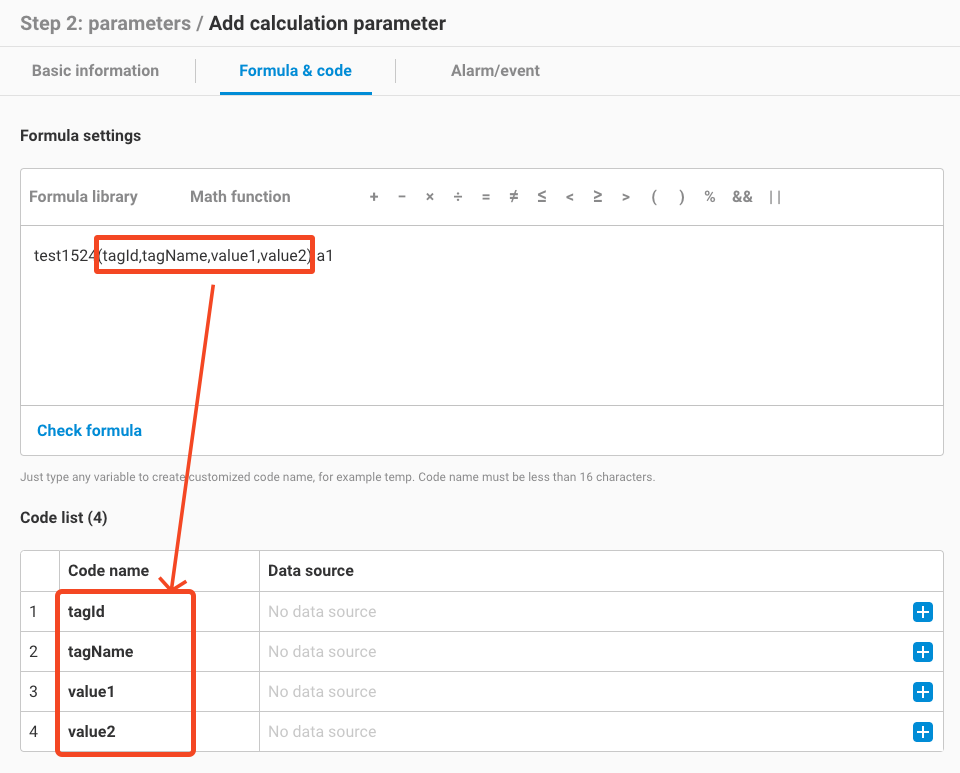
- examplePlugin(tagId, tagName, value1, value2).a1
-
Click on "Check formula." If the plugin has any inputs (configured in section 2.3, API URL / API Body), the input variables will be displayed in the Code list. The further steps for operation are the same as the calculation parameter settings.
-
Once you have completed the configuration, save it. When the calculation frequency is reached, the calculation parameter will retrieve the configured output value from the plugin and use it as the computation result for that calculation parameter.