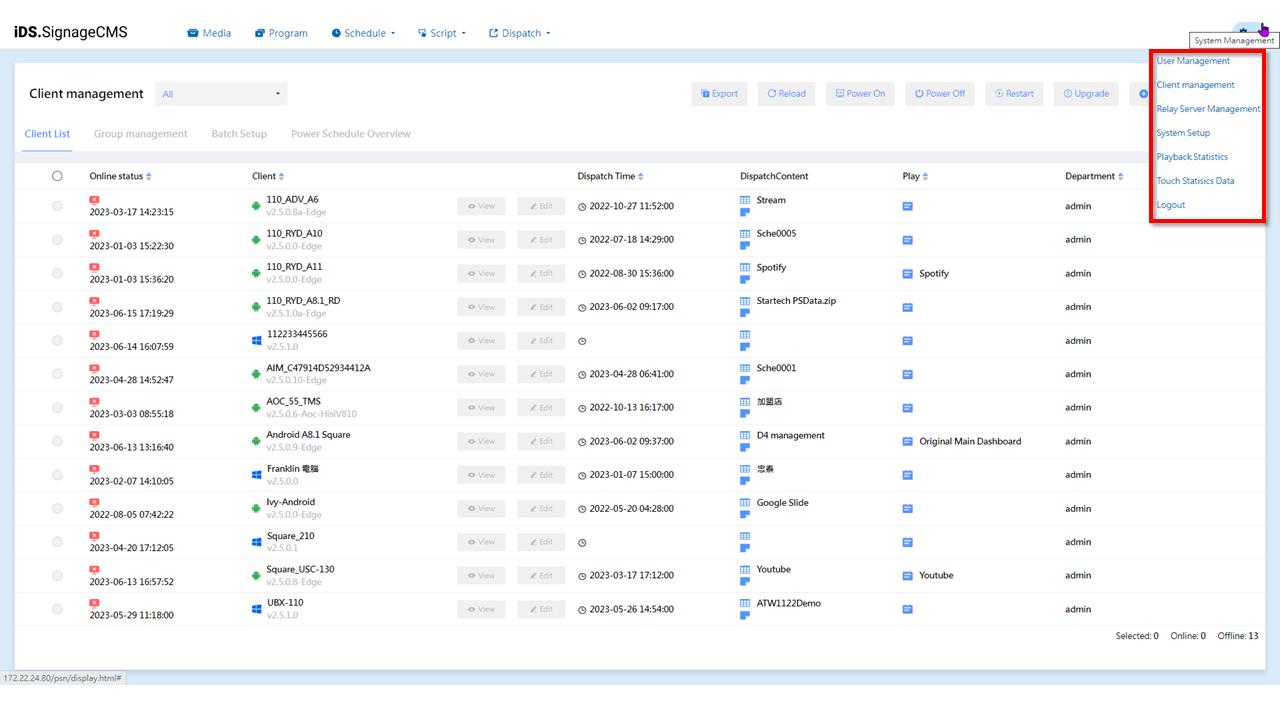
Client Management is used to manage the players that are bound within the system. It consists of four sub-functions: Client List, Group Management, Batch Setup, and Power Schedule Overview . Here is a detailed description of each function:
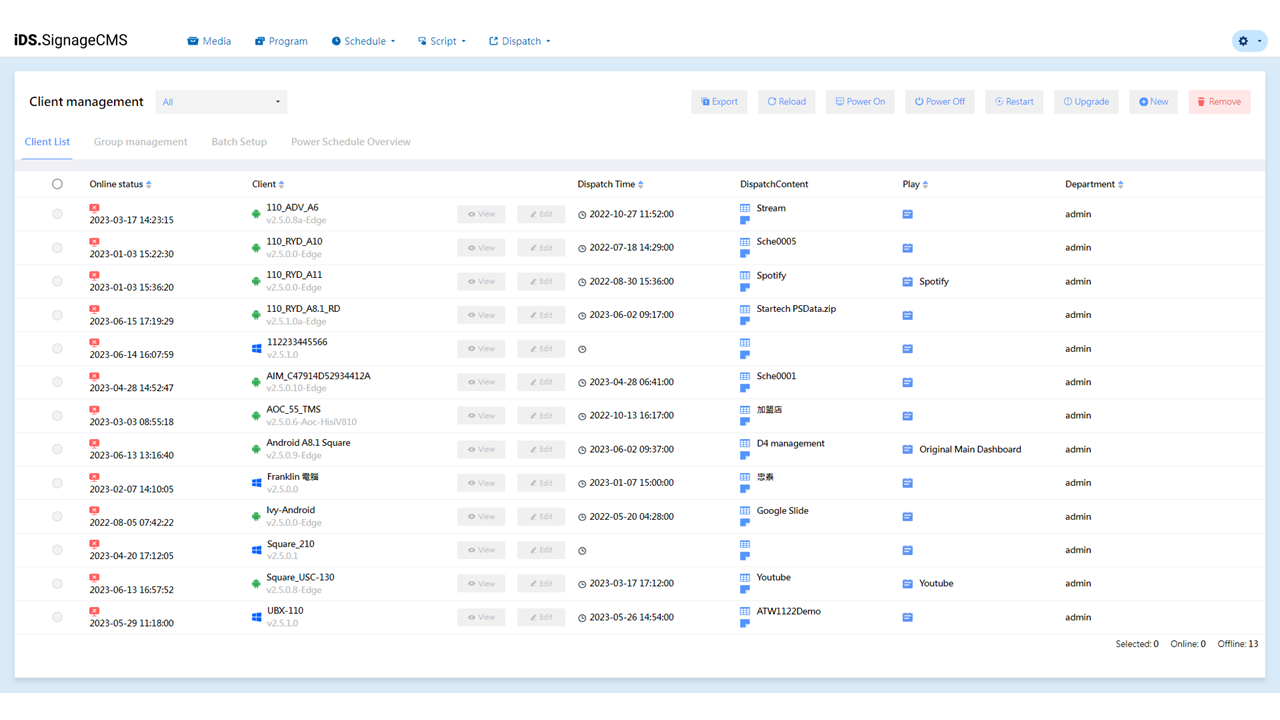
- Client List: The Client List serves as the configuration interface for players, where you can perform various settings. It is primarily divided into the Function Area and the List Display Area. Here is a detailed explanation of each function:
- Function Area of the Client List:
- Export: Allows you to export the registered players as an Excel list for easier management and querying purposes.
- Reload: By clicking this button, you can refresh the online status of the players to ensure that the displayed status in the system is in sync with the actual status.
- Power On: After selecting a player, clicking this button will power on the player. > Please note that this button is only applicable to Windows players with Wake-on-LAN (WOL) functionality configured.
- Power Off: After selecting a player, clicking this button will power off the player. > Please note that this button is only applicable to Windows players with Wake-on-LAN (WOL) functionality configured.
- Restart: Clicking this button allows you to reboot the selected player.
- ungrade: After selecting a Client, clicking this button will update the player to the latest version.
- New: Clicking the Add button allows you to create a new player and bind it to the system.
- Remove: After selecting a player, clicking the Delete button will remove the bound player. > Note: Some functionalities are only supported in a private cloud environment.
List Display Area of the Client List:
- Client Management
- Online Status: Displays the connection status of the player, indicating whether the player is currently online or offline. It also shows the timestamp of the last online status update.
- Client: Displays the identification name or number assigned to each player, allowing for easy differentiation between different players.
- Dispatch Time: Shows the timestamp of the most recent deployment to the player, indicating the last time the playback content was updated.
- DispatchContent: Displays the content that was last deployed to the player, indicating the most recent updated playback content.
- Play: Shows the program or media file currently being played by the player.
- Partment/Store: Displays the department or store to which the player belongs, helping to differentiate between different organizational units.
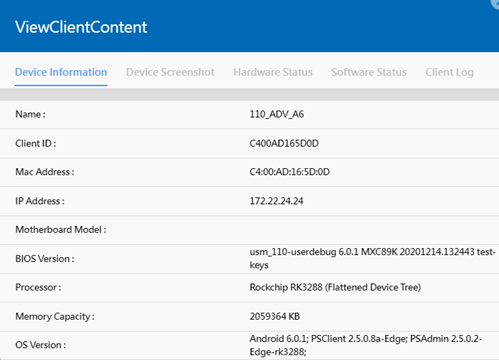
- View Client Content: Clicking this button allows you to view detailed information about the player or perform further operations. This may include viewing device information, device Screenshot, H/W Stauts, S/W status, and Client log.
- Edit:
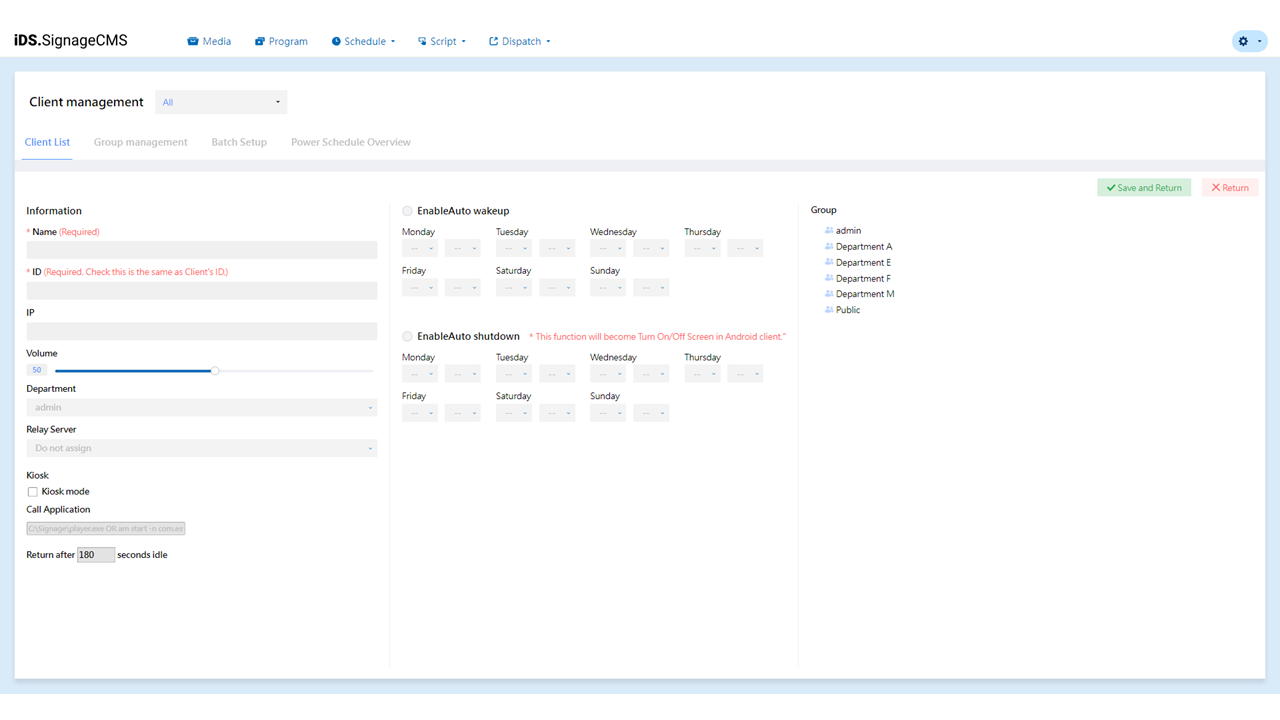
- Name: Enter the name of the player.
- ID: Enter the player's ID for identification.
- IP: Enter the player's IP address.
- Volume: Control the volume of the player, set between 0 and 100.
- Department: Set the department of the player to categorize and manage players from different departments.
- Relay Server: If your system has a media server configured, you can choose to use the media server here.
- Kiosk Mode: When enabled, the player enters Kiosk Mode and you can set the main program to call. You can also set the player to automatically return to signage mode after a custom idle time.
- Enable Automatic Startup: If you want the player to start up automatically at specific times, you can set the startup time and recurrence pattern, based on a weekly cycle.
- Enable Automatic Shutdown: If you want the player to shut down automatically at specific times, you can set the shutdown time and recurrence pattern, based on a weekly cycle. > Note: The automatic startup and shutdown functions are only available on the Windows platform. If you are using the Android platform, they would be equivalent to turning on and off the screen.
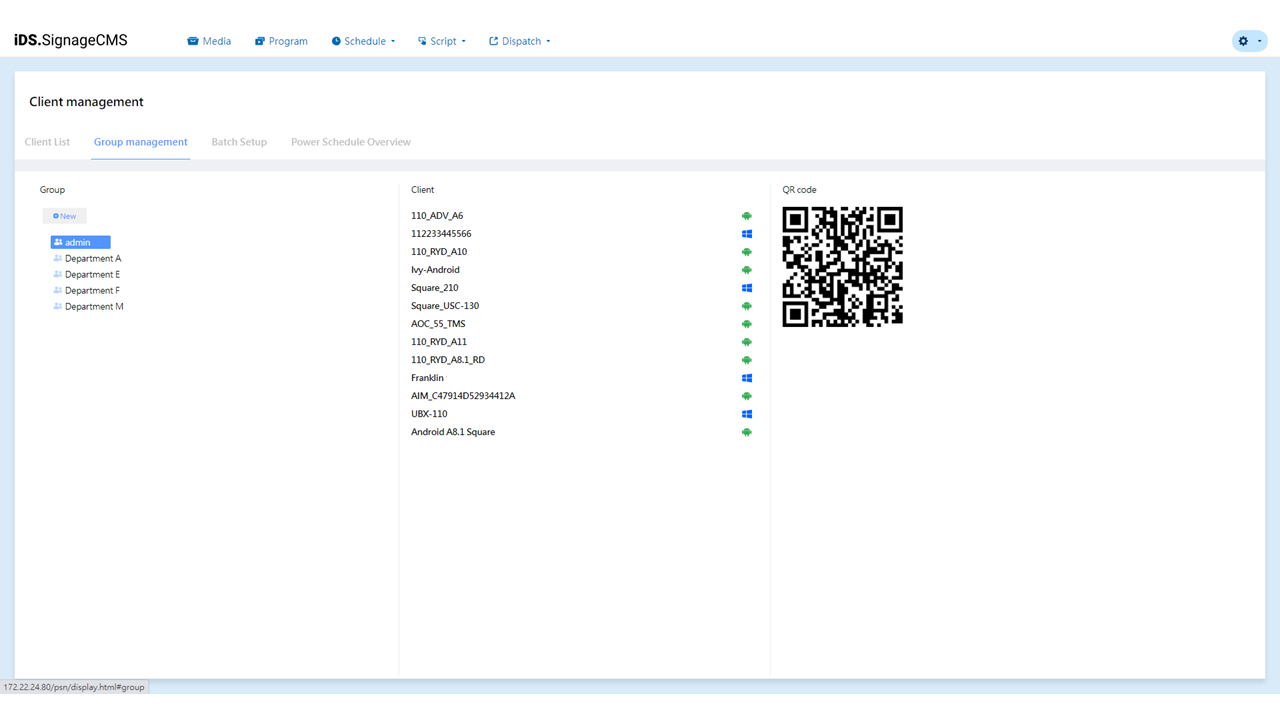
Group Management:
- You can add and manage groups for players. You can create player groups based on factors such as departments, regions, or purposes to facilitate management and control. In this section, you can create new groups, edit the names and descriptions of existing groups, and add players to specific groups.
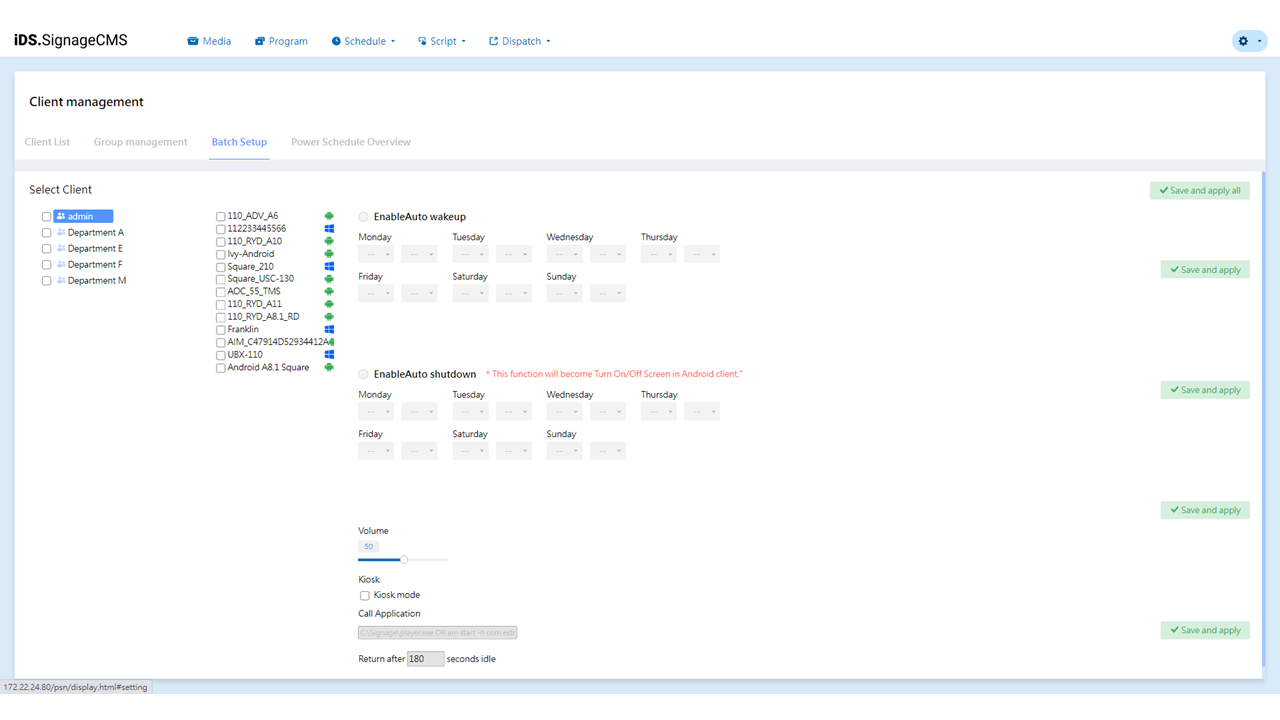
Batch Setup:
-
In this section, you can add and manage group startup and shutdown times for Clients. You can configure startup and shutdown times for multiple Clients within a group, allowing you to save time by setting these times collectively for multiple players at once. This feature streamlines the process and simplifies the management of Client settings.
-
Automatic Startup: If you want the player to automatically start up at specific times, you can set the startup time and recurrence pattern here, based on a weekly cycle.
-
Automatic Shutdown: If you want the player to automatically shut down at specific times, you can set the shutdown time and recurrence pattern here, based on a weekly cycle. > Note: The automatic startup and shutdown functions are only available on the Windows platform. If you are using the Android platform, due to limitations in the Android system, the server will execute commands to turn the screen on and off instead.
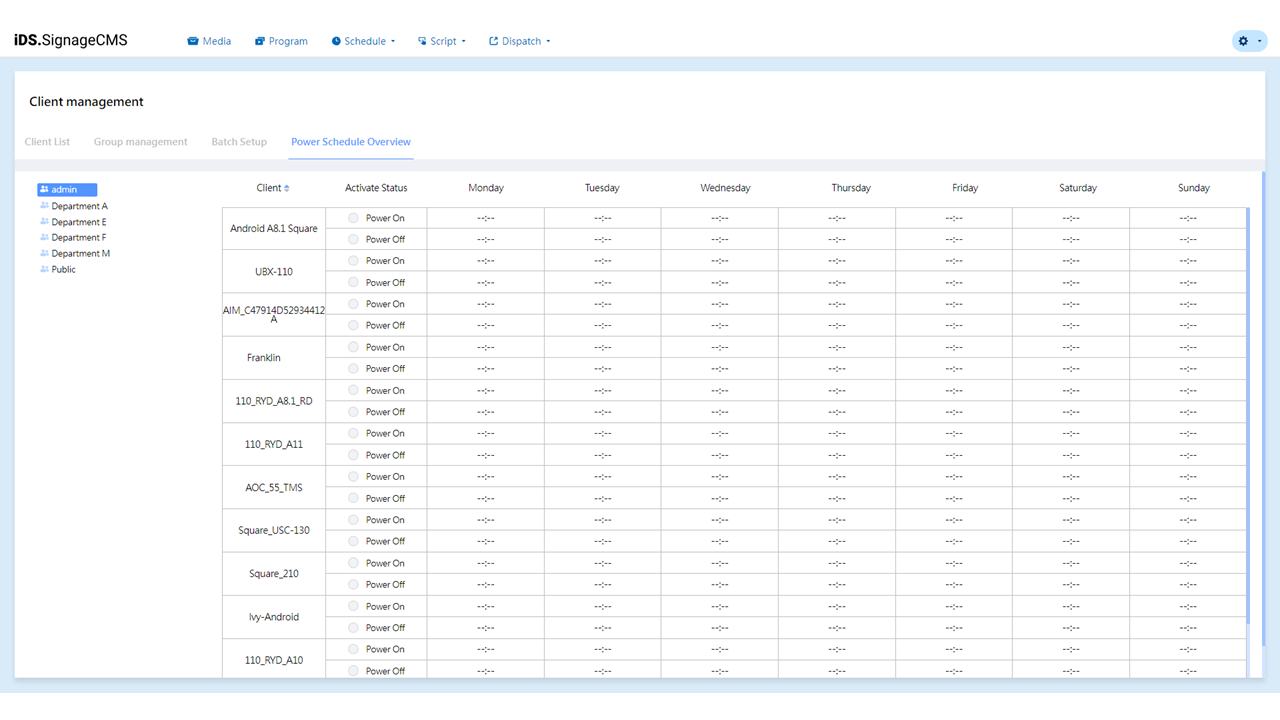
Power Schedule Overview:
- You can view the startup and shutdown schedules for both player groups and individual players. In this section, users can review the schedules of all players, providing a clear understanding of when players will start up and shut down.
- The overview of startup and shutdown schedules helps users better plan the usage of players and ensures they are operational when needed, contributing to efficient management and utilization.