App Builder's Handbook - Start Up
Introduction
This guide outlines the essential steps to setup, and begin utilizing the WEDA Platform. By following this guide, you will establish the foundational components of the WEDA system, allowing you to connect devices, gather real-time sensor data, and remotely deploy containers.
This process is divided into five key phases:
1. Access WISE Portal: WISE Portal is the web-based administrative interface. You will learn how to sign in and create additional local user accounts.
2. Register a Device on WEDA Core: This is the process of enrolling a new device. You will use the administrative APIs to obtain an accessToken, establish a new organization, and formally register a device within the WEDA environment.
3. Run WEDA Node: The WEDA Node is the software agent running on the edge device. You will download the necessary device credentials, deploy the WEDA Node, and confirm the device successful connection by verifying the reported capabilities.
4. Get Device Telemetry Data: With the device active, you will move on to the core function data collection. This phase shows you how to enable target sensors, query telemetry states, and retrieve the latest sensor data from the device.
5. Deploy Container to Device: The final step demonstrates WEDA's power in remote management. You will prepare and encode a docker compose file, use it to define a new container stack, and then remotely deploy the container to the edge device.
1. Access WISE Portal
This section describes how to access WISE Portal, reset the admin password, and create a Tenant Admin user.
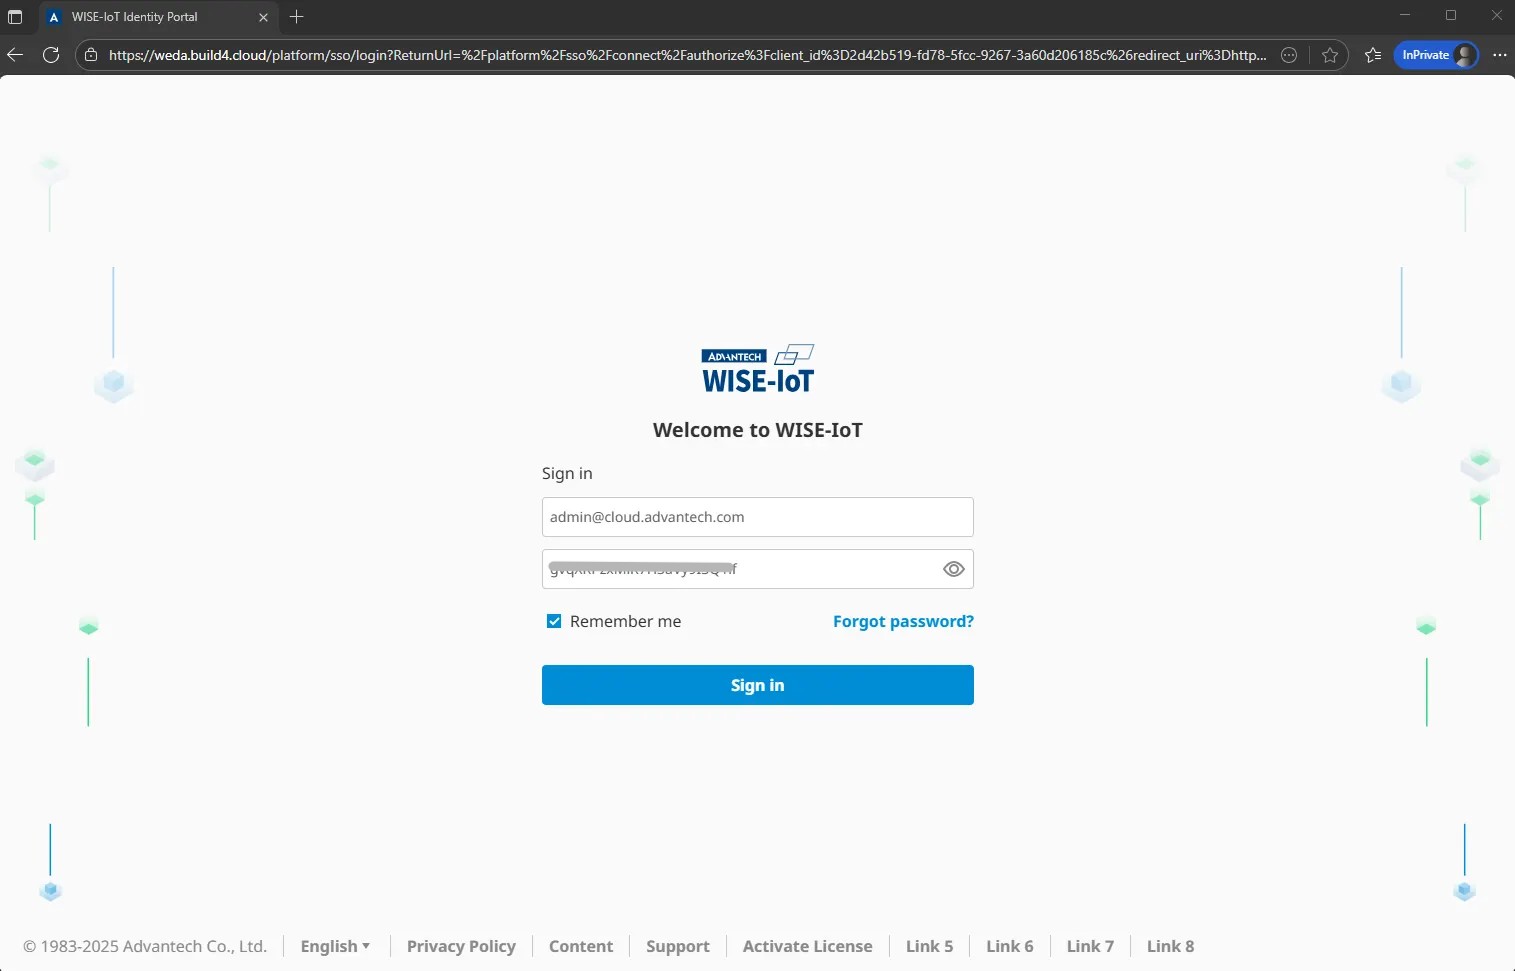
1.1 Sign in WISE Portal
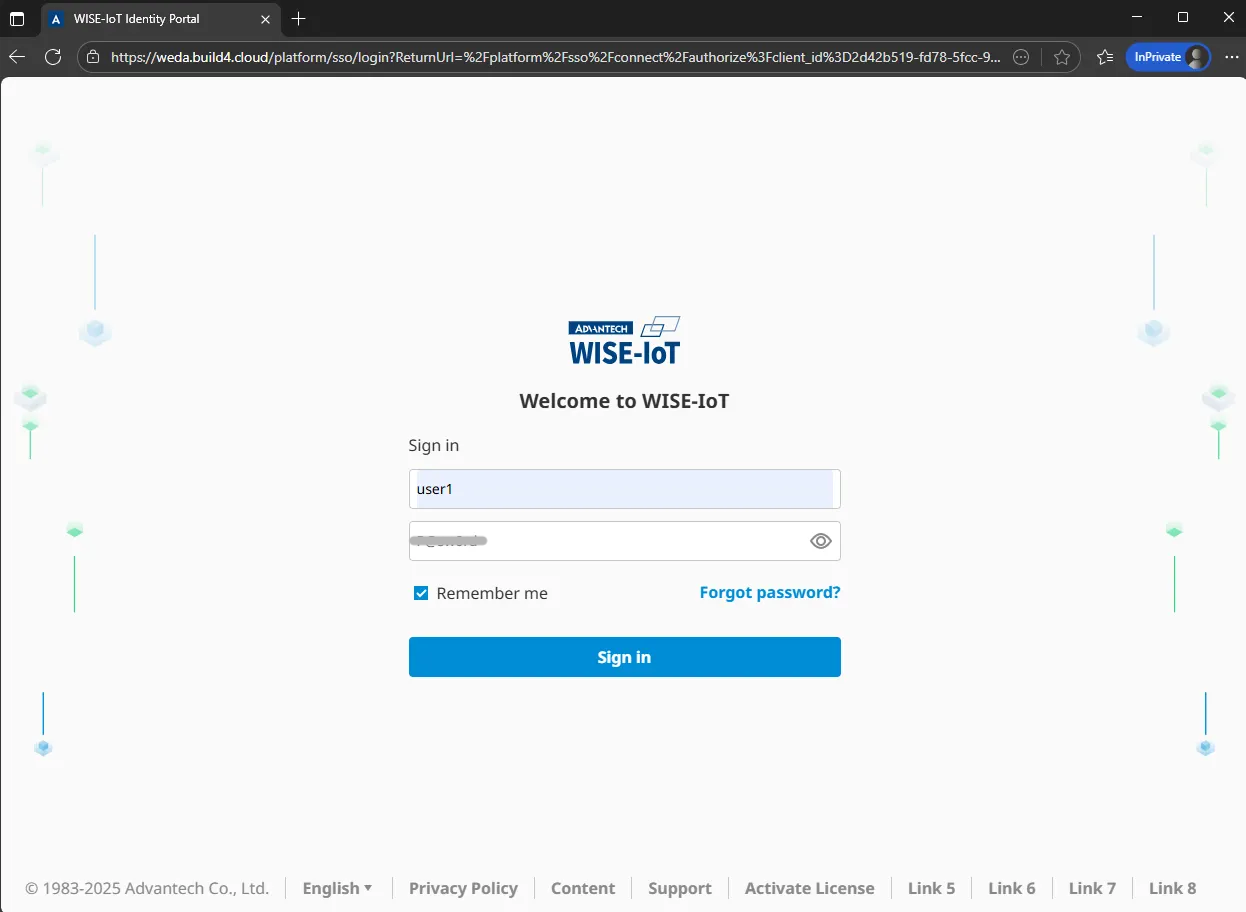
Open a web browser and go to the WISE Portal: https://{domain}/platform/desk. Replace {domain} with the actual domain.
You will be automatically redirected to the correct login page.
Log in with the default SSO credentials.
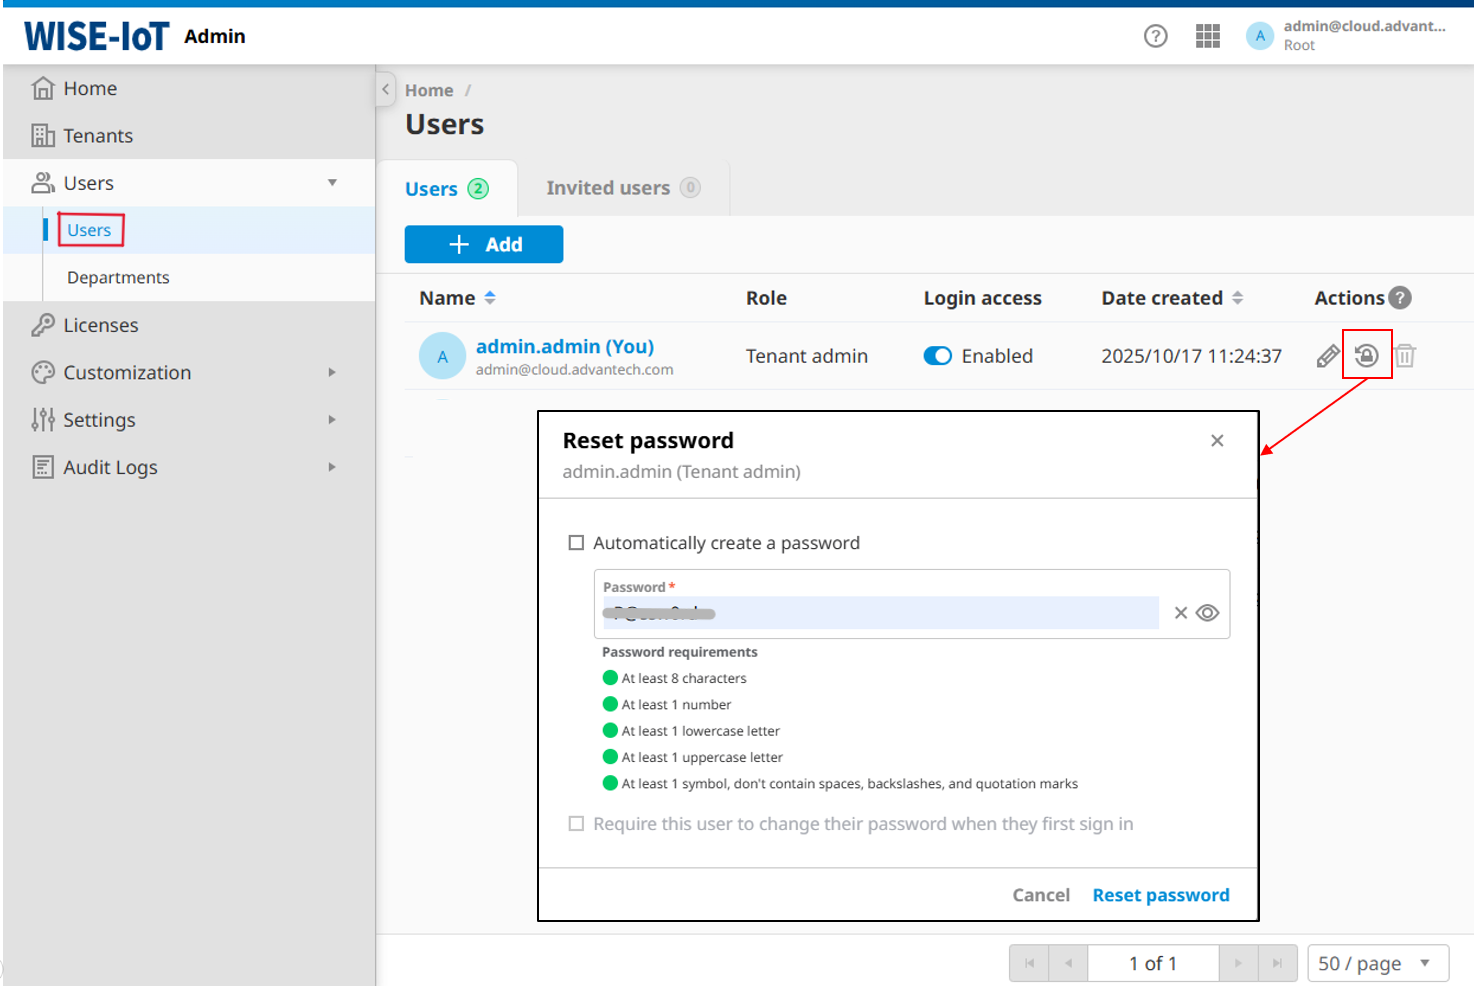
1.2 Reset Admin Password
Go to User in the left menu, find admin@cloud.advantech.com, and reset the password.
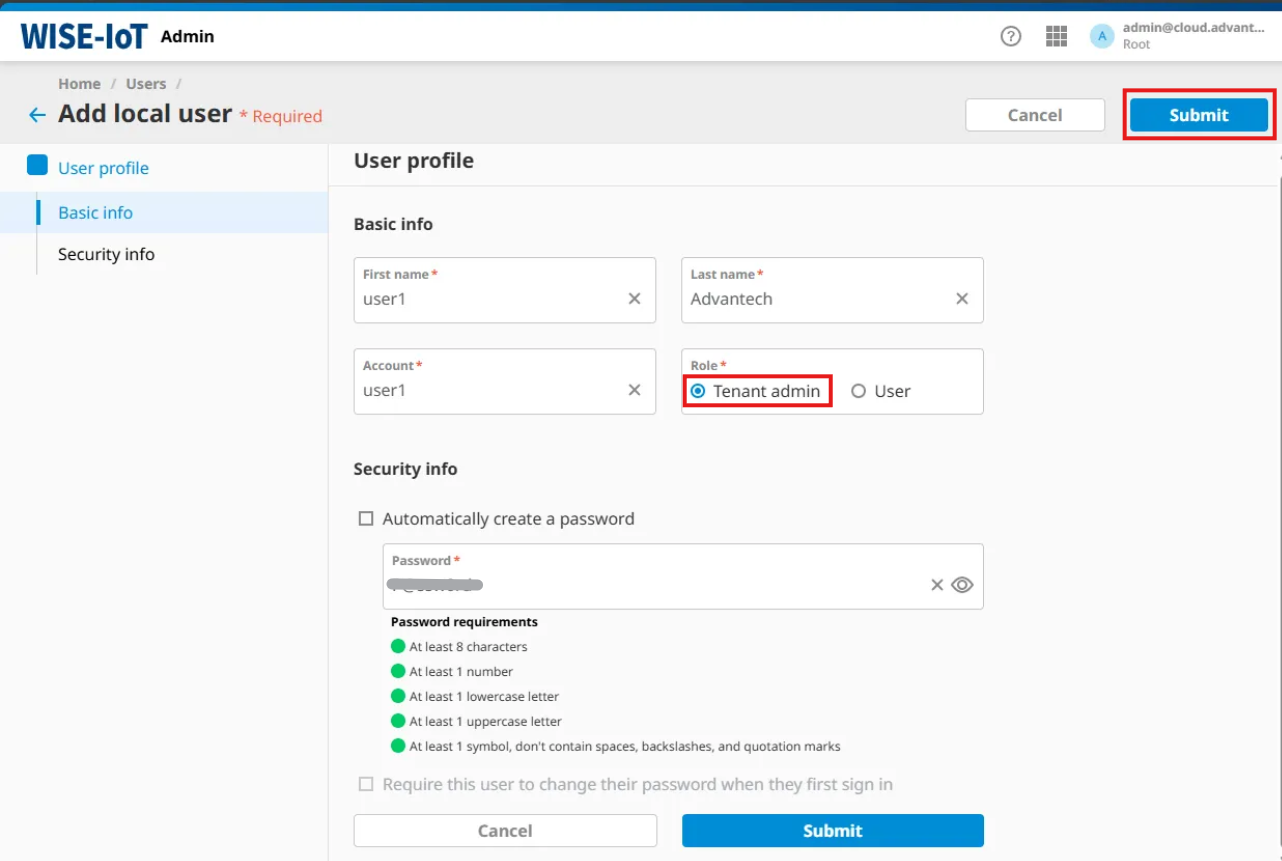
1.3 Add a Local User
Click + Add button to create a new User.

Fill in the user details and choose Tenant Admin as the role.
- First name
- Last name
- Account name
- Your own password
Click Submit.
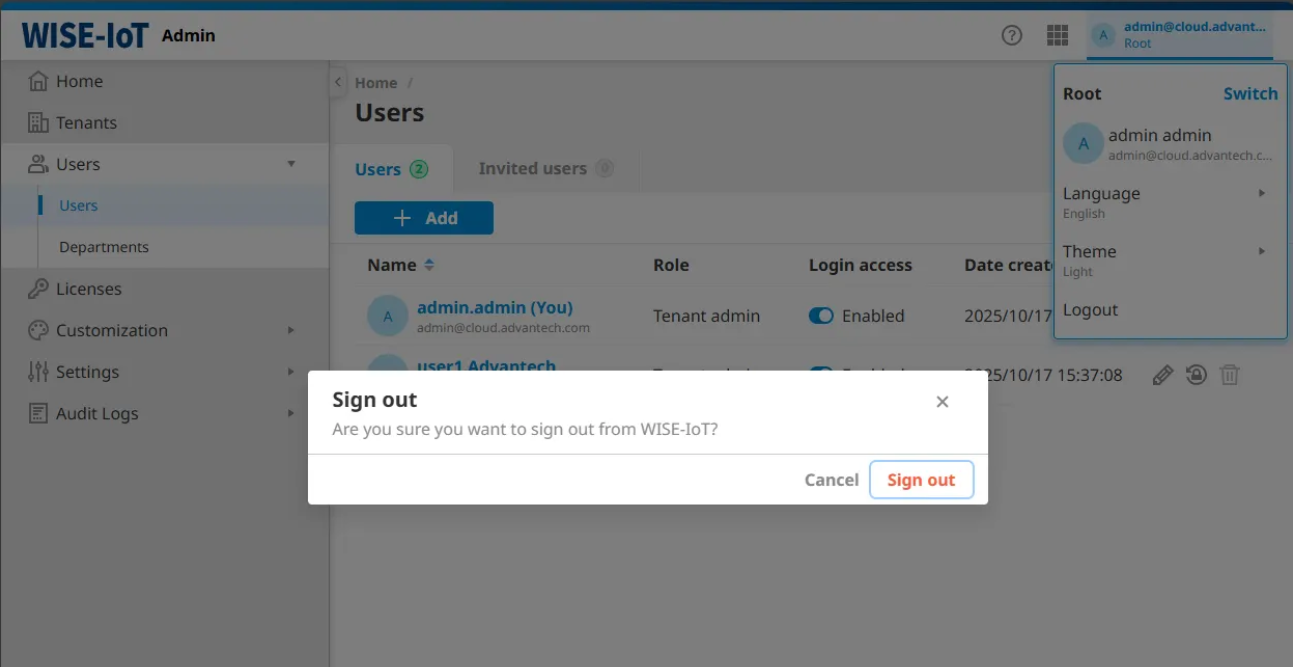
1.4 Sign Out
Click your username in the top-right corner and select Sign Out.

2. Register a Device on WEDA Core
This section describes how to register a device in WEDA Core using APIs. You will retrieve user tokens, create an organization, refresh your access token, and prepare for device onboarding.
2.1 Prerequisites
Before you begin, please ensure your environment meets the following requirements:
- API Tool: Postman or an any REST API client.
- Edge Device: A prepared hardware device (e.g., an Advantech MIC-710).
2.2 Sign in WISE Portal
Log in WISE Portal: https://{domain}/platform/desk using the Tenant Admin account.
2.3 Get User WEDA Core Access Token
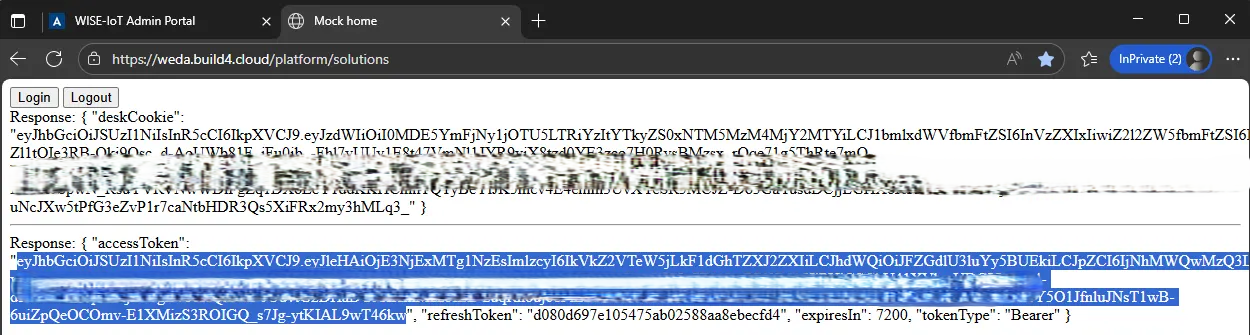
Open a new browser tab and go to: https://{domain}/platform/solutions.
This page will return two types of tokens:
- DeskCookie
- AccessToken - used for WEDA API.
The accessToken should be included in the Authorization header when calling APIs:
Authorization: Bearer {access-token}
2.4 Create a New Org
Create a new organization using the following API.
Endpoint
POST /platform/solutions/api/v1/orgs
Example Request
curl --location --request POST 'https://{domain}/platform/solutions/api/v1/orgs' \
--header 'Content-Type: application/json' \
--header 'Authorization: Bearer {access-token}' \
--data '{
  "name": "Org1"
}
Example Response
{
  "name": "Org1",
  "id": "3a1d1d06-4759-cefd-af34-0705d0ca8902",
  "parentId": null
}
2.5 Refresh the accessToken
Refresh the token to obtain an org-scoped accessToken. Use the accessToken and refreshToken retrieved from the previous step in the request body.
Endpoint
POST /platform/solutions/api/v1/auth/tokens
Example Request
curl --location --request POST 'https://{domain}/platform/solutions/api/v1/auth/tokens?grant_type=refresh_token' \
--header 'Content-Type: application/json' \
--data '{
  "token": "{access-token}",
  "refreshToken": "{refresh-token}"
}'
The refresh token API does not require an Authorization header.
Example Response
{
    "accessToken": "eyJhbGciOiJSUzI1NiIsInR5cCI6IkpXVCJ9....",
    "refreshToken": "1b5cf6c2587f472fb8b159....",
    "expiresIn": 7200,
    "tokenType": "Bearer"
}
Use the new accessToken for the following API requests.
2.6 Create a Device
Create a device using the following API, including the Org ID in the request body.
Endpoint
POST /platform/solutions/api/v1/devices
Example Request
curl --location --request POST 'https://{domain}/platform/solutions/api/v1/devices' \
--header 'Content-Type: application/json' \
--header 'Authorization: Bearer {access-token}' \
--data '{
  "deviceId": "48b02d8861de",
  "hwModel": "MIC-710",
  "orgId": "3a1d40ed-4f97-aed8-c727-57704d3d5d2e"
}'
- deviceId: Must be a MAC address (lowercase letters and numbers only, no symbols).
- hwModel: The system validates hardware information using
/etc/board. Open the file withvi /etc/boardto check the hardware model. If the file doesn’t exist, create it and enter the hardware model inside.
Example Response
{
    "deviceId": "48b02d8861de",
    "hwModel": "MIC-710",
    "orgId": "3a1d40ed-4f97-aed8-c727-57704d3d5d2e",
    "status": "Registered"
}
The device is now registered on WEDA Core.
3. Run WEDA Node
This guide explains how to set up and run WEDA Node to activate your edge device.
3.1 Prerequisites
Before you begin, please ensure your edge device environment meets the following requirements:
- Docker Engine is installed.
- Docker compose is installed.
- Permissions:
sudo / rootaccess for system-level commands.
3.2 Download Device Credential File (Active the Device)
To activate the device, request the WEDA Node credential file using the following API.
It will returns the device authentication details and provides a device credential file (authInfo).
Endpoint
GET /platform/solutions/api/v1/devices/{deviceId}/auth
Example Request
curl --location --request GET 'https://{domain}/platform/solutions/api/v1/devices/48b02d8861de/auth?type=0&enc=true' \
--header 'Authorization: Bearer {access-token}'
Download the file and save it as authinfo.json.

3.3 Remove Previous Registration Data (Optional)
If this device was registered previously, remove any existing dmagent data before redeploying. This step can be skipped for a new deployment.
sudo rm -rf /opt/Advantech/dmagent/data
Stop and clean up existing containers and networks:
docker compose down -v
3.4 Deploy WEDA Node
Upload the downloaded authinfo.json to the edge device. Follow the instructions in WEDA Node Documentation to deploy WEDA Node.
After deployment, verify the services status:
sudo docker compose ps

You should see both dmagent and data agent service running.
3.5 Get Device Capabilities
After WEDA Node is deployed, use the following API to check whether the device is successfully online.
Endpoint
GET /platform/solutions/api/v1/devices/{deviceId}/capabilities
Example Request
curl --location --request GET 'https://{domain}/platform/solutions/api/v1/devices/48b02d8861de/capabilities' \
--header 'Authorization: Bearer {access-token}'
Example Response
[
    {
        "dtmi": "dtmi:advantech:EdgeSync:NetWorkInfo:networkReceiveErrsTotal;1",
        "name": "rndis0.networkReceiveErrsTotal",
        "resourceId": "774d3d37-90df-5dae-8be1-7ef40f006d72",
        "resourceShortId": "06d72",
        "deviceResourceId": "78c20943-a710-5abb-aa5a-15d5ce845f7d",
        "enabled": false,
        "interval": 0
    },
    {
        "dtmi": "dtmi:advantech:EdgeSync:NetWorkInfo:networkReceiveBytesTotal;1",
        "name": "usb0.networkReceiveBytesTotal",
        "resourceId": "942657ac-6d7f-5a40-9d51-2da27889d063",
        "resourceShortId": "9d063",
        "deviceResourceId": "8a6adb13-b85c-53a9-b666-b702ee3ca5db",
        "enabled": false,
        "interval": 0
    },
    {
        "dtmi": "dtmi:advantech:EdgeSync:SystemInfo:systemTimexOffsetSeconds;1",
        "name": "systemTimexOffsetSeconds",
        "resourceId": "7283ff29-c8ac-541c-b963-d7ec9b7dab71",
        "resourceShortId": "dab71",
        "deviceResourceId": "cc9a9f72-7abb-5291-af20-2475f961c36b",
        "enabled": false,
        "interval": 0
    }
]
If the response includes device capability information, the device is successfully online.
4. Get Device Telemetry Data
This section describes how to enable sensors on the edge device and get telemetry data from WEDA Core.
4.1 Enable Target Sensors
After obtaining the full list of device capabilities, select resourceId of the sensors that need to upload data to WEDA Core. Use the following API to update the device configuration and enable the selected sensors with the data reporting frequency.
Endpoint
PATCH /platform/solutions/api/v1/devices/{deviceId}/telemetry-configs/desired
Example Request
curl --location --request PATCH 'https://{domain}/platform/solutions/api/v1/devices/48b02d8861de/telemetry-configs/desired' \
--header 'Content-Type: application/json' \
--header 'Authorization: Bearer {access-token}' \
--data '{
  "allInterval": 2000,
  "sensors": [
    {
      "resourceId": "e1090dee-857c-539d-b572-1e8250113520",
      "enabled": true
    },
    {
      "resourceId": "977f6249-d505-562b-a0af-698981f9710c",
      "enabled": true
    },
    {
      "resourceId": "78f03238-8e21-536d-b445-bcbd8d8b9646",
      "enabled": true
    }
  ]
}'
Example Response
{
    "allInterval": 2000,
    "sensors": [
        {
            "resourceId": "e1090dee-857c-539d-b572-1e8250113520",
            "enabled": true,
            "interval": null
        },
        {
            "resourceId": "977f6249-d505-562b-a0af-698981f9710c",
            "enabled": true,
            "interval": null
        },
        {
            "resourceId": "78f03238-8e21-536d-b445-bcbd8d8b9646",
            "enabled": true,
            "interval": null
        }
    ]
}
4.2 Get Device Telemetry States
Use the following API to confirm if the configuration have been successfully applied.
Endpoint
GET /platform/solutions/api/v1/devices/{deviceId}/telemetry-configs/reported
Example Request
curl --location --request GET 'https://{domain}/platform/solutions/api/v1/devices/48b02d8861de/telemetry-configs/reported' \
--header 'Content-Type: application/json' \
--header 'Authorization: Bearer {access-token}'
Example Response
{
    "allInterval": 2000,
    "sensors": [
        {
            "resourceId": "e1090dee-857c-539d-b572-1e8250113520",
            "enabled": true,
            "interval": null
        },
        {
            "resourceId": "977f6249-d505-562b-a0af-698981f9710c",
            "enabled": true,
            "interval": null
        },
        {
            "resourceId": "78f03238-8e21-536d-b445-bcbd8d8b9646",
            "enabled": true,
            "interval": null
        }
    ]
}
4.3 Get Latest Device Telemetry Data
Use the following API to get the latest telemetry snapshot from the device, including online status and the most recent dataObject values.
Endpoint
GET /platform/solutions/api/v1/devices/{deviceId}/inputs/data-objects/latest
Example Request
curl --location --request GET 'https://{domain}/platform/solutions/api/v1/devices/48b02d8861de/inputs/data-objects/latest' \
--header 'Content-Type: application/json' \
--header 'Authorization: Bearer {access-token}'
Example Response
{
    "deviceId": "48b02d8861de",
    "time": "2025-10-30T06:26:26.145Z",
    "dataObjects": {
        "systemTimeSeconds": 170010.165,
        "ramSwapTotalBytes": 3592273920,
        "sdaDiskIOTimeSecondsTotal": 0,
        "mmcblk0DiskWrittenBytesTotal": 6952206336,
        "mmcblk0DiskReadBytesTotal": 2559474688
    },
    "dataTypes": [
        "double",
        "double",
        "double",
        "double",
        "double"
    ]
}
5. Deploy Container to Device
This section describes how to deploy container applications to the edge device.
5.1 Prepare a Docker Compose File
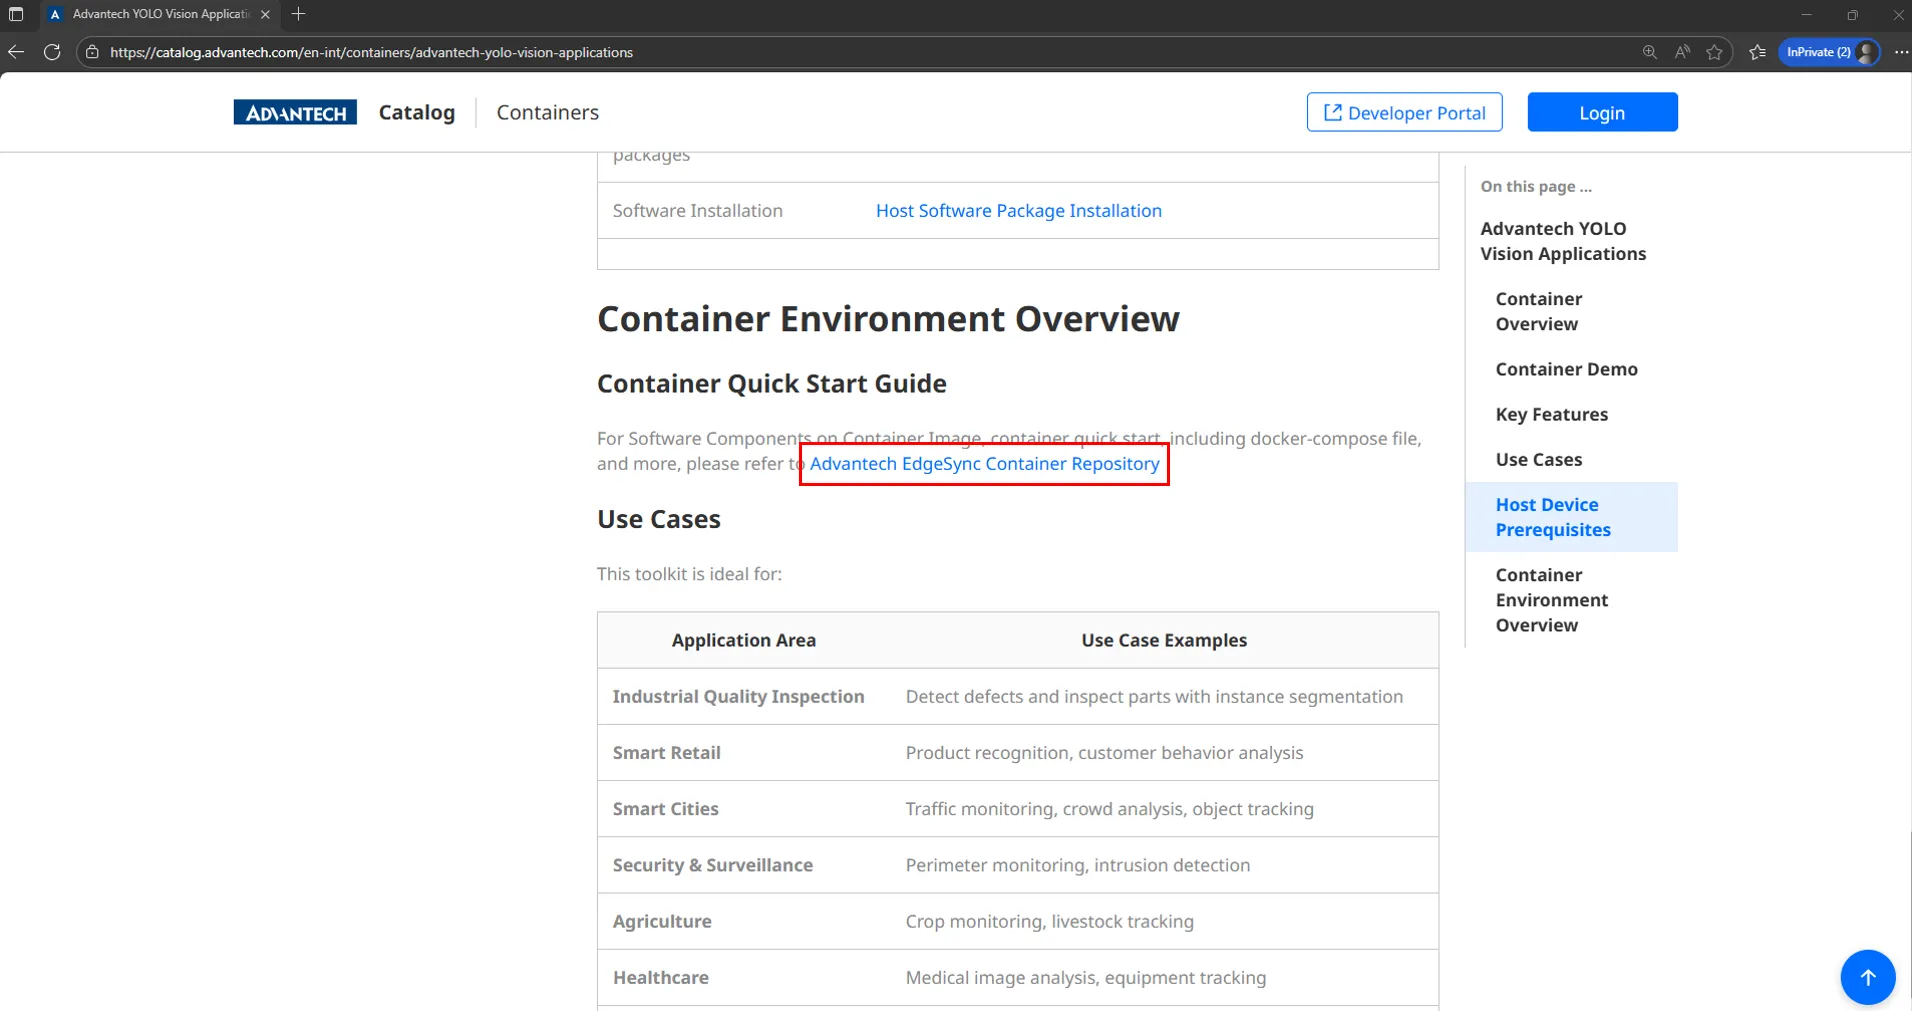
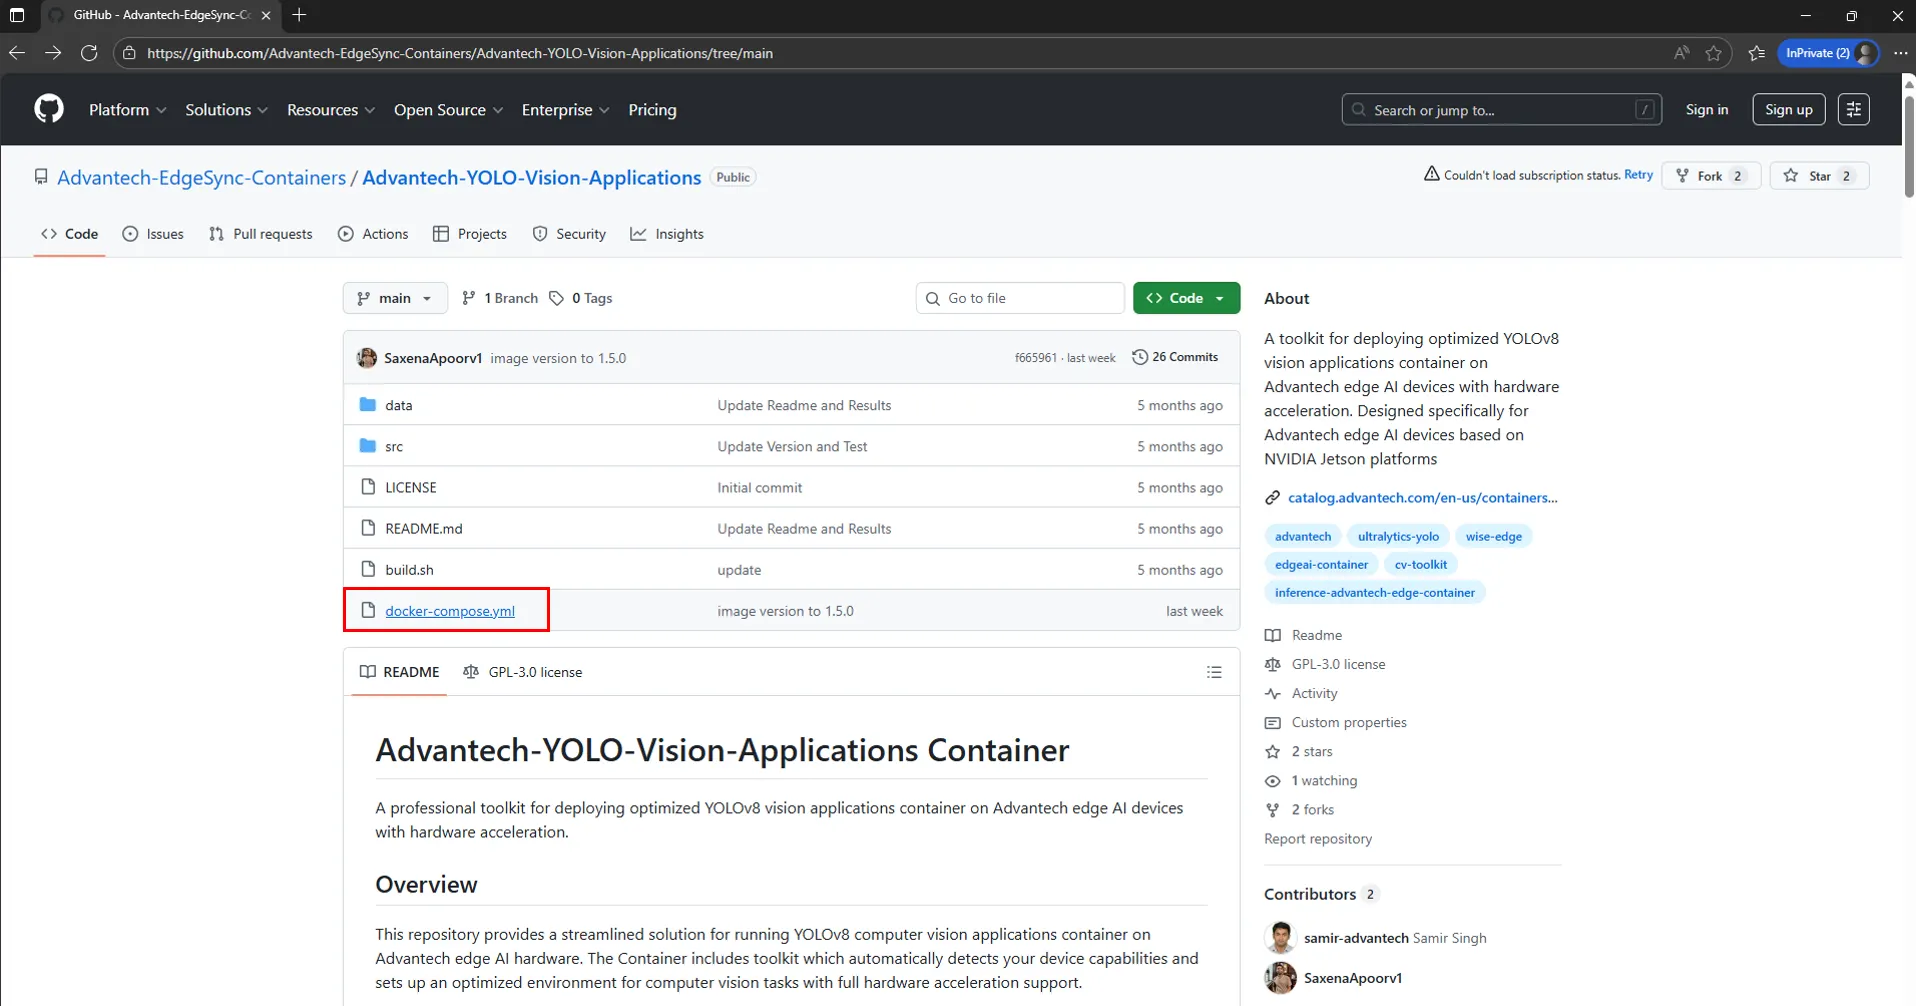
Prepare a docker-compose.yml file, or select a container from the Advantech Catalog which has a GitHub repository link.


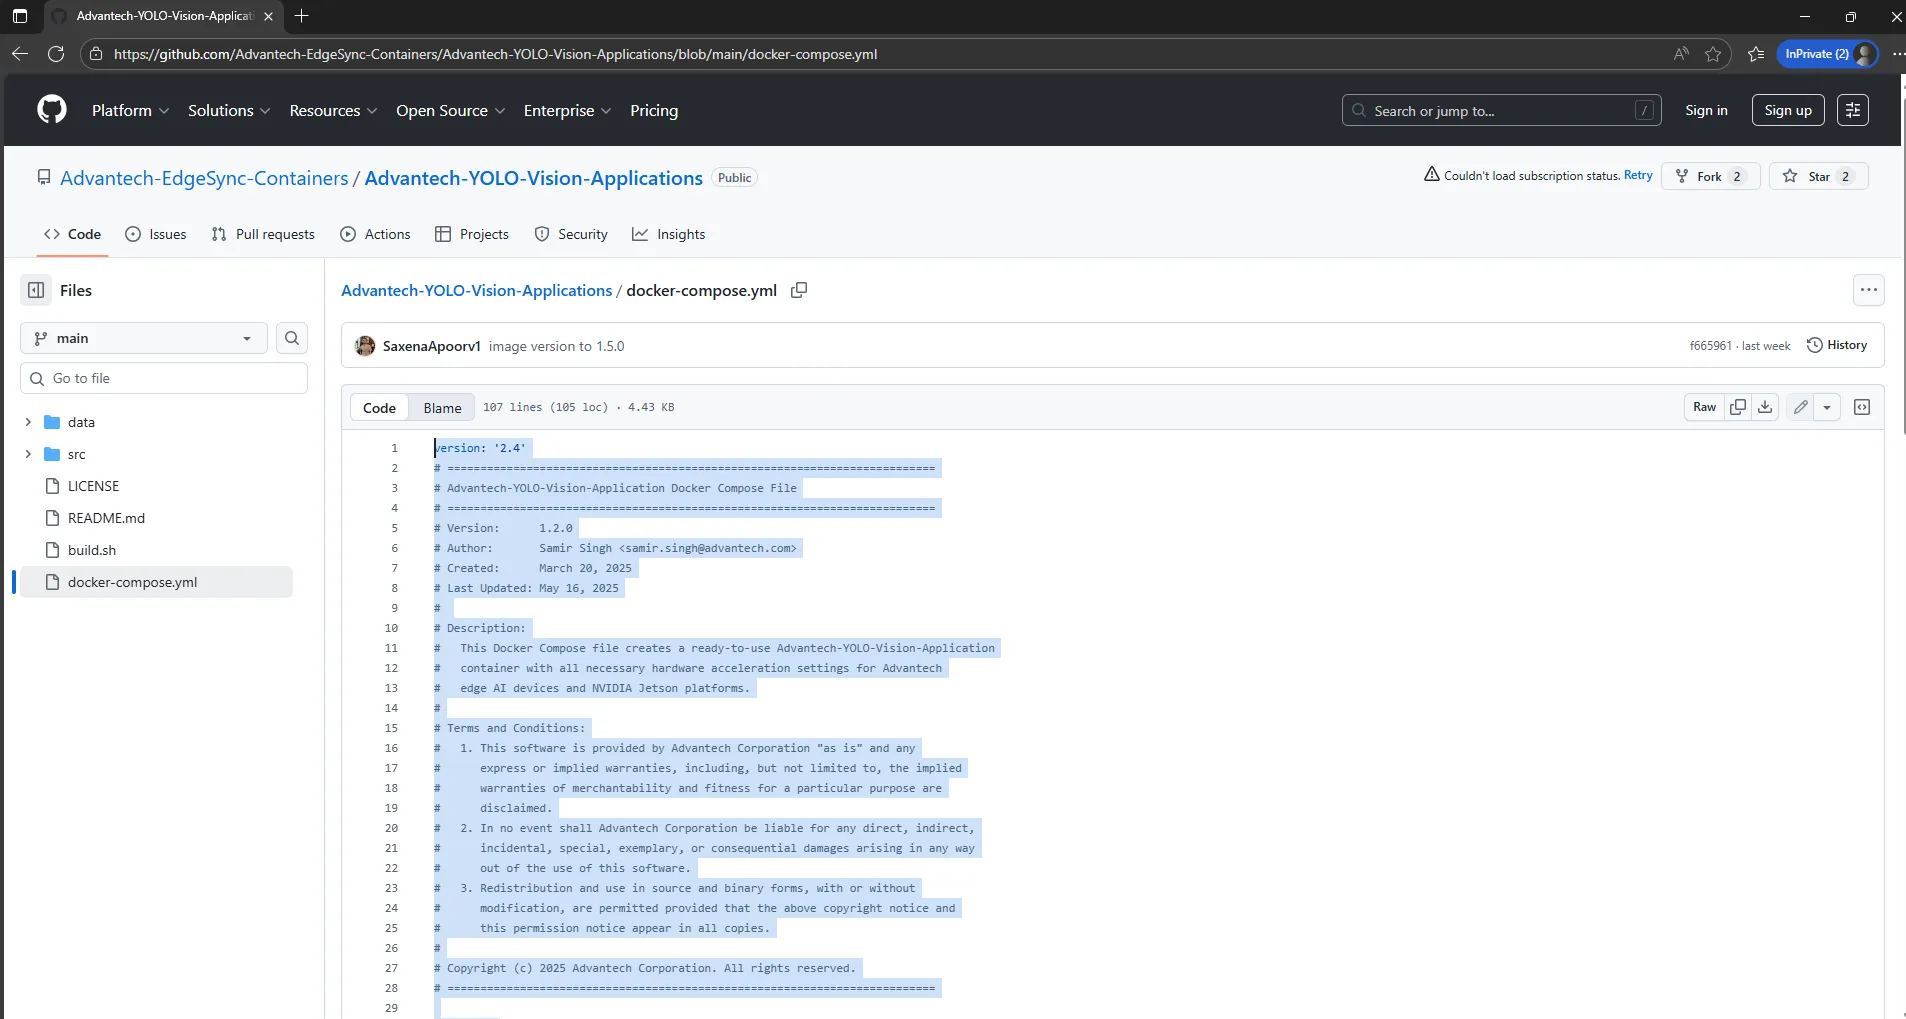
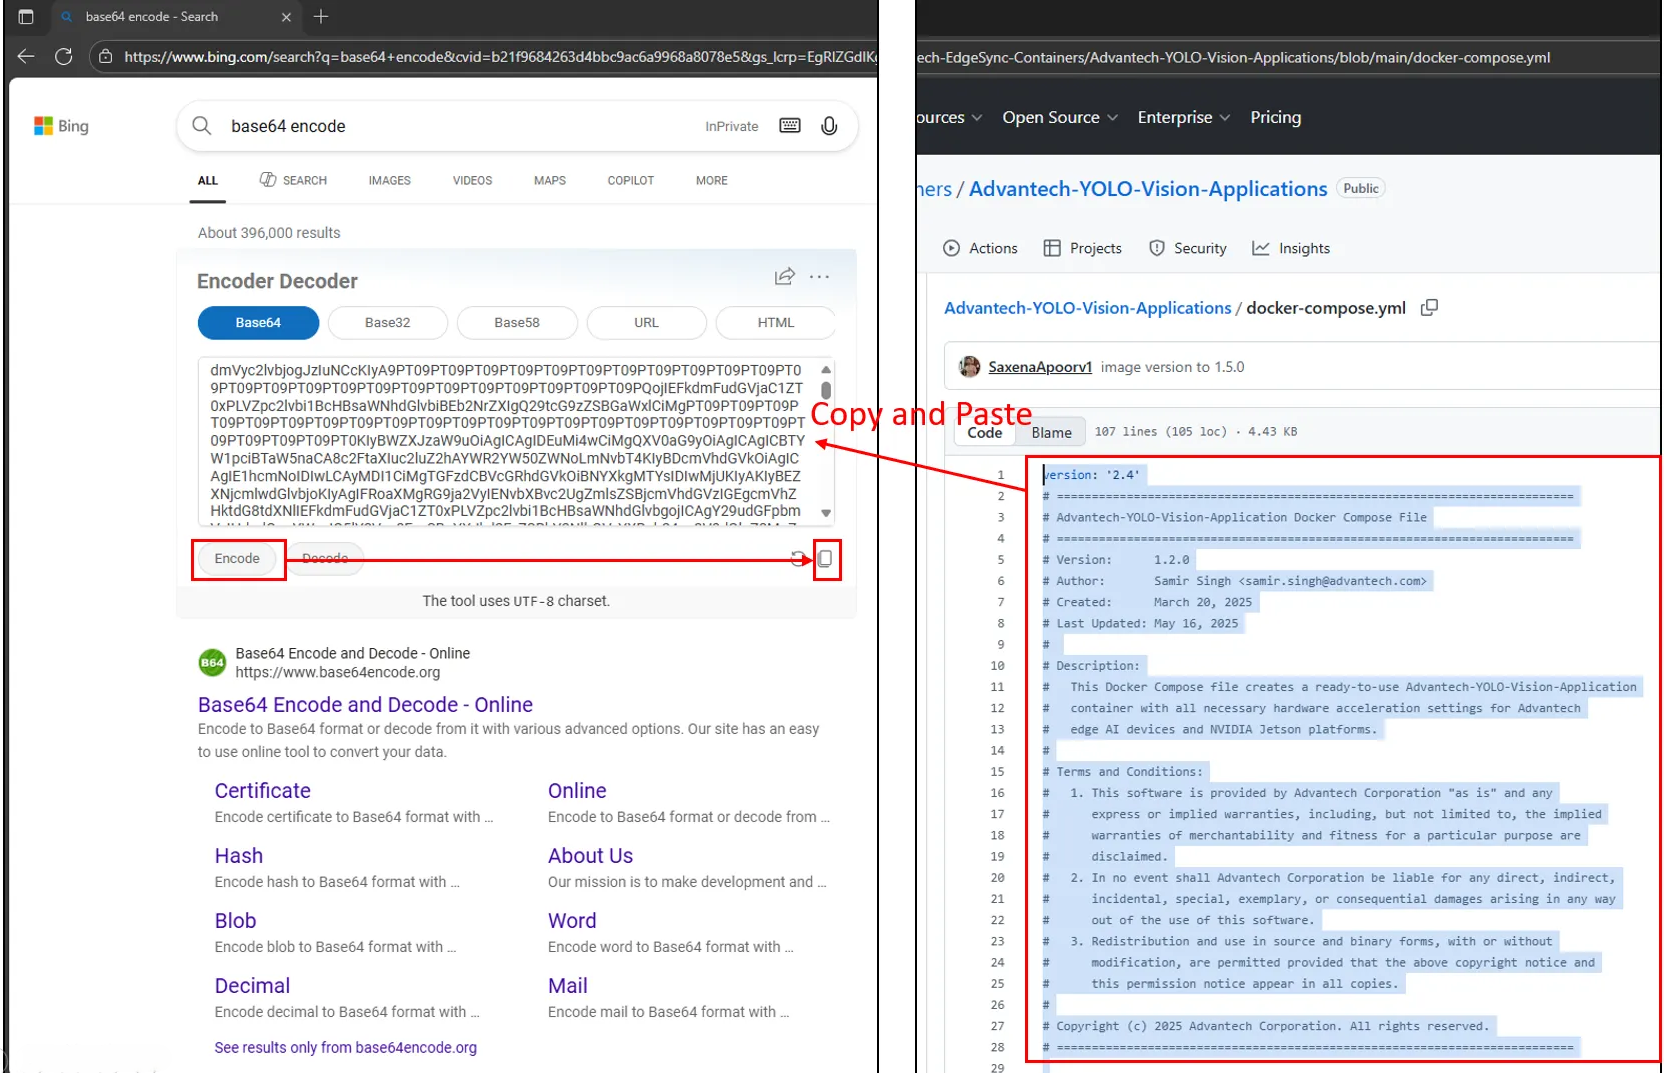
5.2 Encode the File in Base64
Copy the docker-compose.yml content and encode it in Base64 format. The encoded result will used as composeFileContent in the stack creation API request.
5.3 Create a Container Stack
Use the following API to create a container stack. Put the Base64-encoded Compose file in composeFileContent. The system will automatically assign a revision number.
Endpoint
POST /platform/solutions/api/v1/orgs/{orgID}/docker-settings/stack-configs
Example Request
curl --location --request POST 'https://{domain}/platform/solutions/api/v1/orgs/3a1d40ed-4f97-aed8-c727-57704d3d5d2e/docker-settings/stack-configs' \
--header 'Content-Type: application/json' \
--header 'Authorization: Bearer {access-token}' \
--data '{
  "stackName": "stack-name1",
  "type": "compose",
  "composeFileContent": "{Base64-encoded}",
  "environment": {},
  "description": "this is description"
}'
Example Response
{
    "stackConfigId": "e700312d-18e9-4a93-b291-0108596b0a91",
    "stackRevision": "70e1771a-0fd3-4e85-9a17-6ea752f92d0b",
    "stackName": "stack-name1",
    "type": "compose",
    "composeFileContent": "{Base64-encoded}",
    "environment": {},
    "description": "this is description",
    "creationTime": "2025-10-30T09:42:39.014305Z"
}
5.4 List Stack Configurations
After a stack is created, use the following API to list all stack configurations in the organization to confirm the active stack deployments.
Endpoint
GET /platform/solutions/api/v1/orgs/{orgID}/docker-settings/stack-configs
Example Request
curl --location --request GET 'https://{domain}/platform/solutions/api/v1/orgs/3a1d40ed-4f97-aed8-c727-57704d3d5d2e/docker-settings/stack-configs' \
--header 'Content-Type: application/json' \
--header 'Authorization: Bearer {access-token}'
Example Response
{
    "totalCount": 1,
    "items": [
        {
            "stackConfigId": "e700312d-18e9-4a93-b291-0108596b0a91",
            "stackRevision": "70e1771a-0fd3-4e85-9a17-6ea752f92d0b",
            "stackName": "stack-name1",
            "type": "compose",
            "composeFileContent": "{Base64-encoded}",
            "environment": {},
            "description": "this is description",
            "creationTime": "2025-10-30T09:42:39.014305Z"
        }
    ]
}
5.5 Deploy the Container
Use the following API to deploy the container stack to an edge device. You can deploy the same stack to multiple devices by providing a list of deviceIds.
Endpoint
Example Request
curl --location --request POST 'https://{domain}/platform/solutions/api/v1/orgs/3a1d40ed-4f97-aed8-c727-57704d3d5d2e/docker-settings/stack-configs/e700312d-18e9-4a93-b291-0108596b0a91/revisions/70e1771a-0fd3-4e85-9a17-6ea752f92d0b:deploy' \
--header 'Content-Type: application/json' \
--header 'Authorization: Bearer {access-token}' \
--data '{
  "deviceIds": [
    "48b02d8861de"
  ]
}'
Example Response
{
    "stackDeployments": [
        {
            "stackRevision": "70e1771a-0fd3-4e85-9a17-6ea752f92d0b",
            "deploymentId": "b4833ebb-ac6c-4a77-a075-e7ad0e036790",
            "taskId": "c0383dfc-e918-41f3-997e-4f5fa1ace7d8",
            "stackName": "stack-name1",
            "deviceId": "48b02d8861de",
            "status": "deploying",
            "containers": [],
            "error": {},
            "active": true
        }
    ],
    "totalDevices": 1,
    "skippedDevices": 0,
    "newlyDeployedDevices": 1,
    "deviceActions": {
        "48b02d8861de": "add"
    }
}
5.6 Check Stack Deployments
Use the following API to view active stack deployments and verify the stack status on the edge device.
Endpoint
GET /platform/solutions/api/v1/orgs/{orgID}/docker-settings/stack-configs/deployments
Example Request
curl --location --request GET 'https://{domain}/platform/solutions/api/v1/orgs/3a1d40ed-4f97-aed8-c727-57704d3d5d2e/docker-settings/stack-configs/deployments' \
--header 'Content-Type: application/json' \
--header 'Authorization: Bearer {access-token}'
Example Response
{
    "totalCount": 1,
    "items": [
        {
            "stackRevision": "70e1771a-0fd3-4e85-9a17-6ea752f92d0b",
            "deploymentId": "b4833ebb-ac6c-4a77-a075-e7ad0e036790",
            "taskId": "c0383dfc-e918-41f3-997e-4f5fa1ace7d8",
            "stackName": "stack-name1",
            "deviceId": "48b02d8861de",
            "status": "running(1)",
            "containers": [
                {
                    "id": "586e6eb9-5f0c-4173-9c9e-937a50c45fa7",
                    "name": "advantech-yolo-vision",
                    "state": "",
                    "restartCount": 0,
                    "created": 1761891735912,
                    "errors": []
                }
            ],
            "error": {},
            "active": true
        }
    ]
}
If the response shows "status": "running", the container is successfully running on the edge device.