Onboard Your Device
Prerequisites
Please check the Prerequisites & Basics section before starting the onboarding process.
Before running any request, select the weda-core environment in Postman and confirm required variables are filled.
Workflow Overview
This onboarding tutorial involves operations on both WEDA Cloud and WEDA Edge. Before running the detailed API steps, review the flow below to understand where each action happens.
In this chapter, the flow is:
- Get access token (Cloud)
- Create organization (Cloud)
- Start WEDA Node to get
hwModelanddeviceId(Edge) - Register device (Cloud)
- Verify connection status (Cloud and Edge)
- Get telemetry data (Cloud)
1. Get Access Token (Cloud)
Postman Collection: 0-WiseSso
The first collection is 0-WiseSso, which contains the workflow to get an access token. Please make sure to run the APIs in the correct order, which means running 5 requests in sequence, and you will get the access token at the end of the workflow.
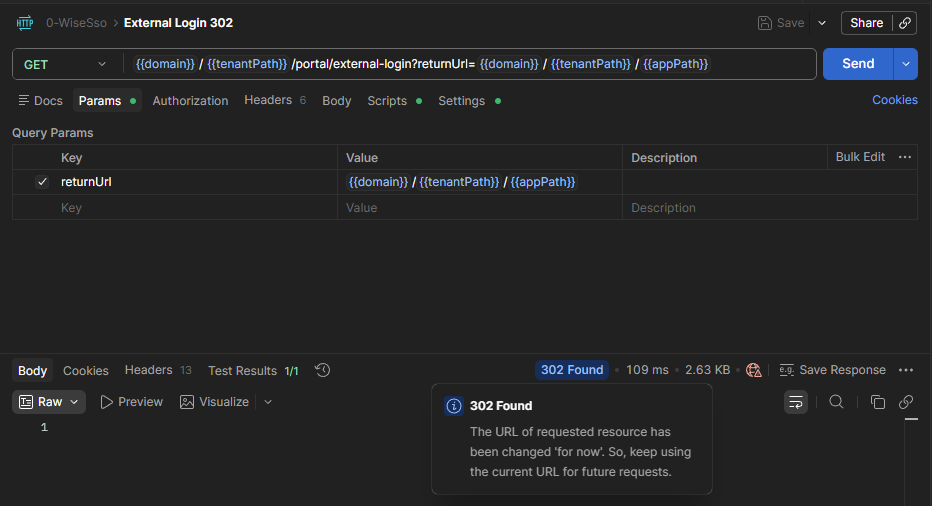
- External Login 302
- This request initializes the SSO redirect flow and establishes the initial login session context.
- Expected result: WEDA Cloud returns
302.
- Account Login
- This step submits your account credentials to authenticate the user with the identity service.
- Expected result: WEDA Cloud returns
200, accepts the login, and updates the authenticated session context.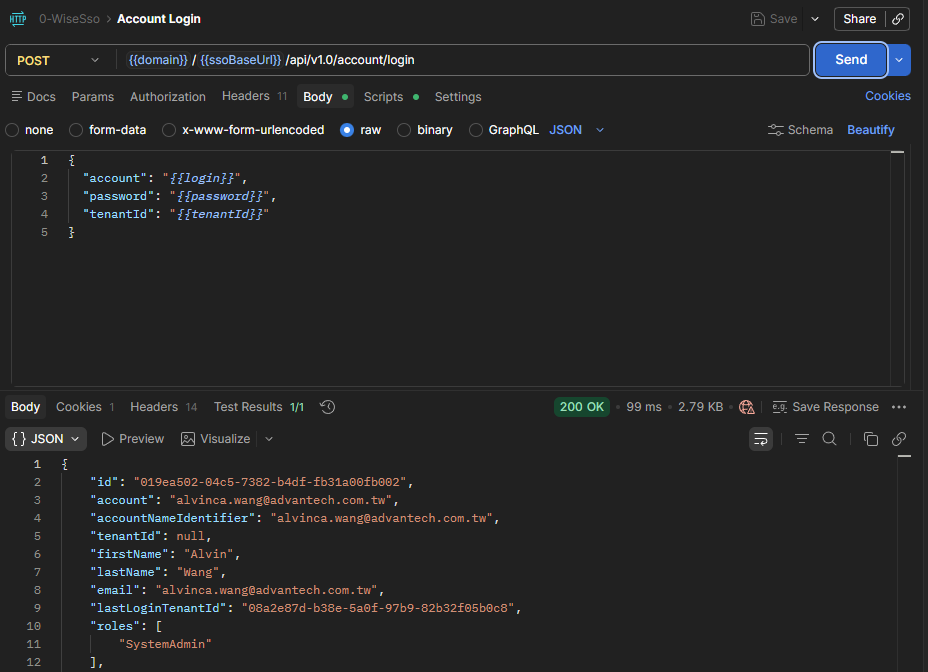
- External Login 200
- This call completes the tenant-aware login return flow and confirms the correct tenant context.
- Expected result: WEDA Cloud returns
200with the expected tenant context.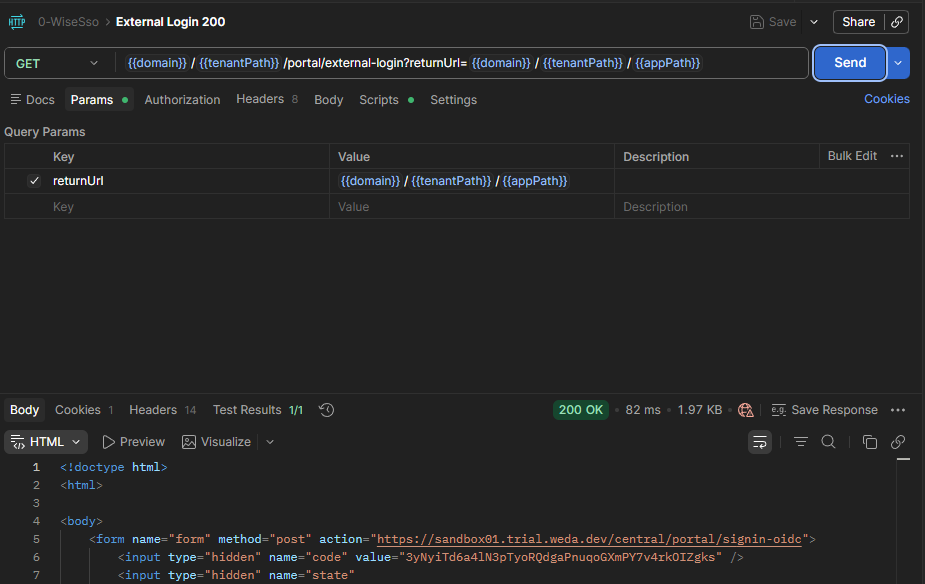
- Signin Oidc
- This step uses the authenticated session cookie to perform OIDC sign-in and obtain exchangeable identity tokens.
- Expected result: WEDA Cloud returns
302and redirects with the OIDC exchange context.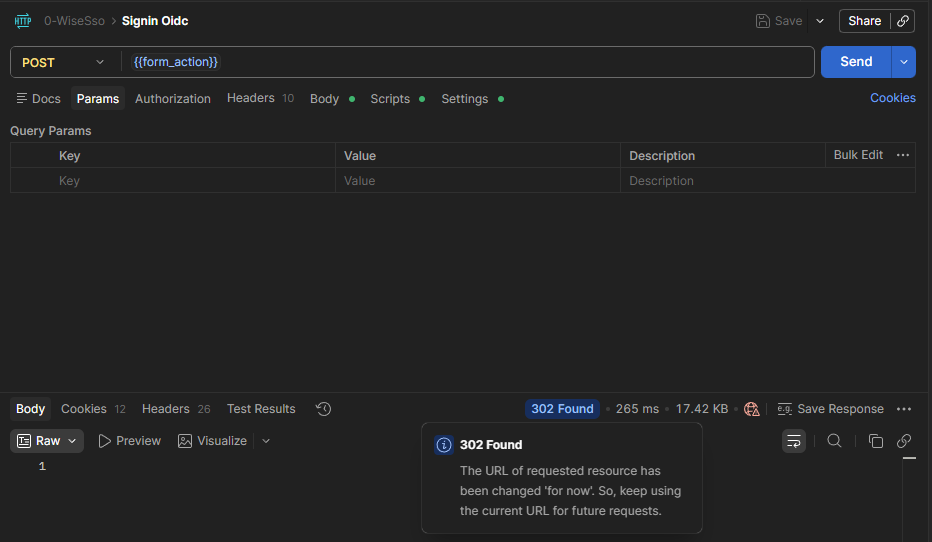
- This final request exchanges the OIDC result for the WEDA access token used by subsequent API requests.
- Expected result: WEDA Cloud returns
201with a valid WEDA access token for subsequent API calls.
2. Create a New Organization (Cloud)
Create a new organization using the following APIs.
Postman Collection: 1-Org & ClientCrend
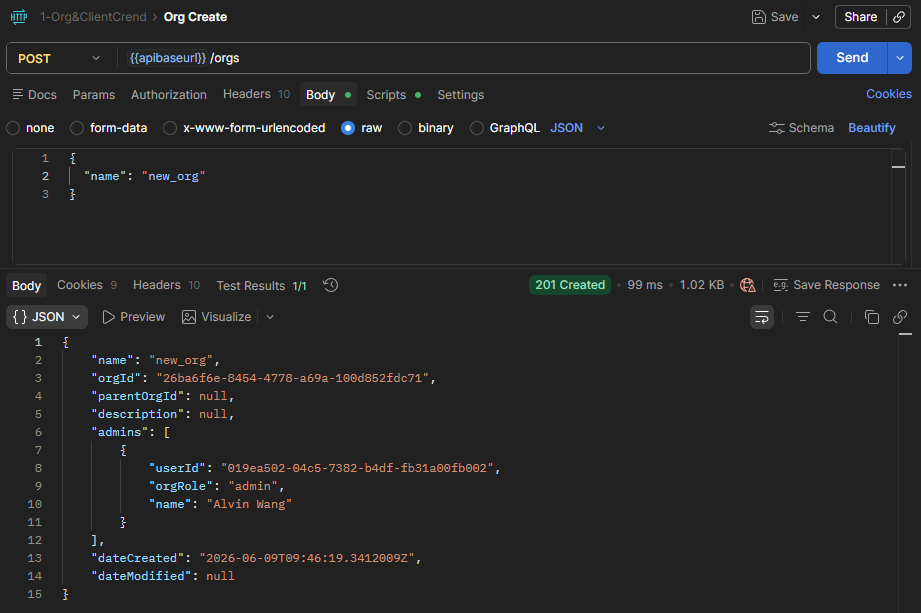
- Org Create: Create a new organization with a unique name.
- This request creates a new organization under your current tenant.
- Expected result: WEDA Cloud returns
201and provides the created organization information.
If the organization name already exists, WEDA Cloud returns 409.
Example Request: Curl
curl --location --request POST 'https://{domain}/{tenantPath}/{appPath}/api/v1/orgs' \
--header 'Content-Type: application/json' \
--header 'Authorization: Bearer {access-token}' \
--data '{
  "name": "new_org"
}'
Example Response
{
  "name": "new_org",
  "orgId": "26ba6f6e-8454-4778-a69a-100d852fdc71",
  "parentOrgId": null,
  "description": null,
  "admins": [
    {
      "userId": "019ea502-04c5-7382-b4df-fb31a00fb002",
      "orgRole": "admin",
      "name": "Alvin Wang"
    }
  ],
  "dateCreated": "2026-06-09T09:46:19.3412009Z",
  "dateModified": null
}
Key parameters:
orgId: The organization ID returned after creating the organization. You will use it again in the device creation step.- Example: In the response above,
26ba6f6e-8454-4778-a69a-100d852fdc71is theorgId.
- Example: In the response above,
Other APIs in the 1-Org & ClientCrend collection:
- Org List: Get the list of organizations.
- Org Delete: Delete an organization by its ID.
- Client-Cred Create: Create a new client credential.
- Client-Cred List: Get the list of client credentials.
- Client-Cred Delete: Delete a client credential by its ID.
- Connect Token: Exchange
client_idandclient_secretfor a client access token (grant_type=client_credentials), typically used for service-to-service API access.
Note: Client credential is required for third-party integrations. For example, Grafana data source.
3. Start WEDA Node (Edge)
Run WEDA Node Activator first to get the device information before registering it in WEDA Cloud.
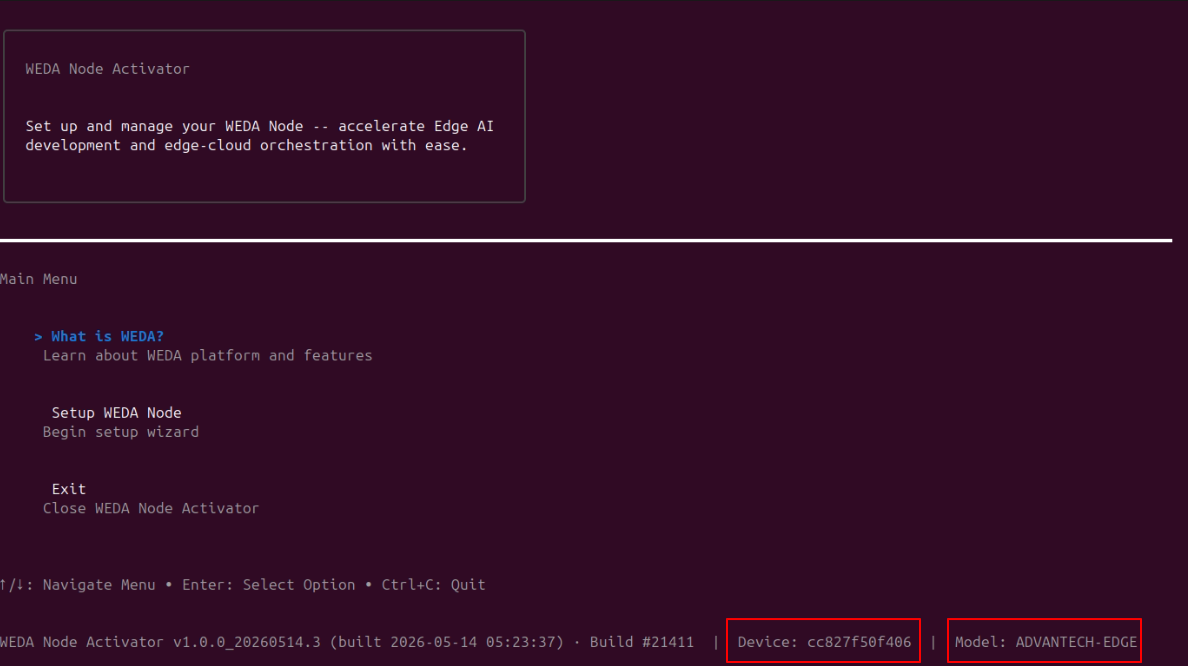
deviceId: Find this value in the Device field.hwModel: Find this value in the Model field.
4. Register a Device (Cloud)
Create a device using the following APIs, the variable orgId will automatically be populated if you have finished the previous step 2. Create a New Organization (Cloud).
Postman Collection: 2-Provisioning&Activation
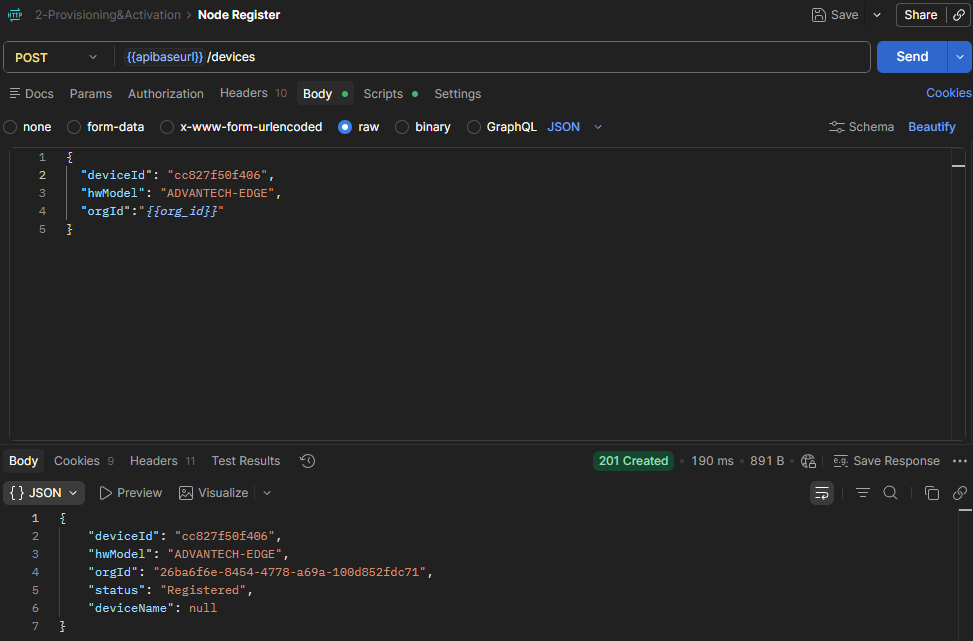
- Node Register: Create a new device under the organization.
- This request registers the device in WEDA Cloud using
deviceId,hwModel, andorgId. - Expected result: WEDA Cloud returns
201and provides the registered device information.
- This request registers the device in WEDA Cloud using
Example Request: Curl
curl --location --request POST 'https://{domain}/{tenantPath}/{appPath}/api/v1/orgs/devices' \
--header 'Content-Type: application/json' \
--header 'Authorization: Bearer {access-token}' \
--data '{
  "deviceId": "cc827f50f406",
  "hwModel": "ADVANTECH-EDGE",
  "orgId": "26ba6f6e-8454-4778-a69a-100d852fdc71"
}'
Example Response
{
    "deviceId": "cc827f50f406",
    "hwModel": "ADVANTECH-EDGE",
    "orgId": "26ba6f6e-8454-4778-a69a-100d852fdc71",
    "status": "Registered",
    "deviceName": null
}
Key parameters:
deviceId: Must be a MAC address (lowercase letters and numbers only, no symbols).hwModel: Hardware model of the device, for exampleMIC-710orADVANTECH-EDGE.orgId: The organization ID returned from the previous step.status: At this stage, the device is only registered in WEDA Cloud. If WEDA Node is not connected yet, the status remainsRegistered.deviceName: Optional display name for the device. This value can be defined by the user.
Other APIs in the 2-Provisioning&Activation collection:
- Node Activation: Get device auth info used for activation (encrypted auth payload/file) (see Appendix).
- Node List: Get a paginated device list. You should see the newly created device in the list.
- Node List Under Org: Get the list of devices under the organization.
- Token Refresh: Get a new access token using the refresh token.
- Node Deactivate: Deactivate a device by its ID. status:
deactivate - Node Remove: Delete a device by its ID.
5. Start WEDA Node and Verify Connection (Edge and Cloud)
Setup WEDA Node (Edge)
In this chapter, the goal is to run WEDA Node on the Edge device and verify that the device connects successfully.
Step 1: Run WEDA Node Activator
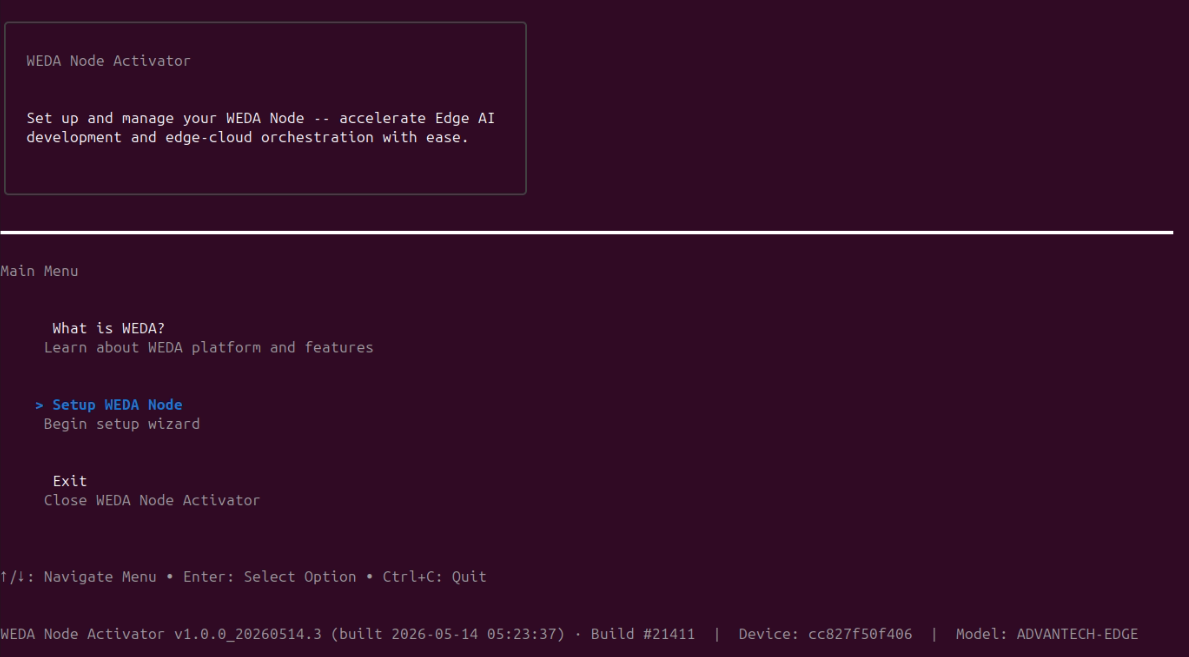
- Open WEDA Node Activator on the edge device.
- Select Setup WEDA Node
Step 2: License Agreement
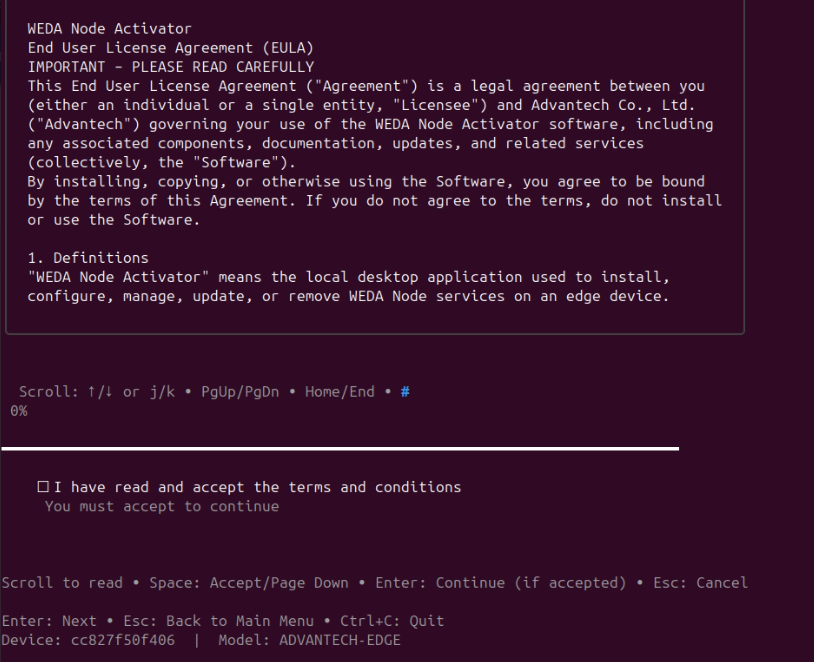
Please read the license agreement completely. After reviewing the content, press Space to accept it, then continue to the next step.
Step 3: Credential Source
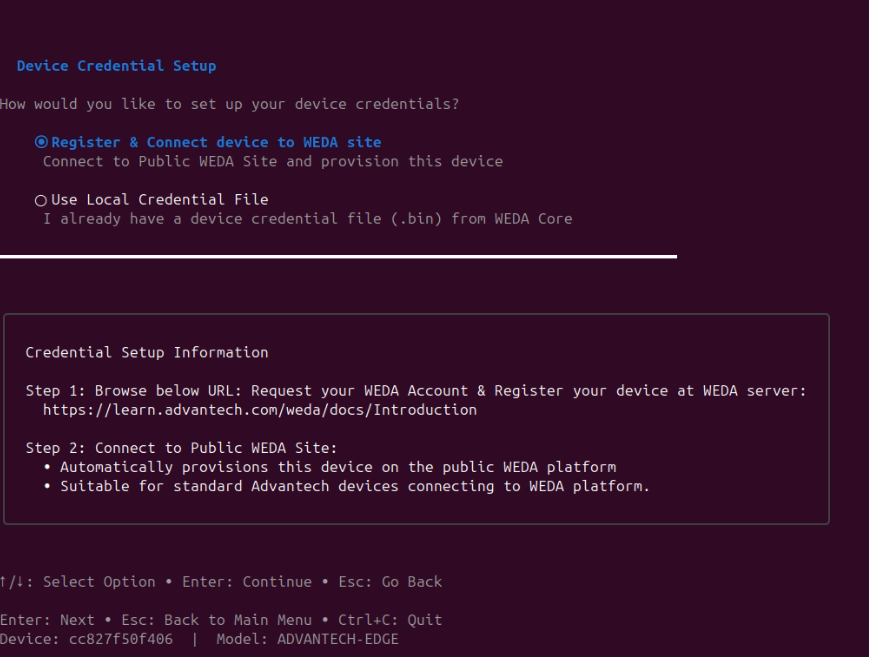
Option A: Register & Connect Device to WEDA Site (Default)
Best for standard Advantech devices connecting to the public WEDA Cloud.
- Select "Register & Connect Device to WEDA Site" and press Enter.
- The built-in key bundled with the installer is used automatically.
- No login or external file is required.
Expected result: The device is automatically provisioned on the public WEDA platform on first service start.
Option B: Use Local Credential File
Best for offline deployments, LAN environments, or pre-provisioned devices.
If you need to register by local credential file, follow Appendix: Register by Local Credential File.
Step 4: Setup Setting

Use this page to confirm that all installation settings are correct before proceeding.
Step 5: Installing
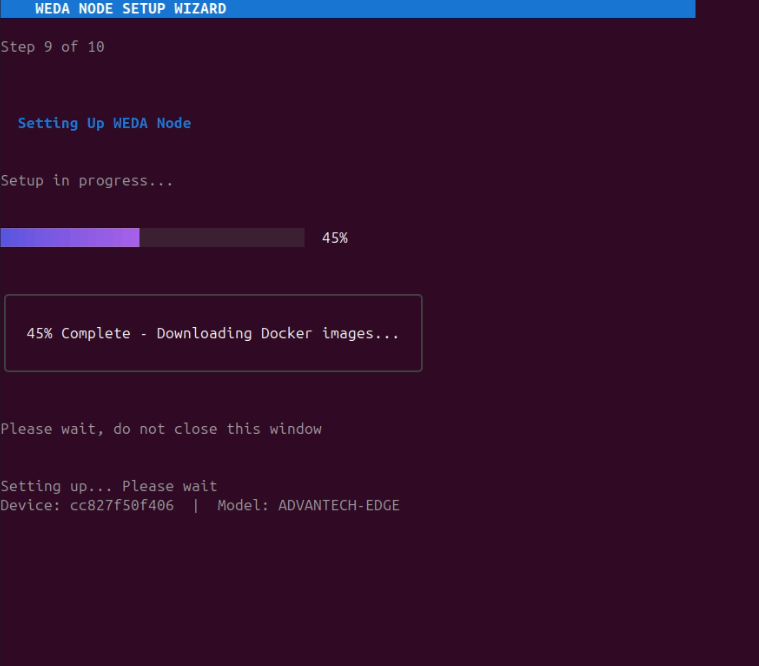
- Fast Network: 2-3 minutes
- Slow Network: 5-10 minutes
- Do NOT close the terminal or press Ctrl+C
Expected result: Docker images downloaded, containers started, service running.
Step 6: WEDA Node Installation Complete
At this stage, you can also confirm on the Edge side that the WEDA Node connection is established.
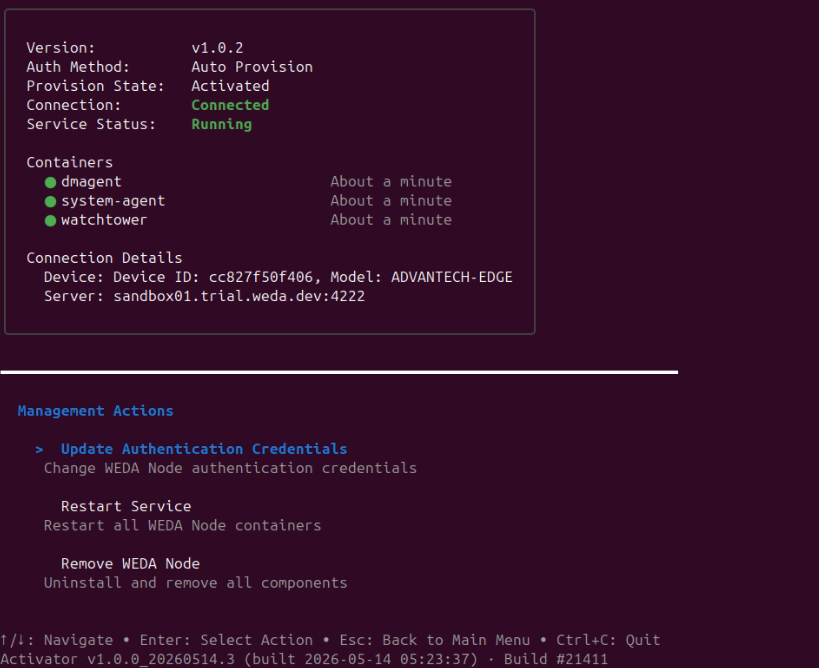
Service Dashboard
Status icons:
●green — running / connected / registered○grey — stopped / unknown✗red — failed / disconnected
Connection box color:
- Green border — device connected to WEDA server
- Red border —
REG_FAILEDor container not found - Grey border — intermediate states
The dashboard auto-refreshes every 5 seconds.
Management Actions
| Action | Description |
|---|---|
| Update Authentication Credentials | Replace the master key or credential file without reinstalling |
| Restart Service | Stop and restart all WEDA Node Docker containers |
| Remove WEDA Node | Uninstall containers, volumes, and configuration (type REMOVE to confirm) |
Verify WEDA Node Connection from Cloud
Postman Collection: 2-Provisioning&Activation
- Node List Under Org: Get the list of devices under the organization.
- This request queries the devices under
orgIdand is used to verify whether the WEDA Node has connected successfully from the Cloud side. - Expected result: WEDA Cloud returns
200, and the response includes yourdeviceId,hwModel, and currentstatus. - Connection check: when the node is online and activated, the device status should become
Activated.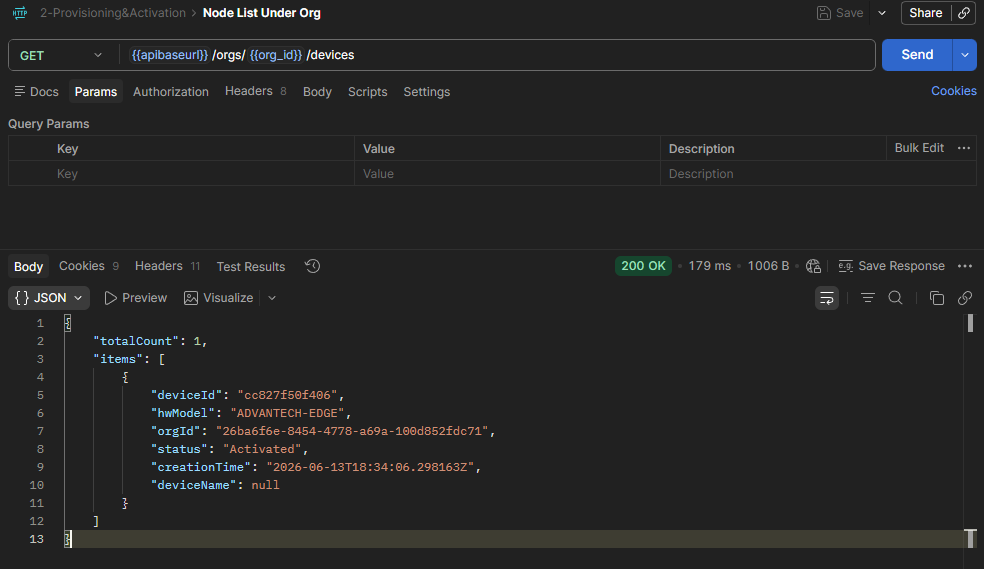
- This request queries the devices under
6. Get Device Telemetry Data
Get telemetry data from the device using the following APIs.
Postman Collection: 3-Telemetry
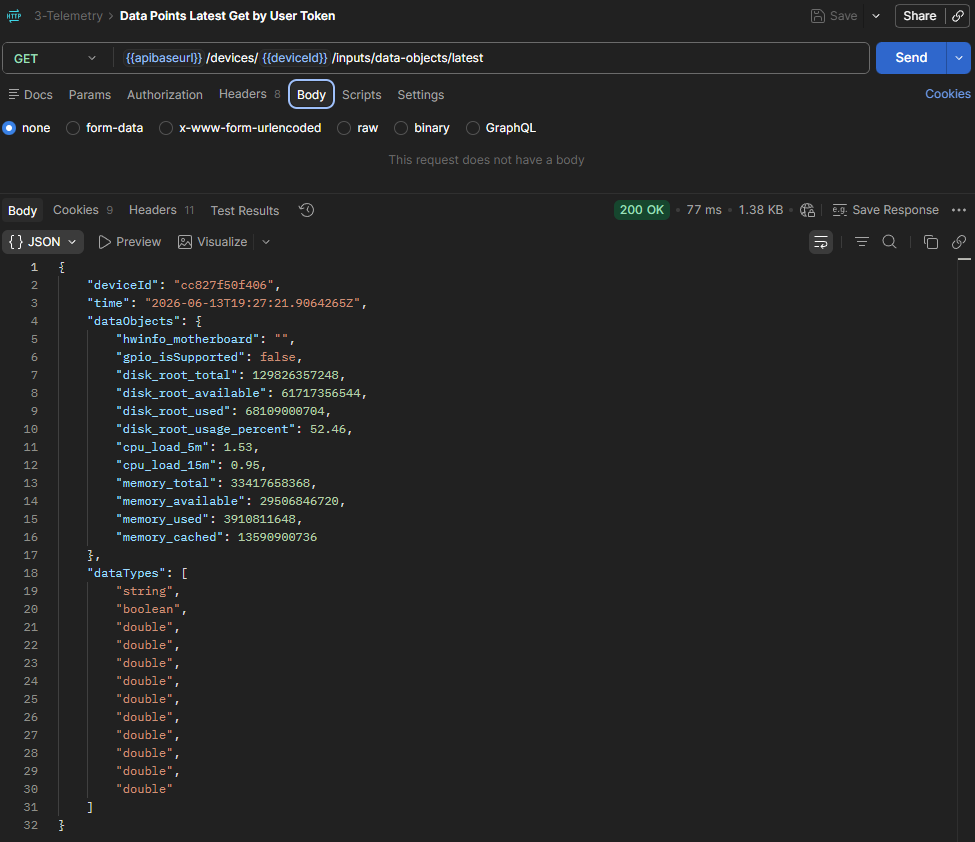
- Data Points Latest Get by User Token: Get the latest telemetry snapshot of a device with a user access token.
- This request returns the latest values of device data objects, including system and sensor measurements.
- Expected result: WEDA Cloud returns
200and provides the latest telemetry data for the specifieddeviceId.
Example Request: Curl
curl --location --request GET 'https://{domain}/{tenantPath}/{appPath}/api/v1/devices/{deviceId}/inputs/data-objects/latest' \
--header 'Content-Type: application/json' \
--header 'Authorization: Bearer {access-token}'
Example Response
{
    "deviceId": "cc827f50f406",
    "time": "2026-06-13T19:27:21.9064265Z",
    "dataObjects": {
        "hwinfo_motherboard": "",
        "gpio_isSupported": false,
        "disk_root_total": 129826357248,
        "disk_root_available": 61717356544,
        "disk_root_used": 68109000704,
        "disk_root_usage_percent": 52.46,
        "cpu_load_5m": 1.53,
        "cpu_load_15m": 0.95,
        "memory_total": 33417658368,
        "memory_available": 29506846720,
        "memory_used": 3910811648,
        "memory_cached": 13590900736
    },
    "dataTypes": [
        "string",
        "boolean",
        "double",
        "double",
        "double",
        "double",
        "double",
        "double",
        "double",
        "double",
        "double",
        "double"
    ]
}
Key parameters:
deviceId: The target device ID for telemetry query.time: The timestamp of the latest telemetry snapshot.dataObjects: The latest measurement values returned by the device.
Other APIs in the 3-Telemetry collection:
- Data Points Historical Get: Get historical data points of a sensor.
- Data Points Latest Get by Client Token: Get the latest data point of a sensor using a client credential.
- Sensor Settings Get: Get the list of sensors and their settings.
- Sensor Settings Change: Change the settings of a sensor.
Note (
Data Points Historical Get):To change the query time range, open the Scripts tab and set
startTimeandendTime. Both values use URL-encoded ISO 8601 datetime strings (for example,2026-03-24T06%3A41%3A04.231Z), not milliseconds.Default script behavior:
startTime: current time minus 1 hourendTime: current time plus 1 minute
Appendix: Register by Local Credential File
Use this method when you need offline deployments or pre-provisioned devices.
- Get Local Credential File: Download the credential file (
.bin) for the device. - Place the downloaded credential file on the Edge device, or confirm the exact file path before setup.
- In WEDA Node Activator, select "Use Local Credential File" and press Enter.
- At previous Step 3 (Credential Source), select the authentication method and choose Local Credentials Setup for this scenario:
| Method | File | Use When |
|---|---|---|
| Auto Provision | N/A | Mass deployment - auto provisions many devices |
| Local Credentials Setup | Device Credential (.bin) | Single device with a downloaded credential file |
- In WEDA Node Activator file picker, select the credential file (
.bin) and press Enter. - Verify registration is successful on Edge and Cloud sides (for example, service is connected on Edge and device status becomes
Activatedon Cloud).
Expected result: WEDA Node is successfully registered and connected using the local credential file.
Congratulations! You have successfully onboarded your edge device to the WEDA platform and retrieved telemetry data. Continue to the next chapter to deploy AI Containers.