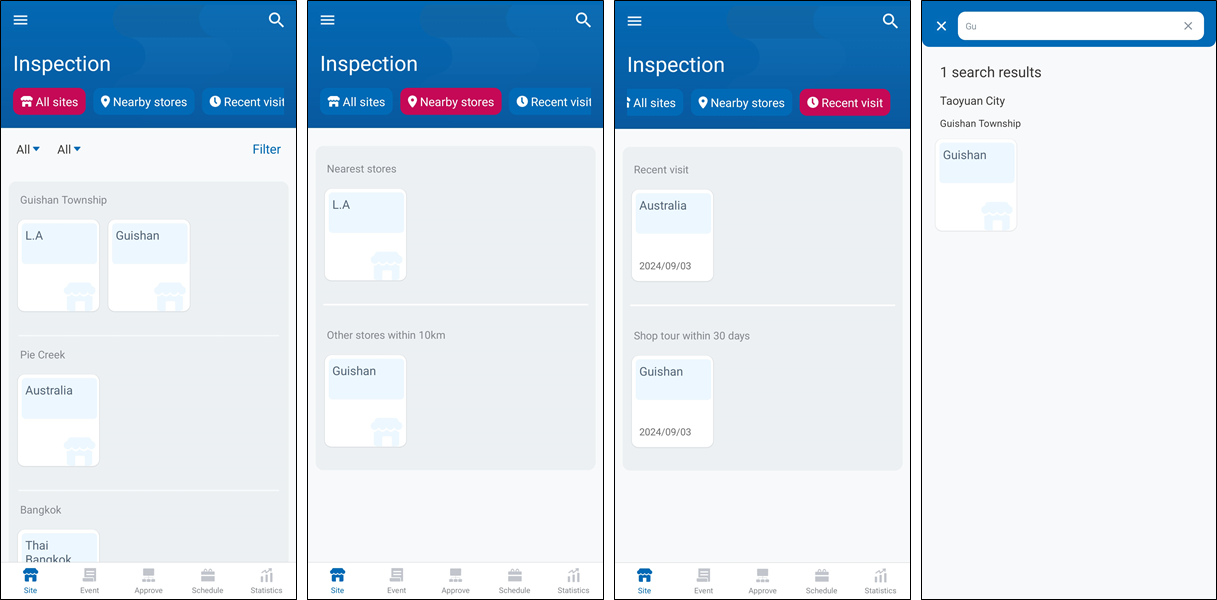
1. Site Selection
There are four ways to select a site: All Sites, Nearby sites, Recent visit and Serch by Keywords. To search a site, tap the Search button on the upper left of the screen and enter the keywords.
- All Sites: Displays all sites under the company by region. Sites can be filtered by country and region.
- Nearby sites: Via GPS and list down four nearest sites within a 10-km.
- Recent visit: Lists the sites which have created an inspection report within the last 30 days.
- Search: Click the search icon on the upper right, and enter the keywords about sites to search the sites.
2. Site Detail
After selecting a site, tap "Detail" at the bottom to view the site's details.
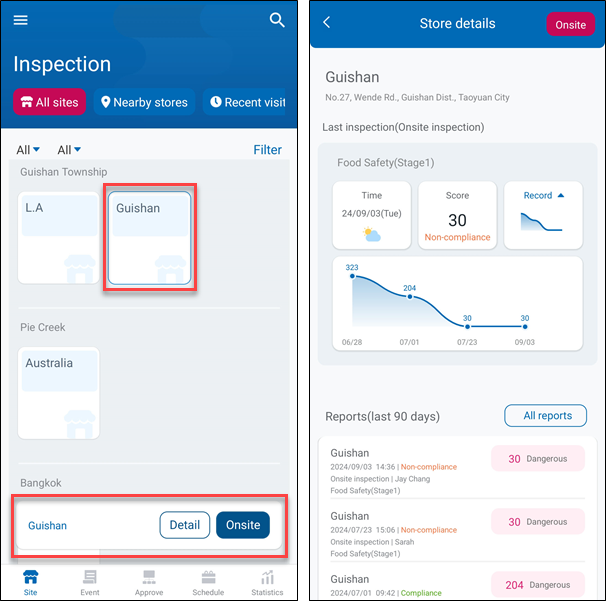
Site Details displays the site's last 10 inspection scores as a curve that can be swiped sideways. The bottom part displays the Reports, Events, and Closed Events of the site.
For Inspection Reports, tap "All Reports" to view all the reports of the site. Tap "Filter" to configure the condition settings.
The Temporary Reports will also show in Site Details. Tap Temporary Report to continue the incomplete inspection task or tap "Delete" to remove the Temporary Report.
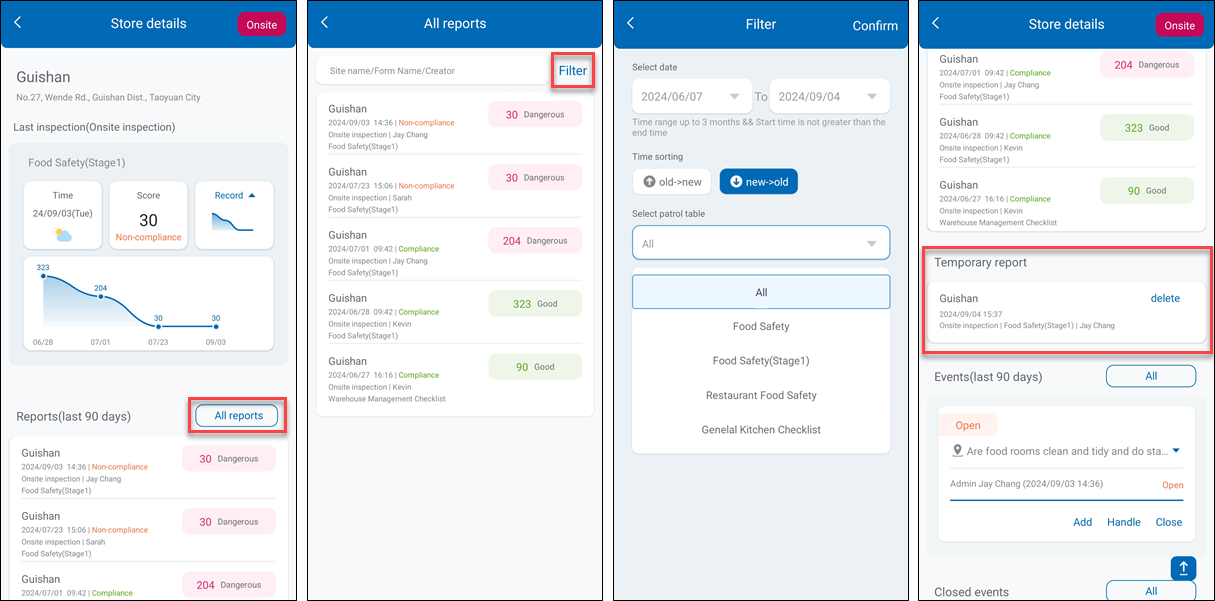
For Events, tap "All" to check all events of the site. Event management can be executed here. Tap "Filter" to configure the condition settings.
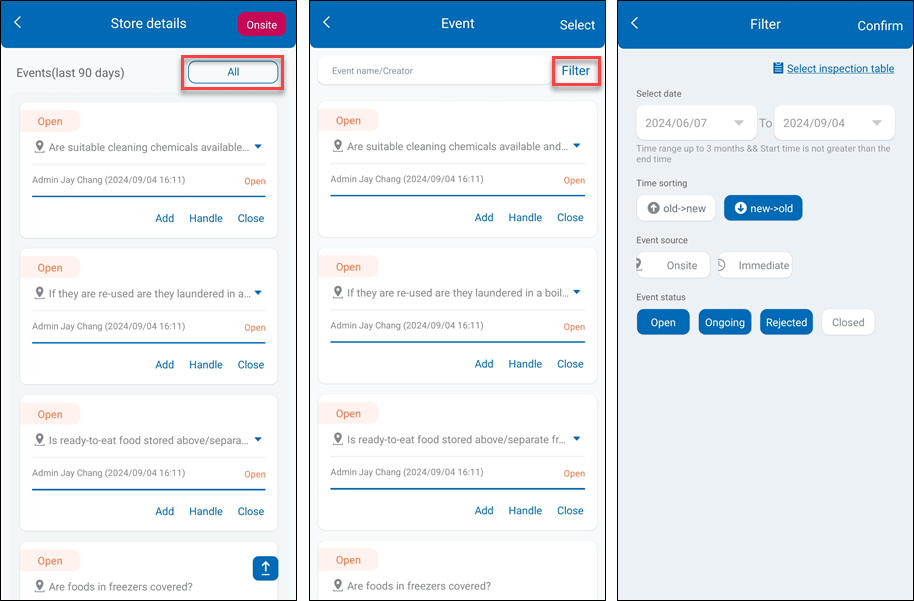
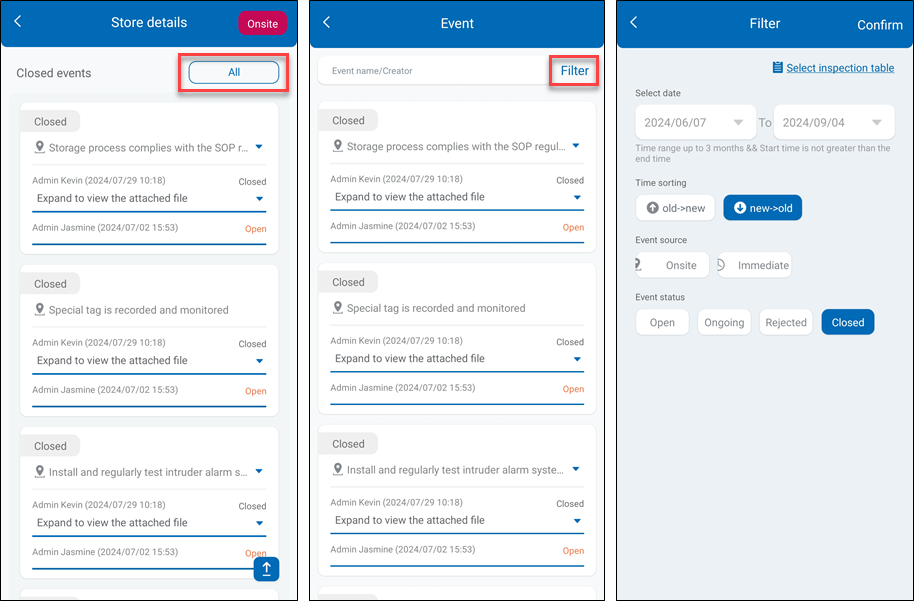
For Closed Events, tap "All" to check all closed events of the site. Tap "Filter" to configure the condition settings.
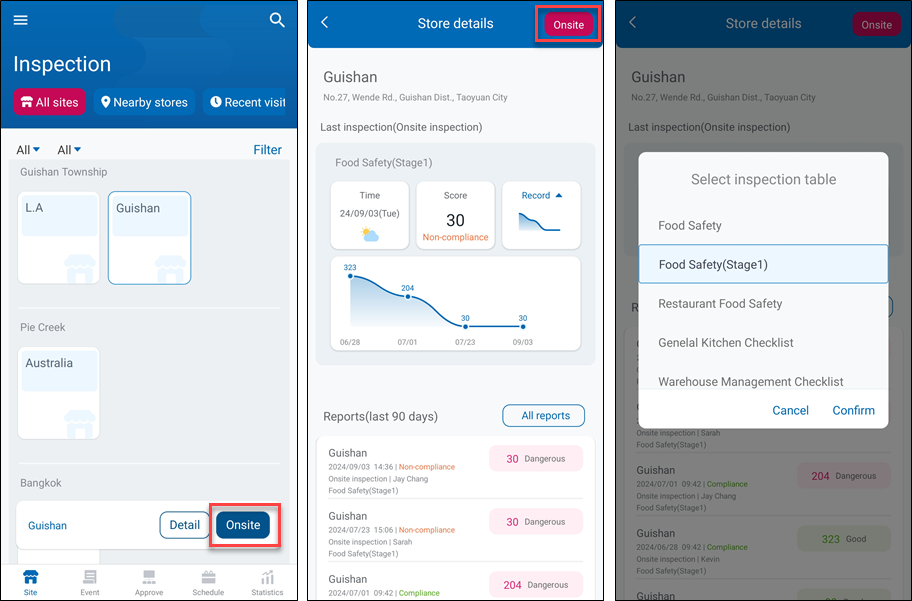
3. On-site Inspection
In the Site Selection page, select a site and tap "Onsite", or in the "Site Details" page and tap "Onsite" to select an inspection list and start the inspection task.
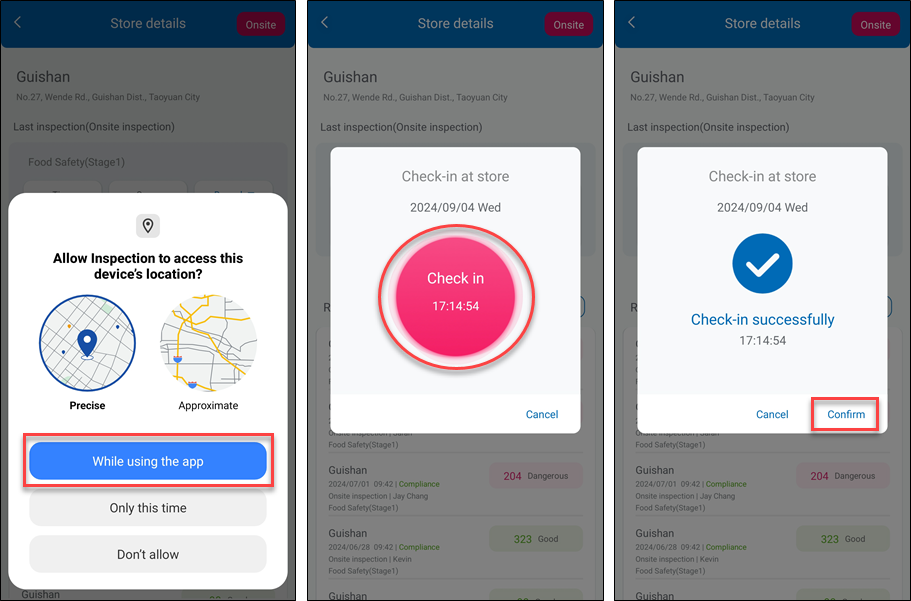
Check-in is required if the "Check-In" function is enabled for the inspection list.
To do so, enable WISE-iService access to a user's phone location settings. Once the positioning is successfully completed, tap "Check in" and then Confirm to start an on-site inspection.
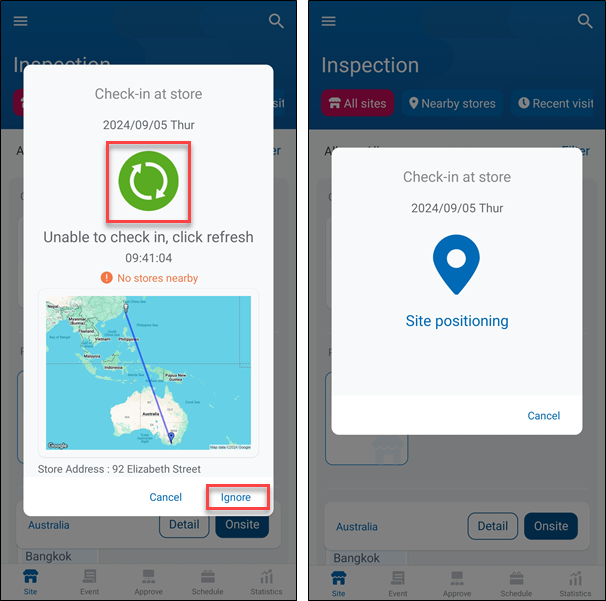
"Unable to check in, click refresh” message will show if positioning fails.
“Fail to check in, click refresh” message will show if check-in fails. The inspector can also click 'Ignore' to skip check-in this time.
> Note: To enable the "Check in" function, please refer to the inspection rules setting in "WISE-iService Inspection Web User Manual - Import Inspection Form".
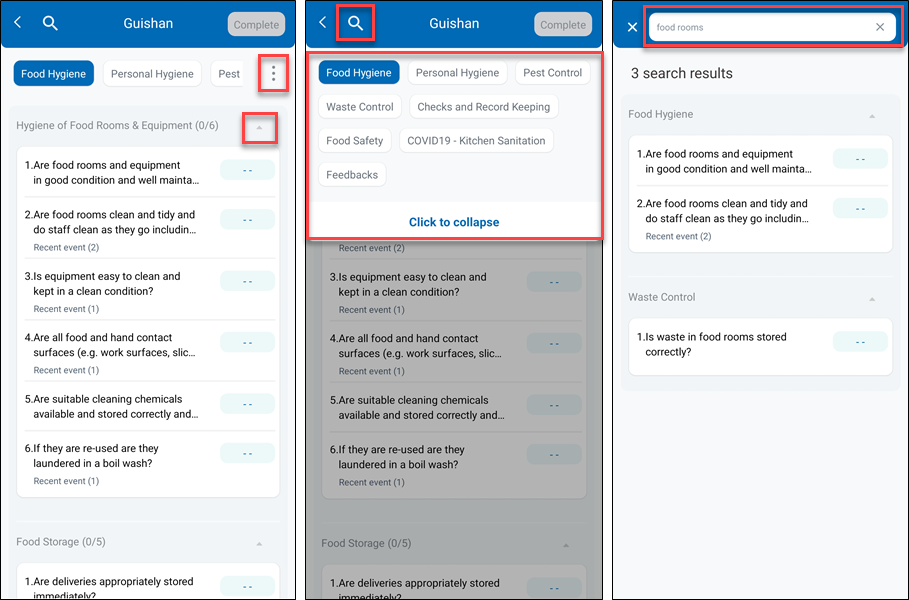
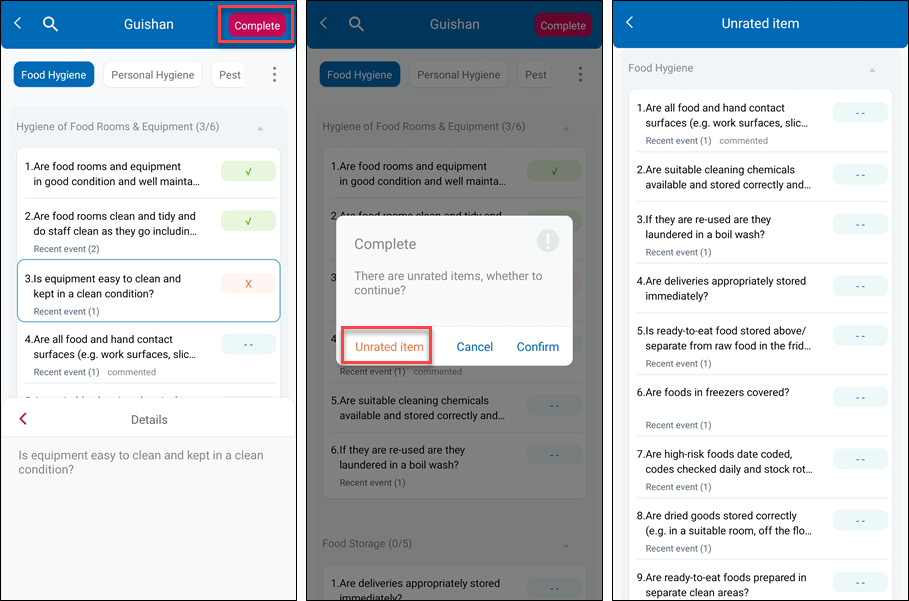
On the Inspection page, the system will mark the inspection item which had categorized as an event within the last 90 days as "Recent Event (number)".
Tap the arrow on the right side of an inspection subcategory to collapse inspection items.
Tap the top on the right side of the Inspection Category to expand all inspection categories. Tap the Search button to search inspection items via keyword.
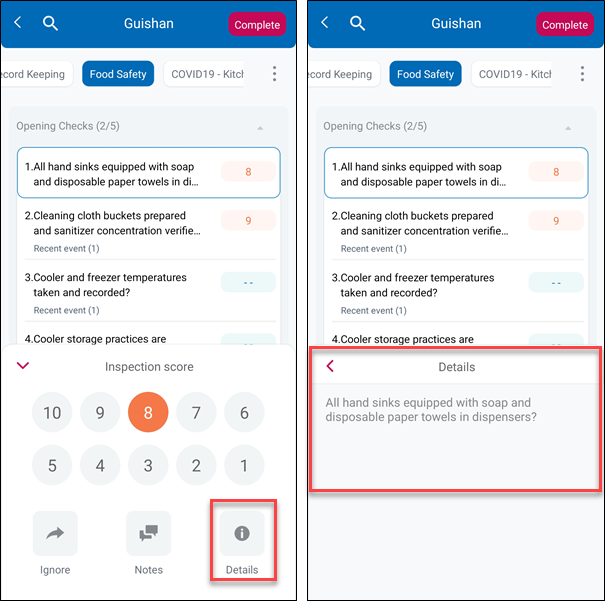
Select an inspection item to score it. Click "Details" for more information of inspection item.
Select "Notes" can enter supervisor recommendations for relevant comments or select a default comment.
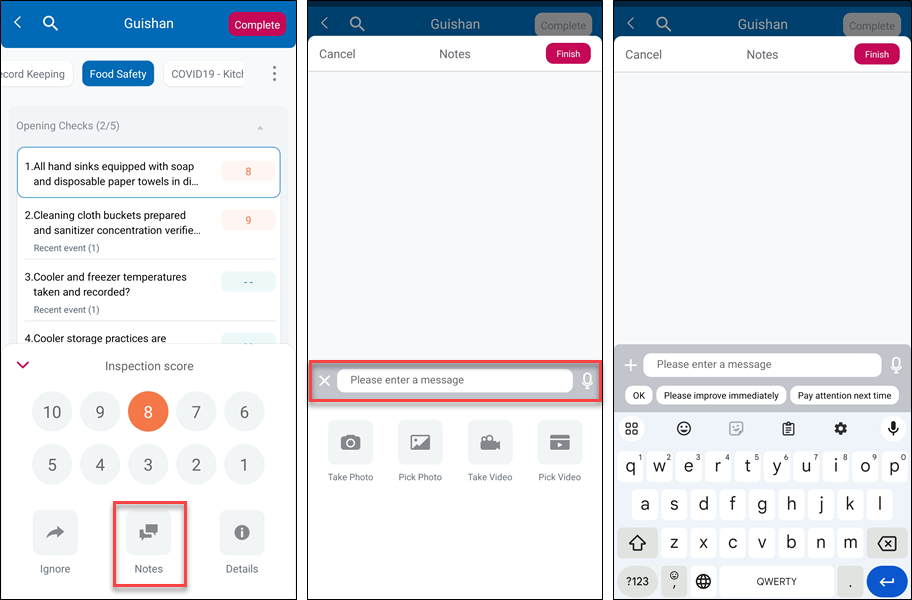
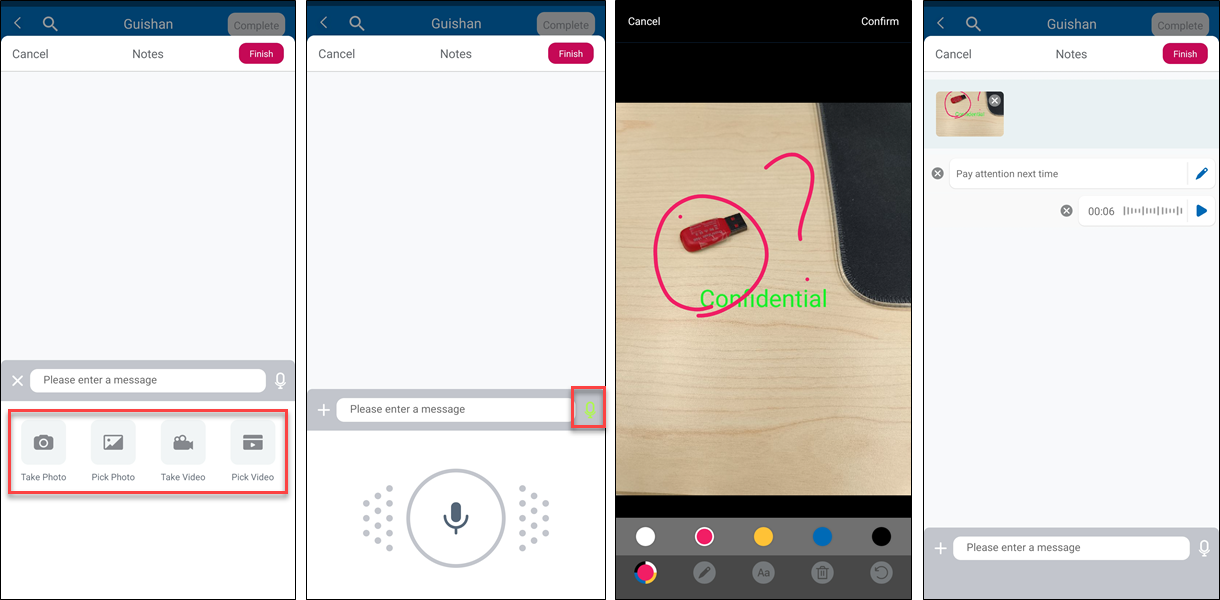
Users can also record an image or video of the on-site inspection, or upload the image or video from phone album(Attachments upload access can be set in Inspection Rules Setting).
Tap the microphone icon and hold the record button at the bottom to record audio.
Tap "Complete" on the upper right and select "Unrated item" to query unrated inspection items.
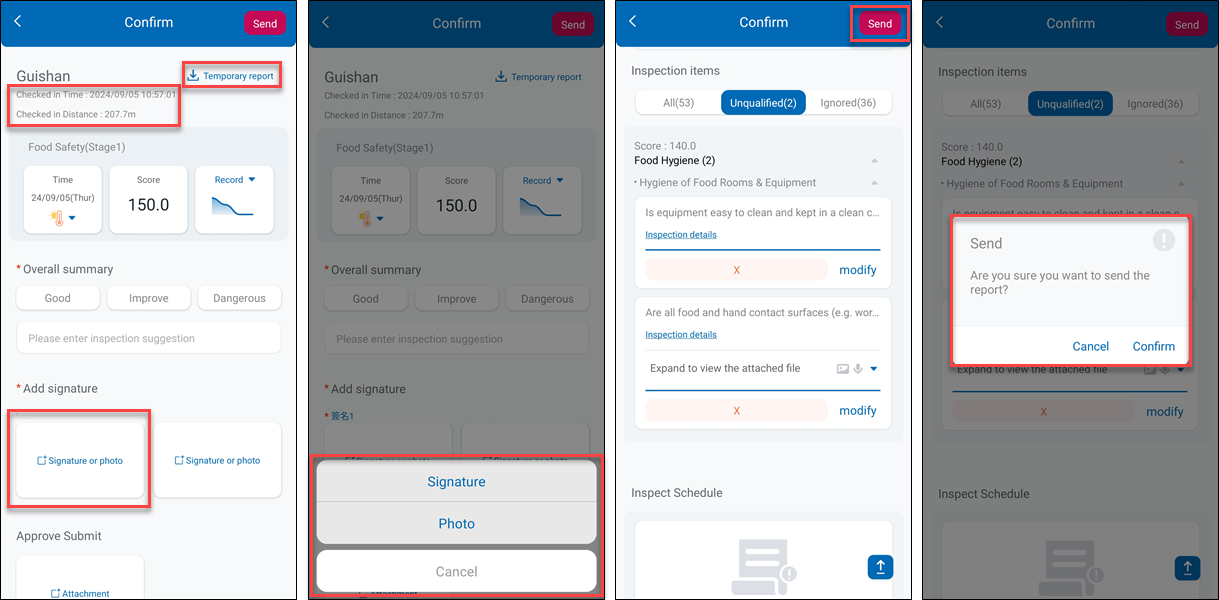
After completing score all inspection items, tap "Complete" on the upper right and then tap "Confirm" to enter the Report Confirm page.

In the Report Confirm page, tap "Temporary report" to save the report for further edit. The Temporary Report will be saved in the user's phone, a maximum of 10 temporary reports may be stored. If the app is accidentally deleted, Temporary Reports will be deleted as well.
If the "Check In" function is enabled, the check-in time will be displayed below the site name and will record the initial check-in time only.
Tap "Record" to view the curve of recent inspection score of the site.
Before submitting a report, it needs to do the summary and signature or photo for the inspection report.
In order to help supervisors do the confirmation before submitting, depending on the results of this time inspection, the bottom inspection items will categorize as "Good", "Improve", "Dangerous".
Once all items have been confirmed, tap "Send" to submit the inspection report.
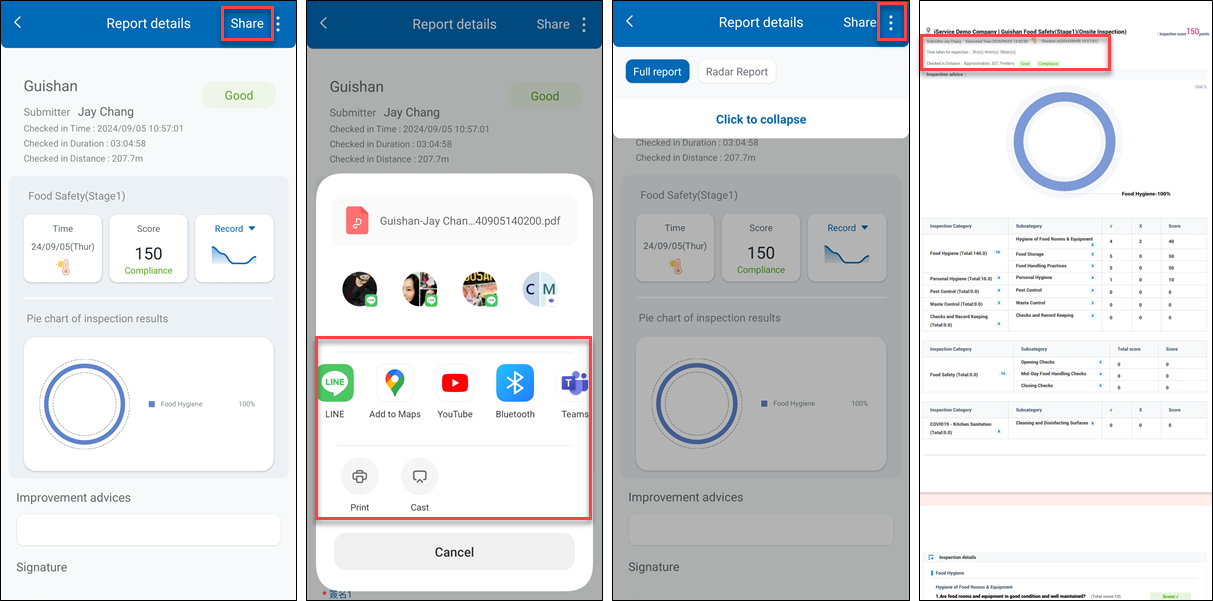
Once an inspection report is generated, it will show the weather information and whether the score meets defined criteria or not.
Tap "Share" to export the inspection report as a PDF file and send it via an APP or Email.
Inspection report templates can be selected from the list on the top right. Users can switch between different templates based on their needs.
The check-in time and the weather information will be displayed in the PDF file (Check-in information will only be displayed if the "Check In" function is enabled).
> Note: Weather icons are described in the following table:
| Icon | Weather | Icon | Weather |
|---|---|---|---|
 | Clear And Cloudless During The Day |  | Hail With Lightning |
| Cloudy |  | Snow Showers | |
 | Mostly Clear | Snowfall | |
 | Cloudless Night | Fog | |
 | Cloudy During The Evening | Dust Storm | |
 | Drizzle |  | Daze |
 | Rain Showers | Cold | |
| Pouring Rain | Scorching Hot | ||
| Thunderstorm | Unknown | ||
| Rain Shower With Hail |