1. User Management
You can add new/delete/modify, or you can also view the detailed information of each user.
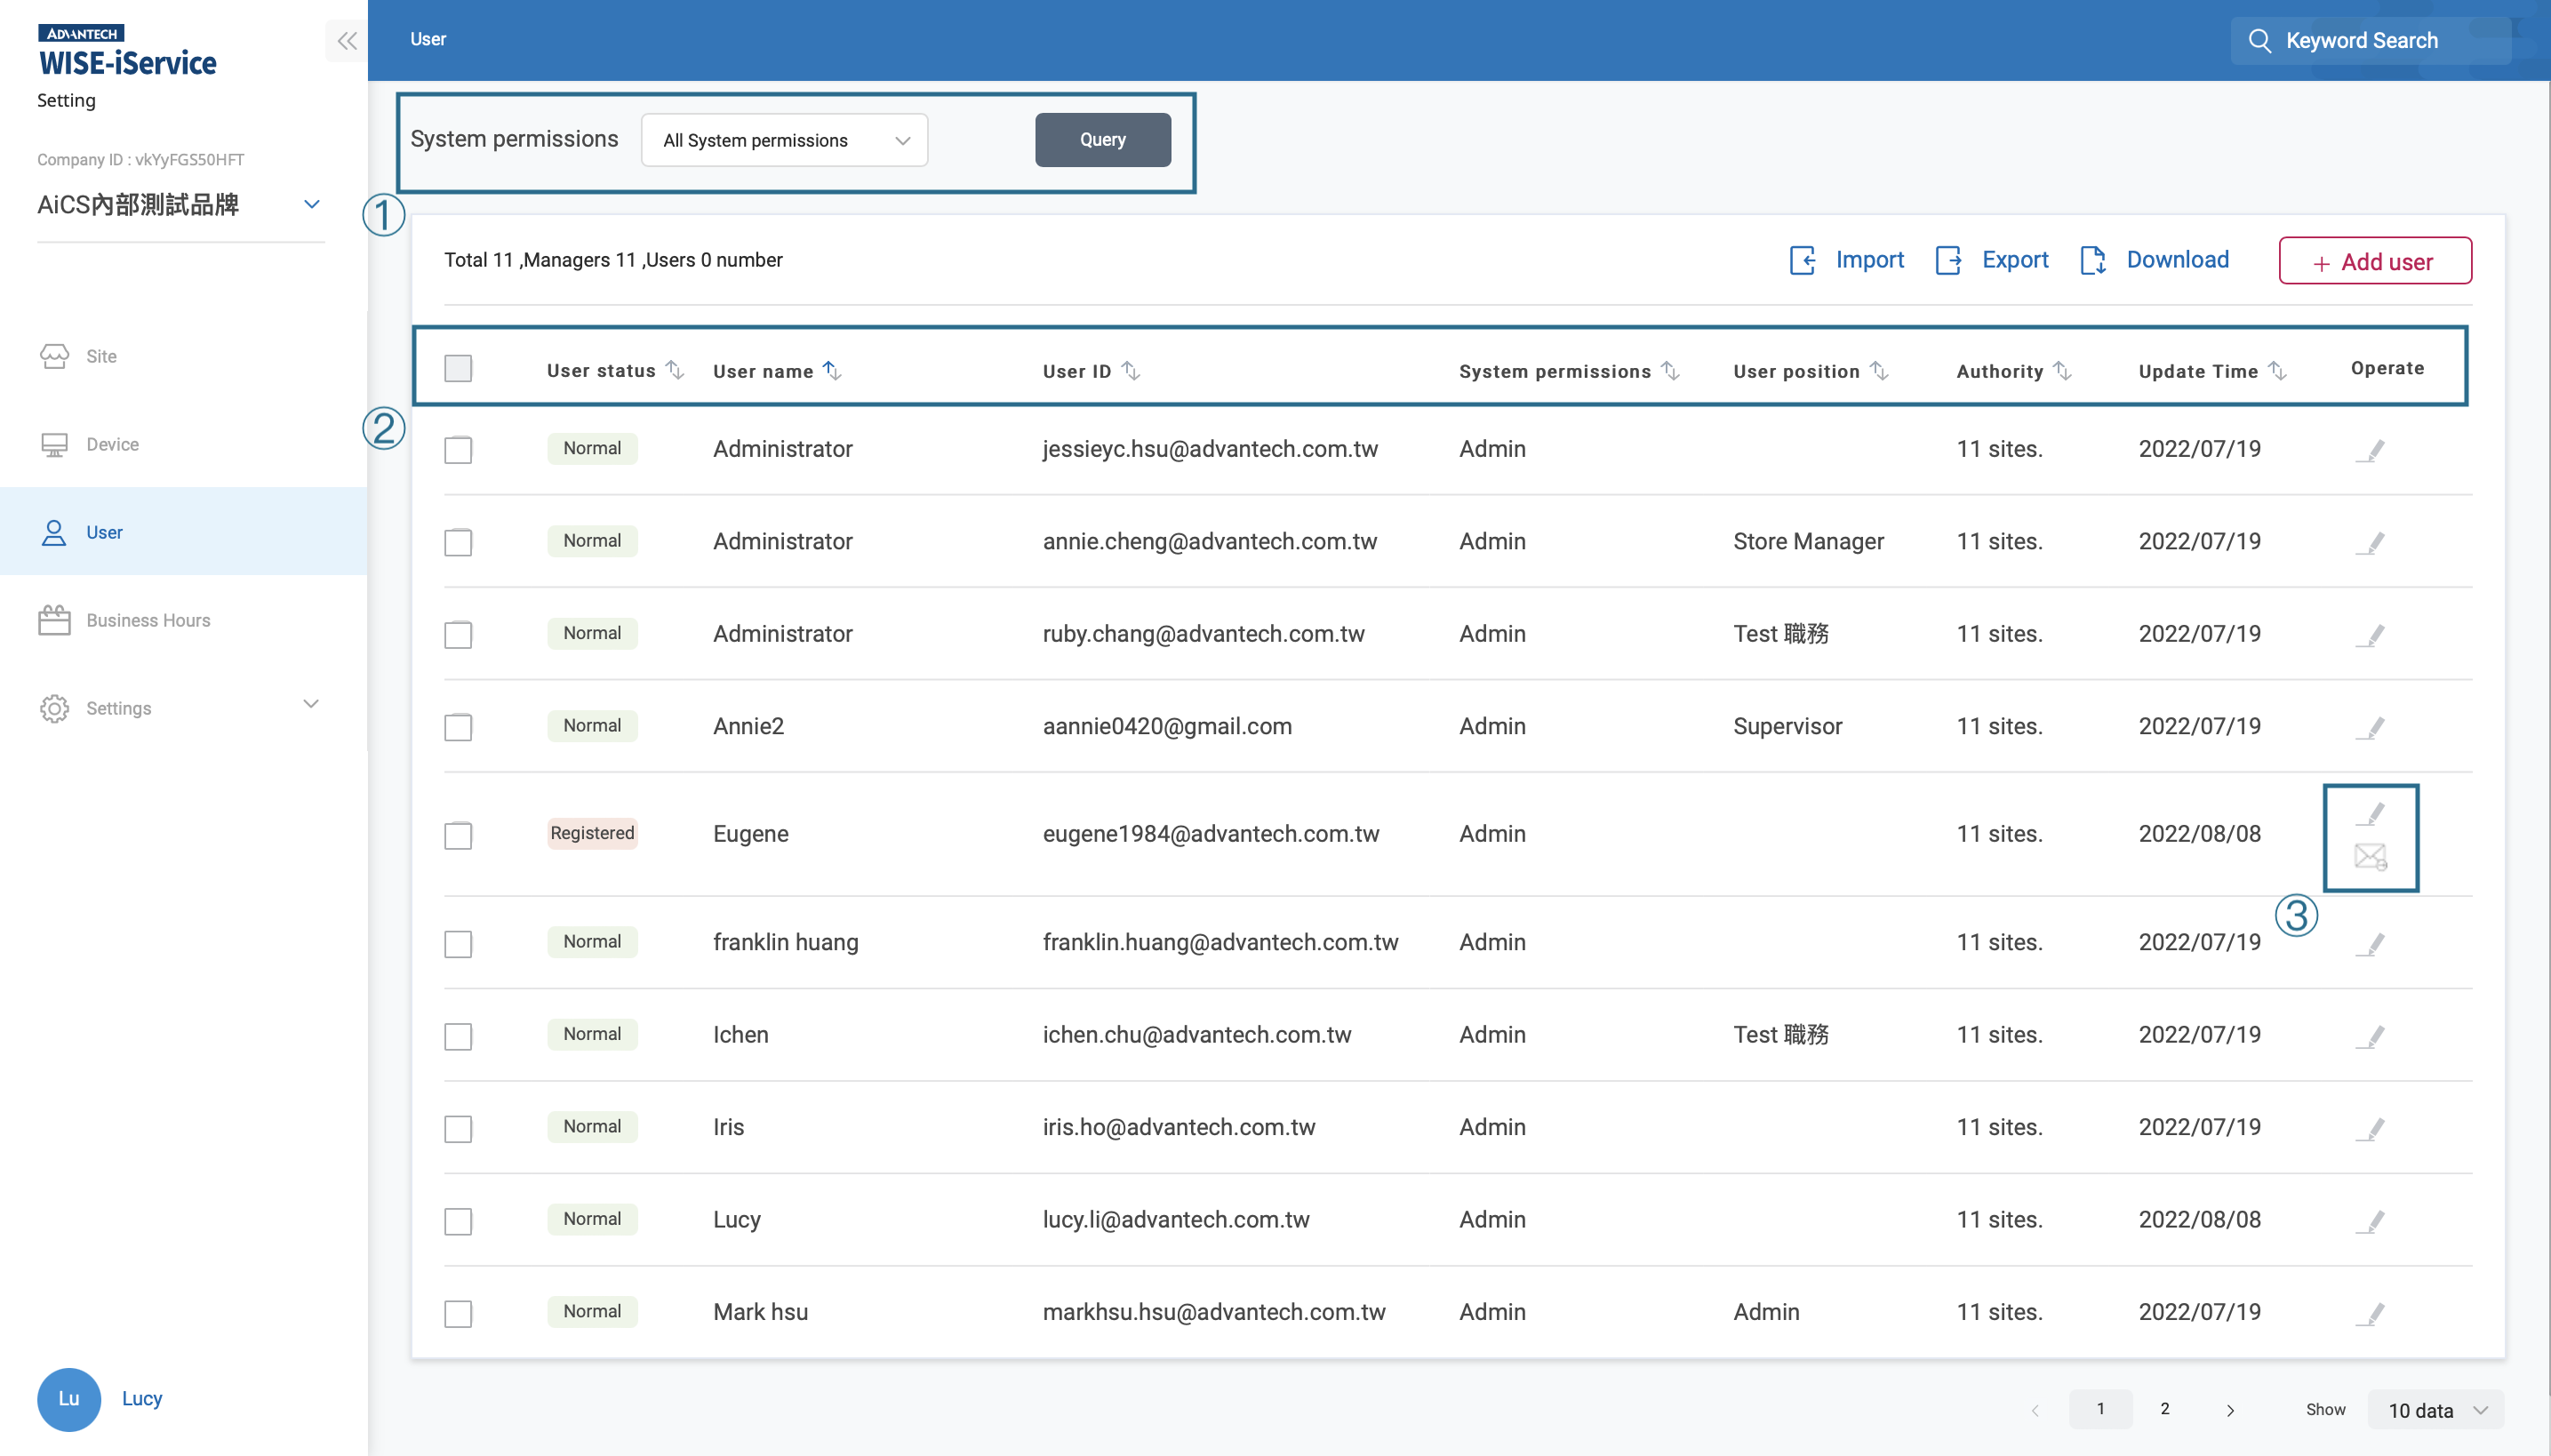
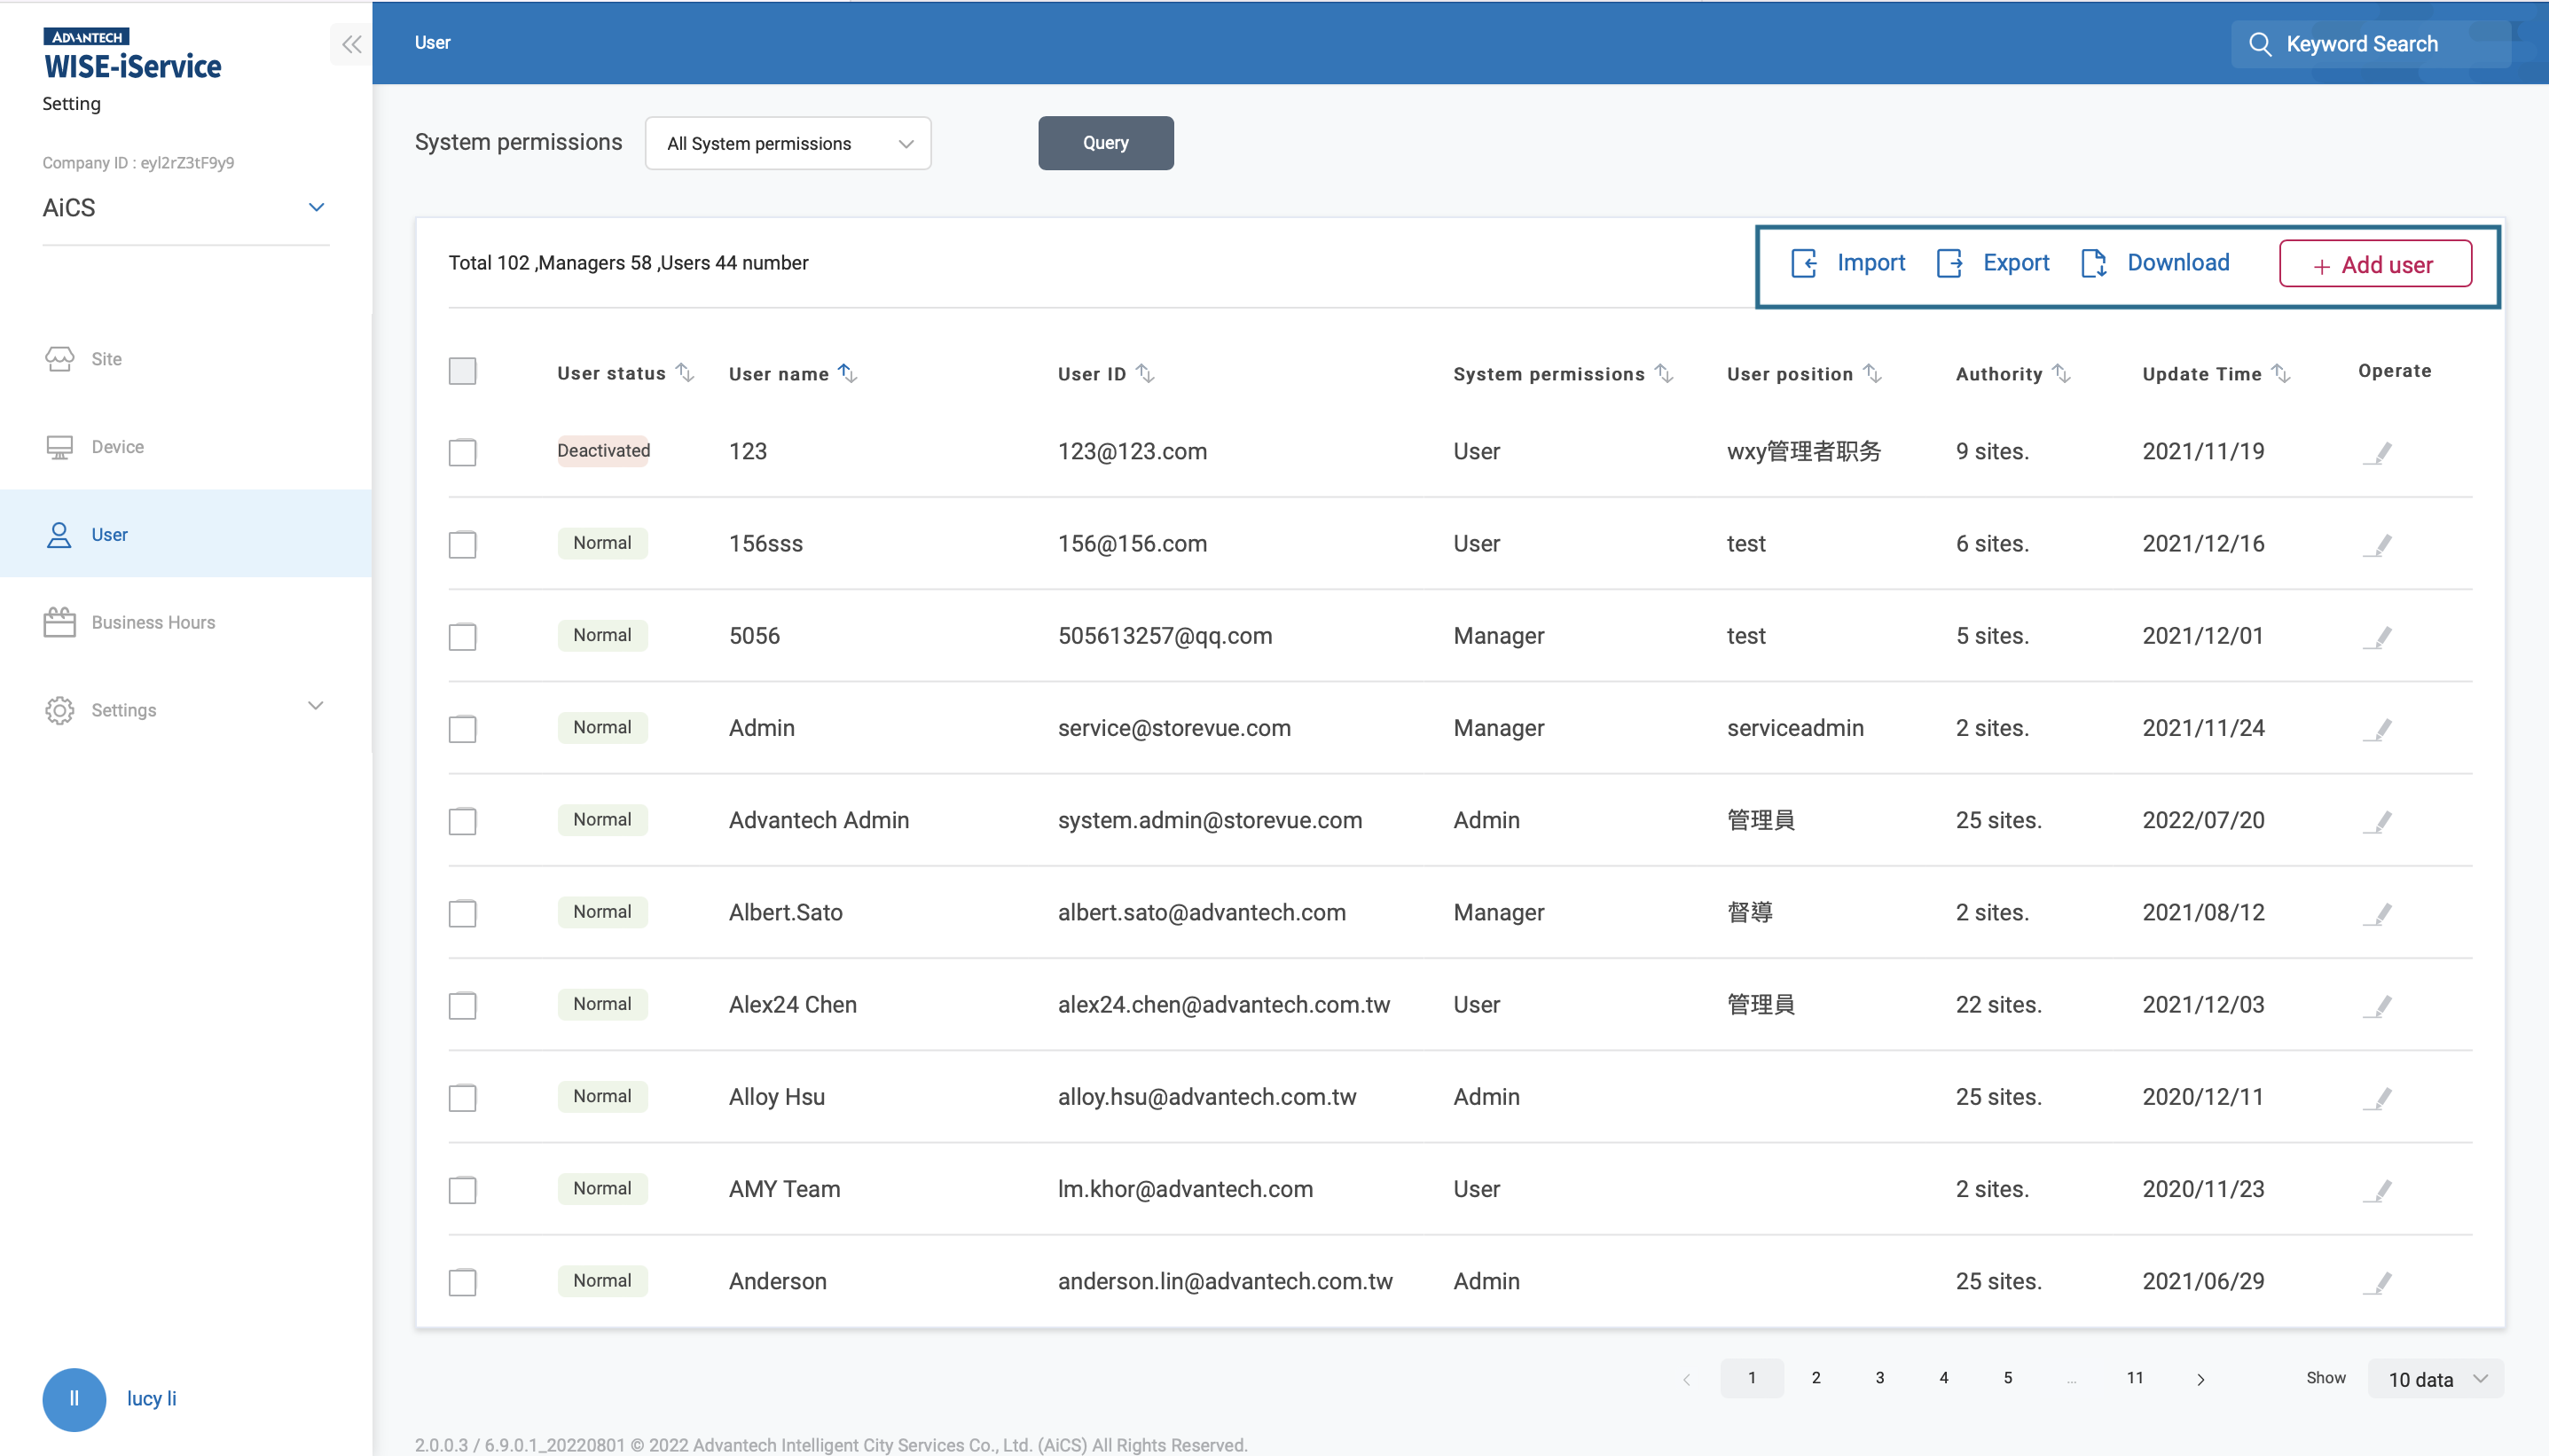
1. System permissions: The user can be listed in accordance with the user's system permissions, which are: system administrators, administrators and general users. 2. User list column: Contains user status, user name, account ID, system authority, employee position, number of store permissions, update time and operation. Among them, the user status will be distinguished according to whether the user clicks the verification letter and whether it is suspended; the update time will be determined according to the user's details; the operation can view the user's detailed information, or to the user who has not received the verification letter to the verification letter. Essence 3. Operate: Click "Operation" in the user list to view and set the user details.
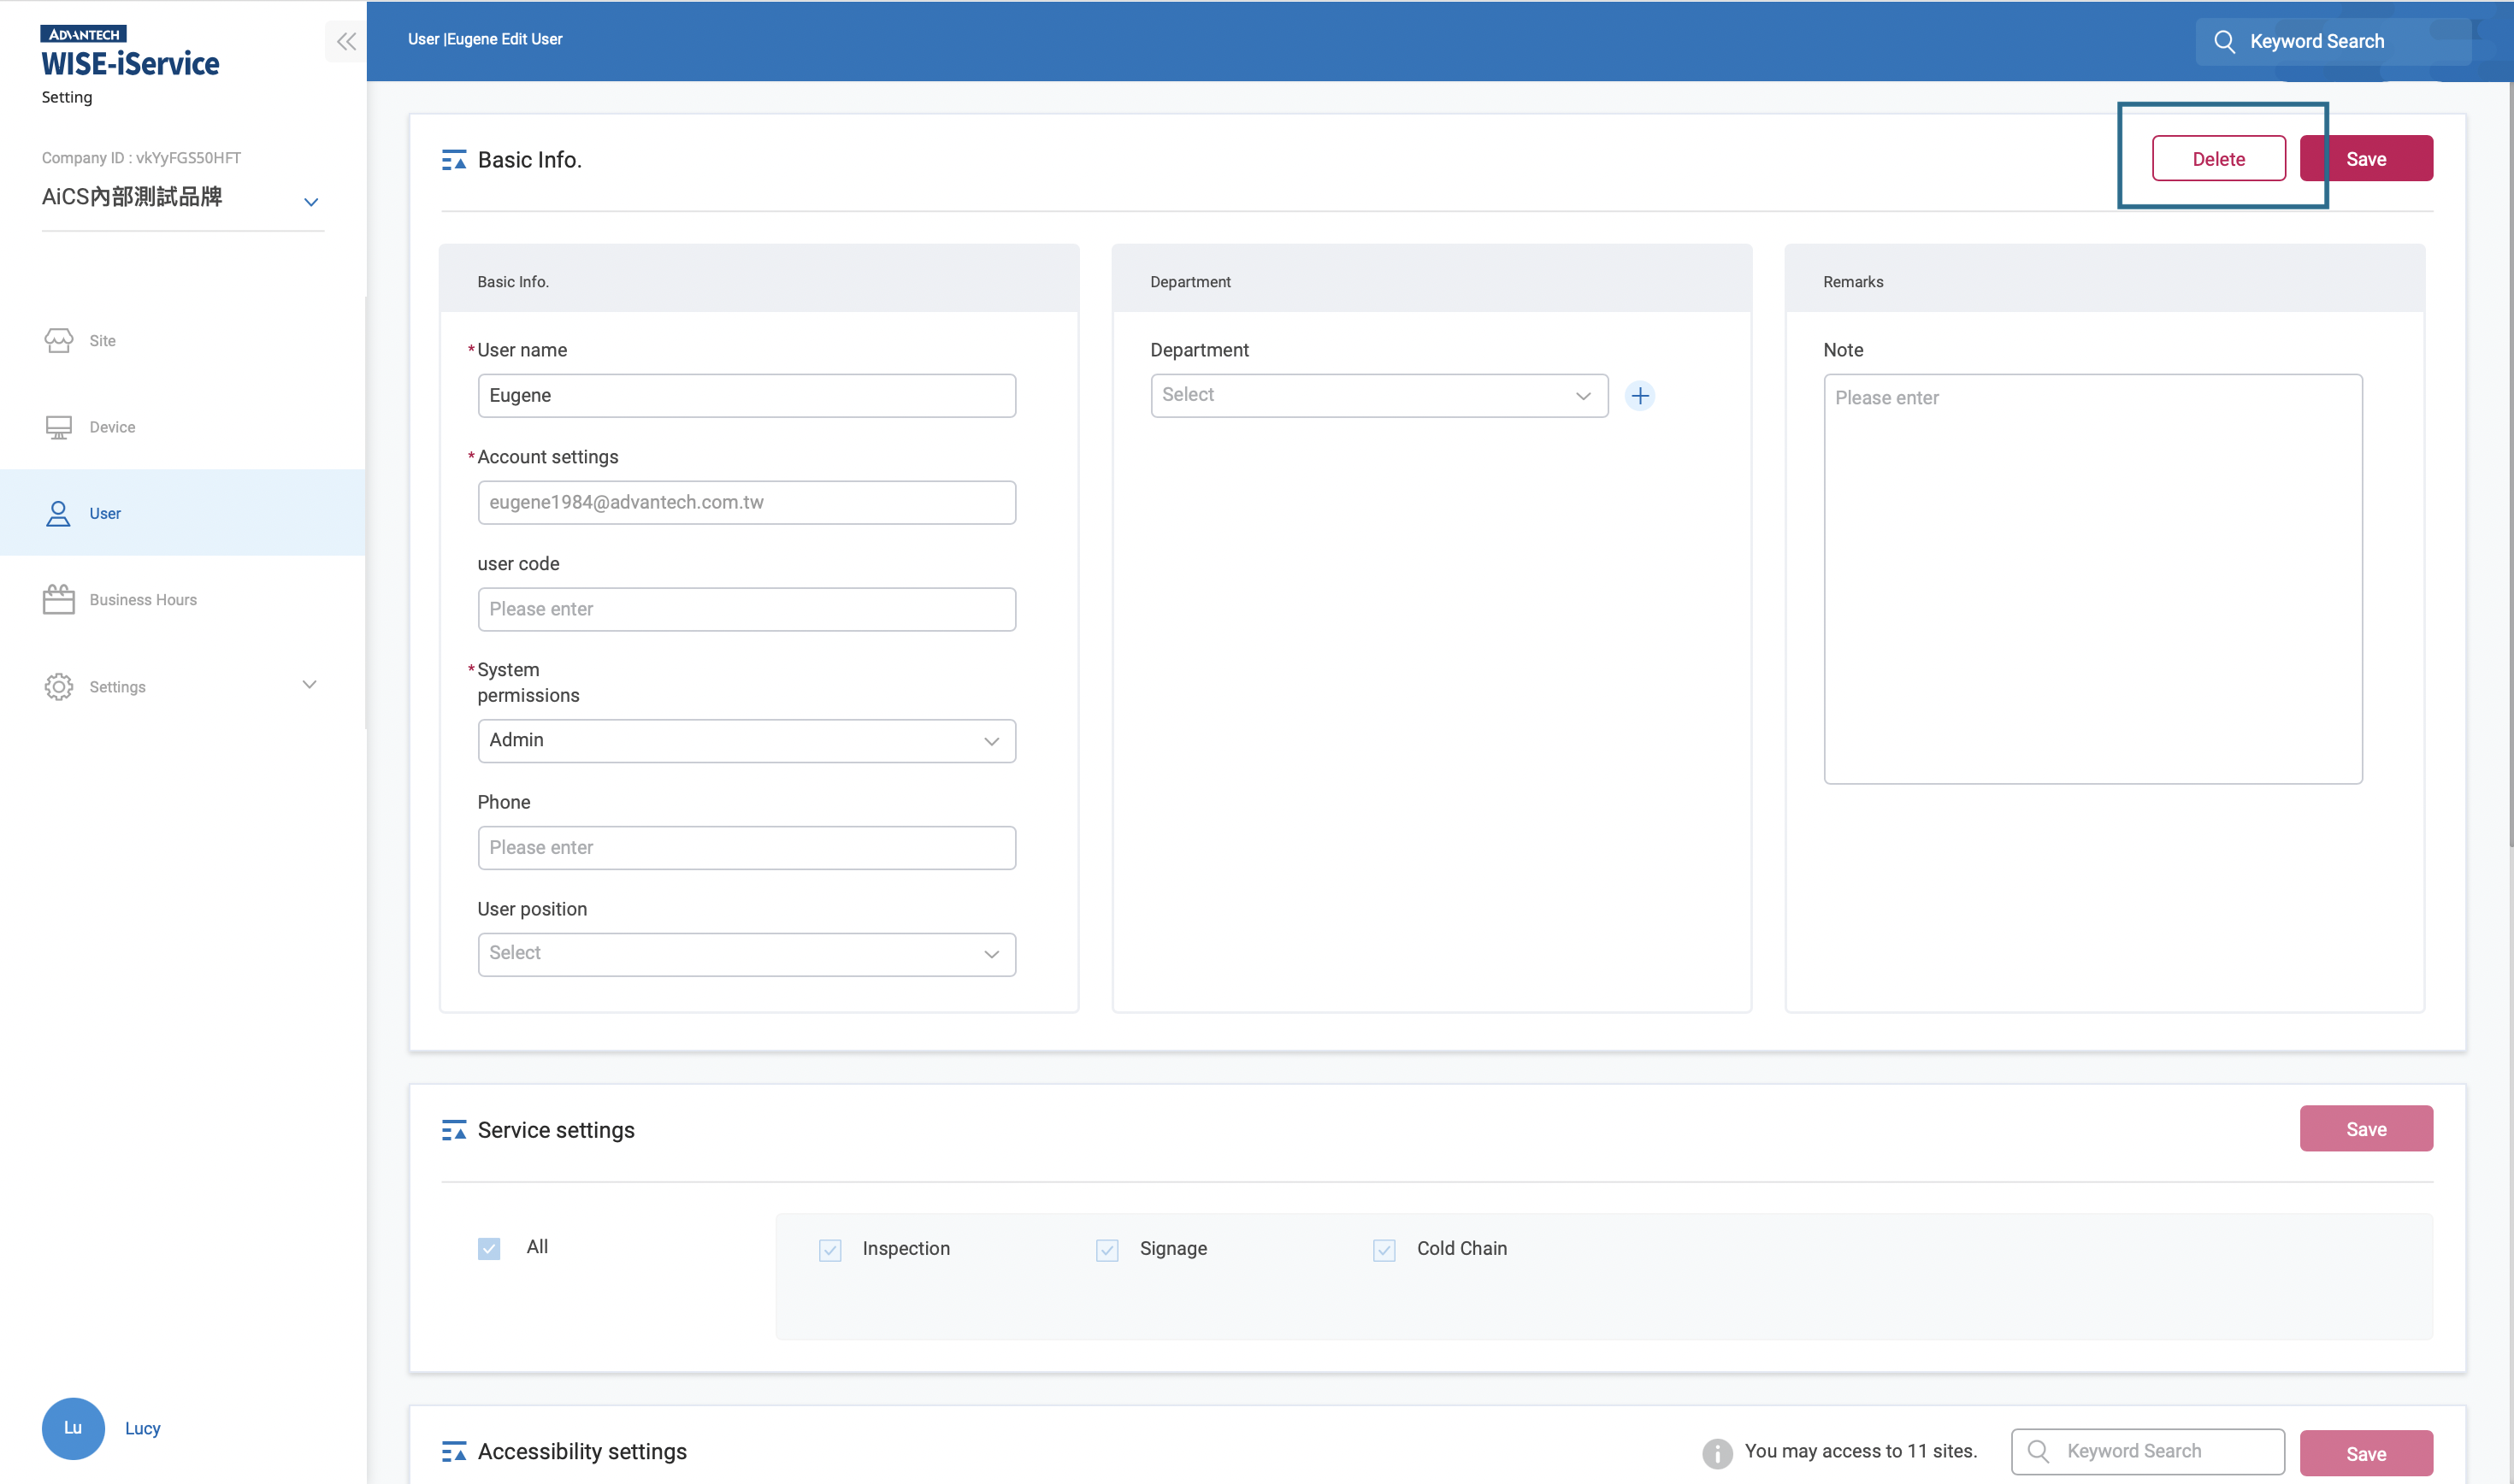
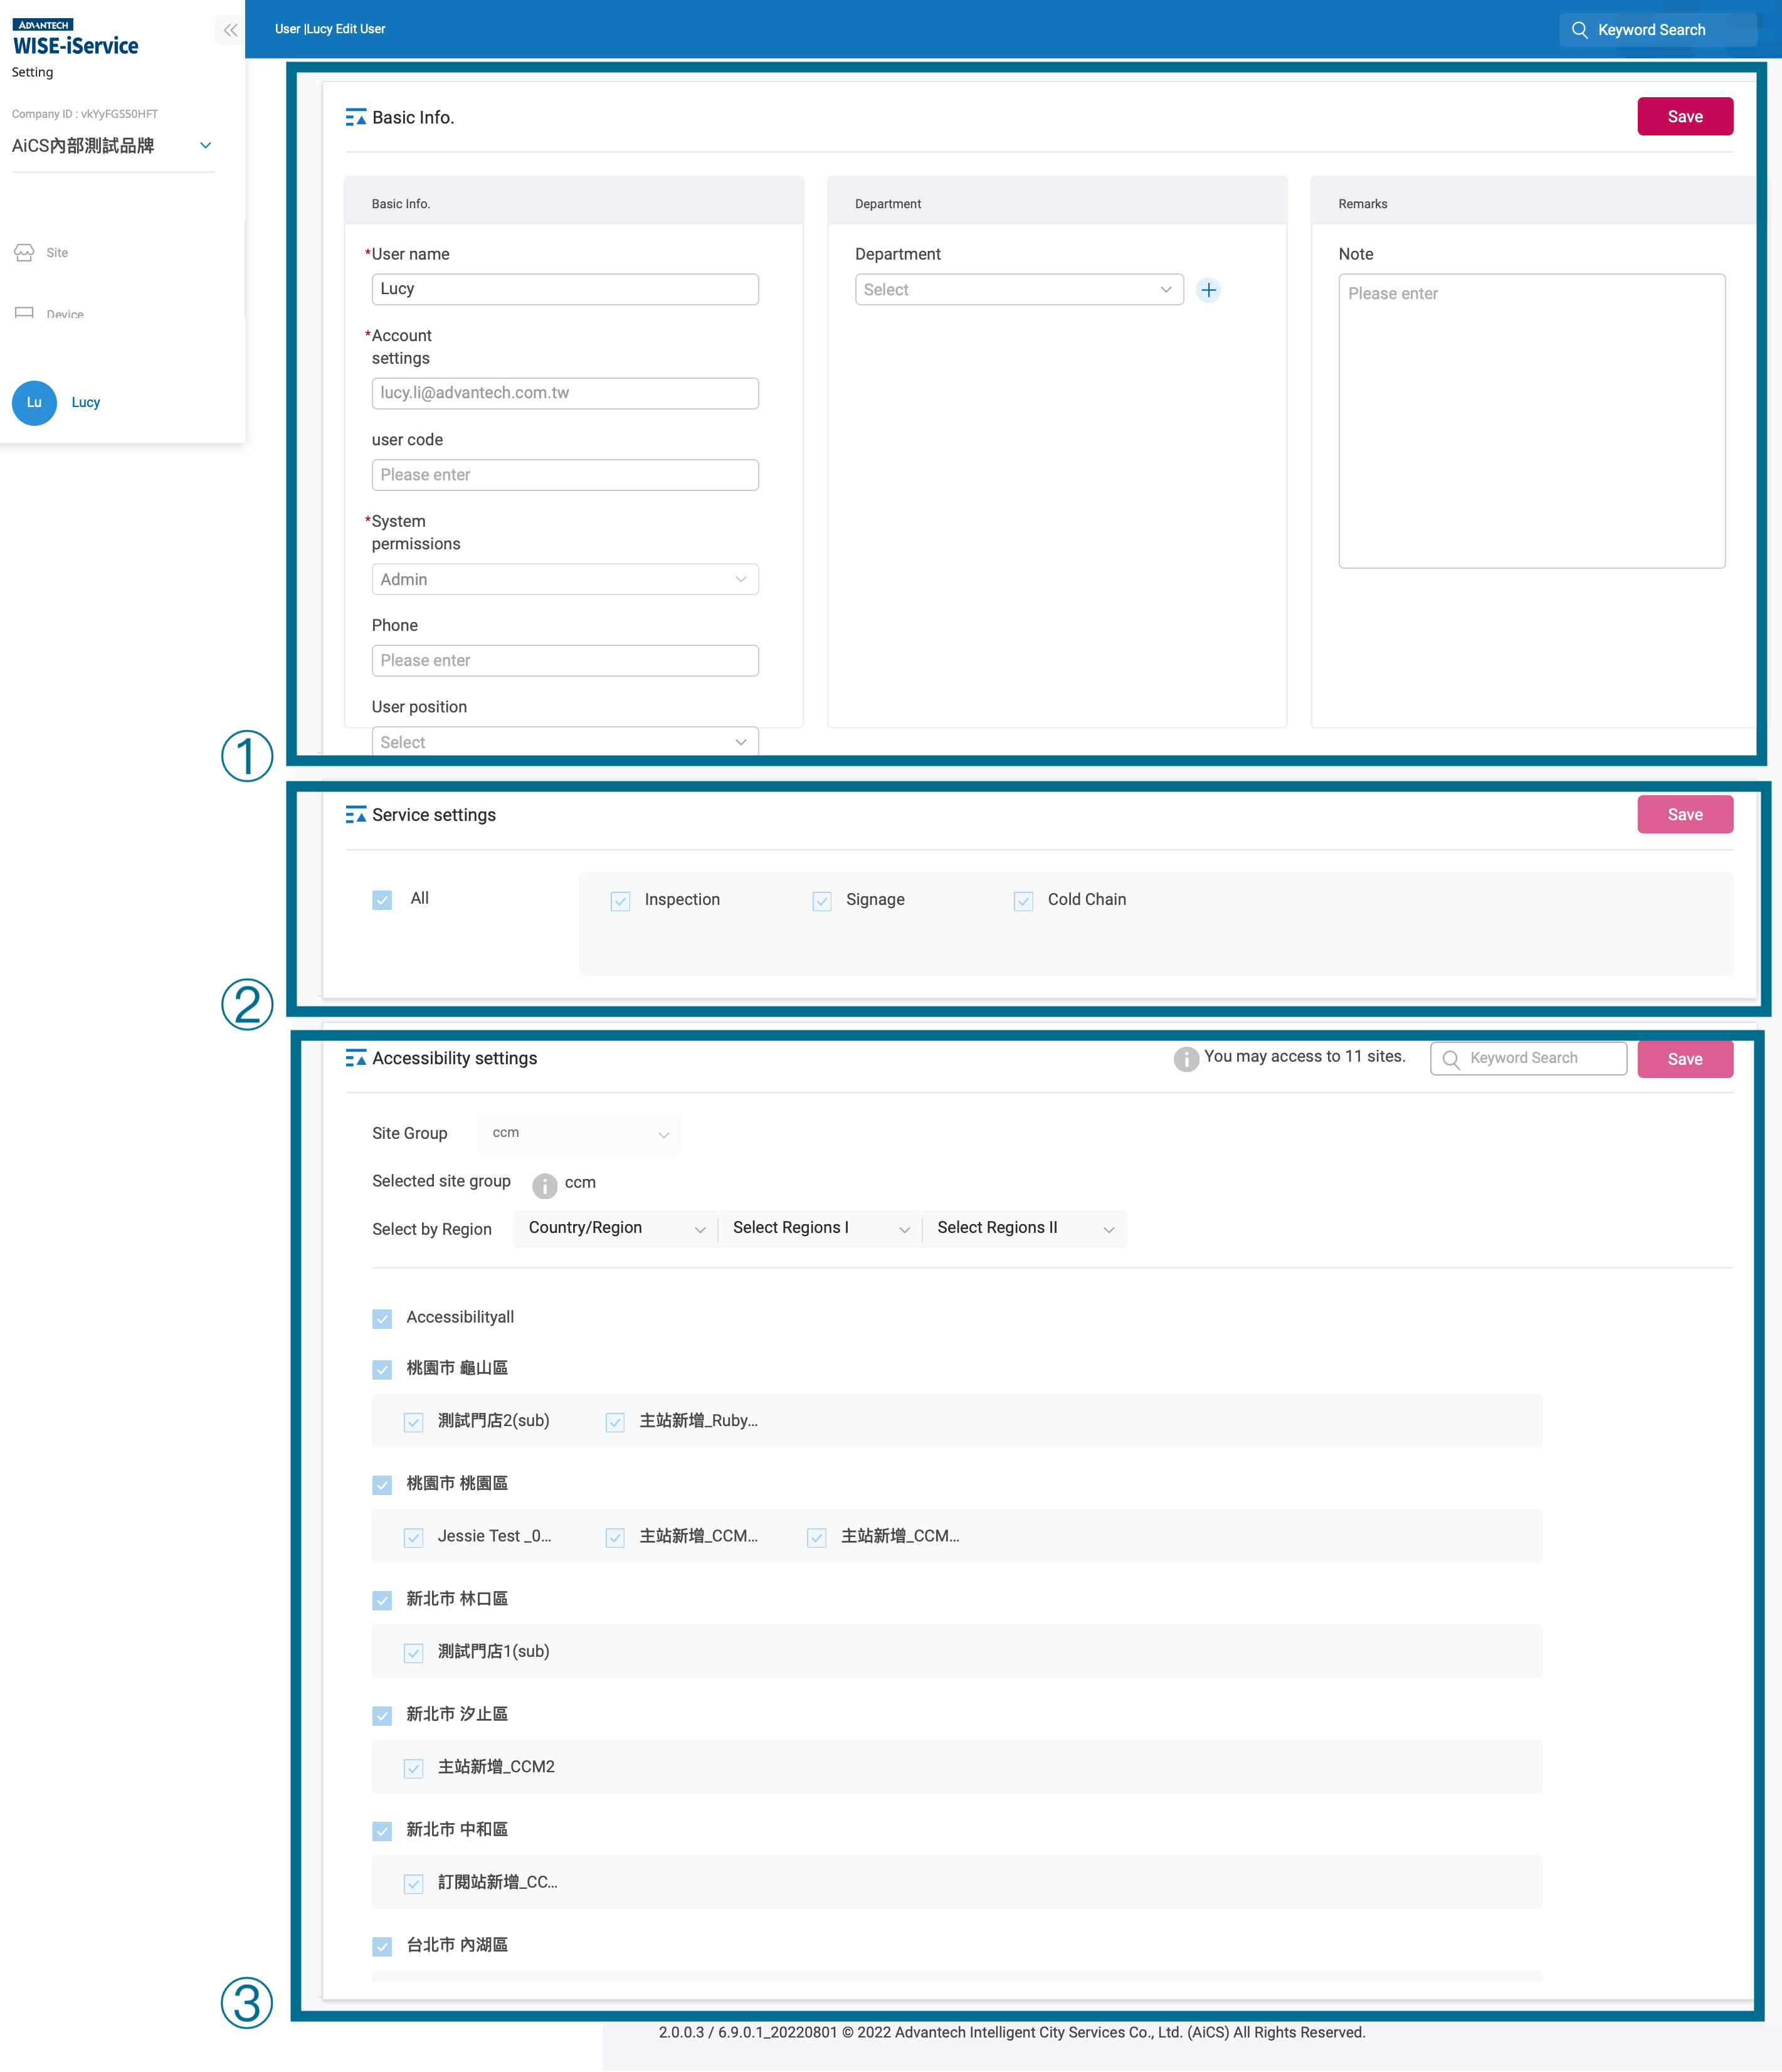
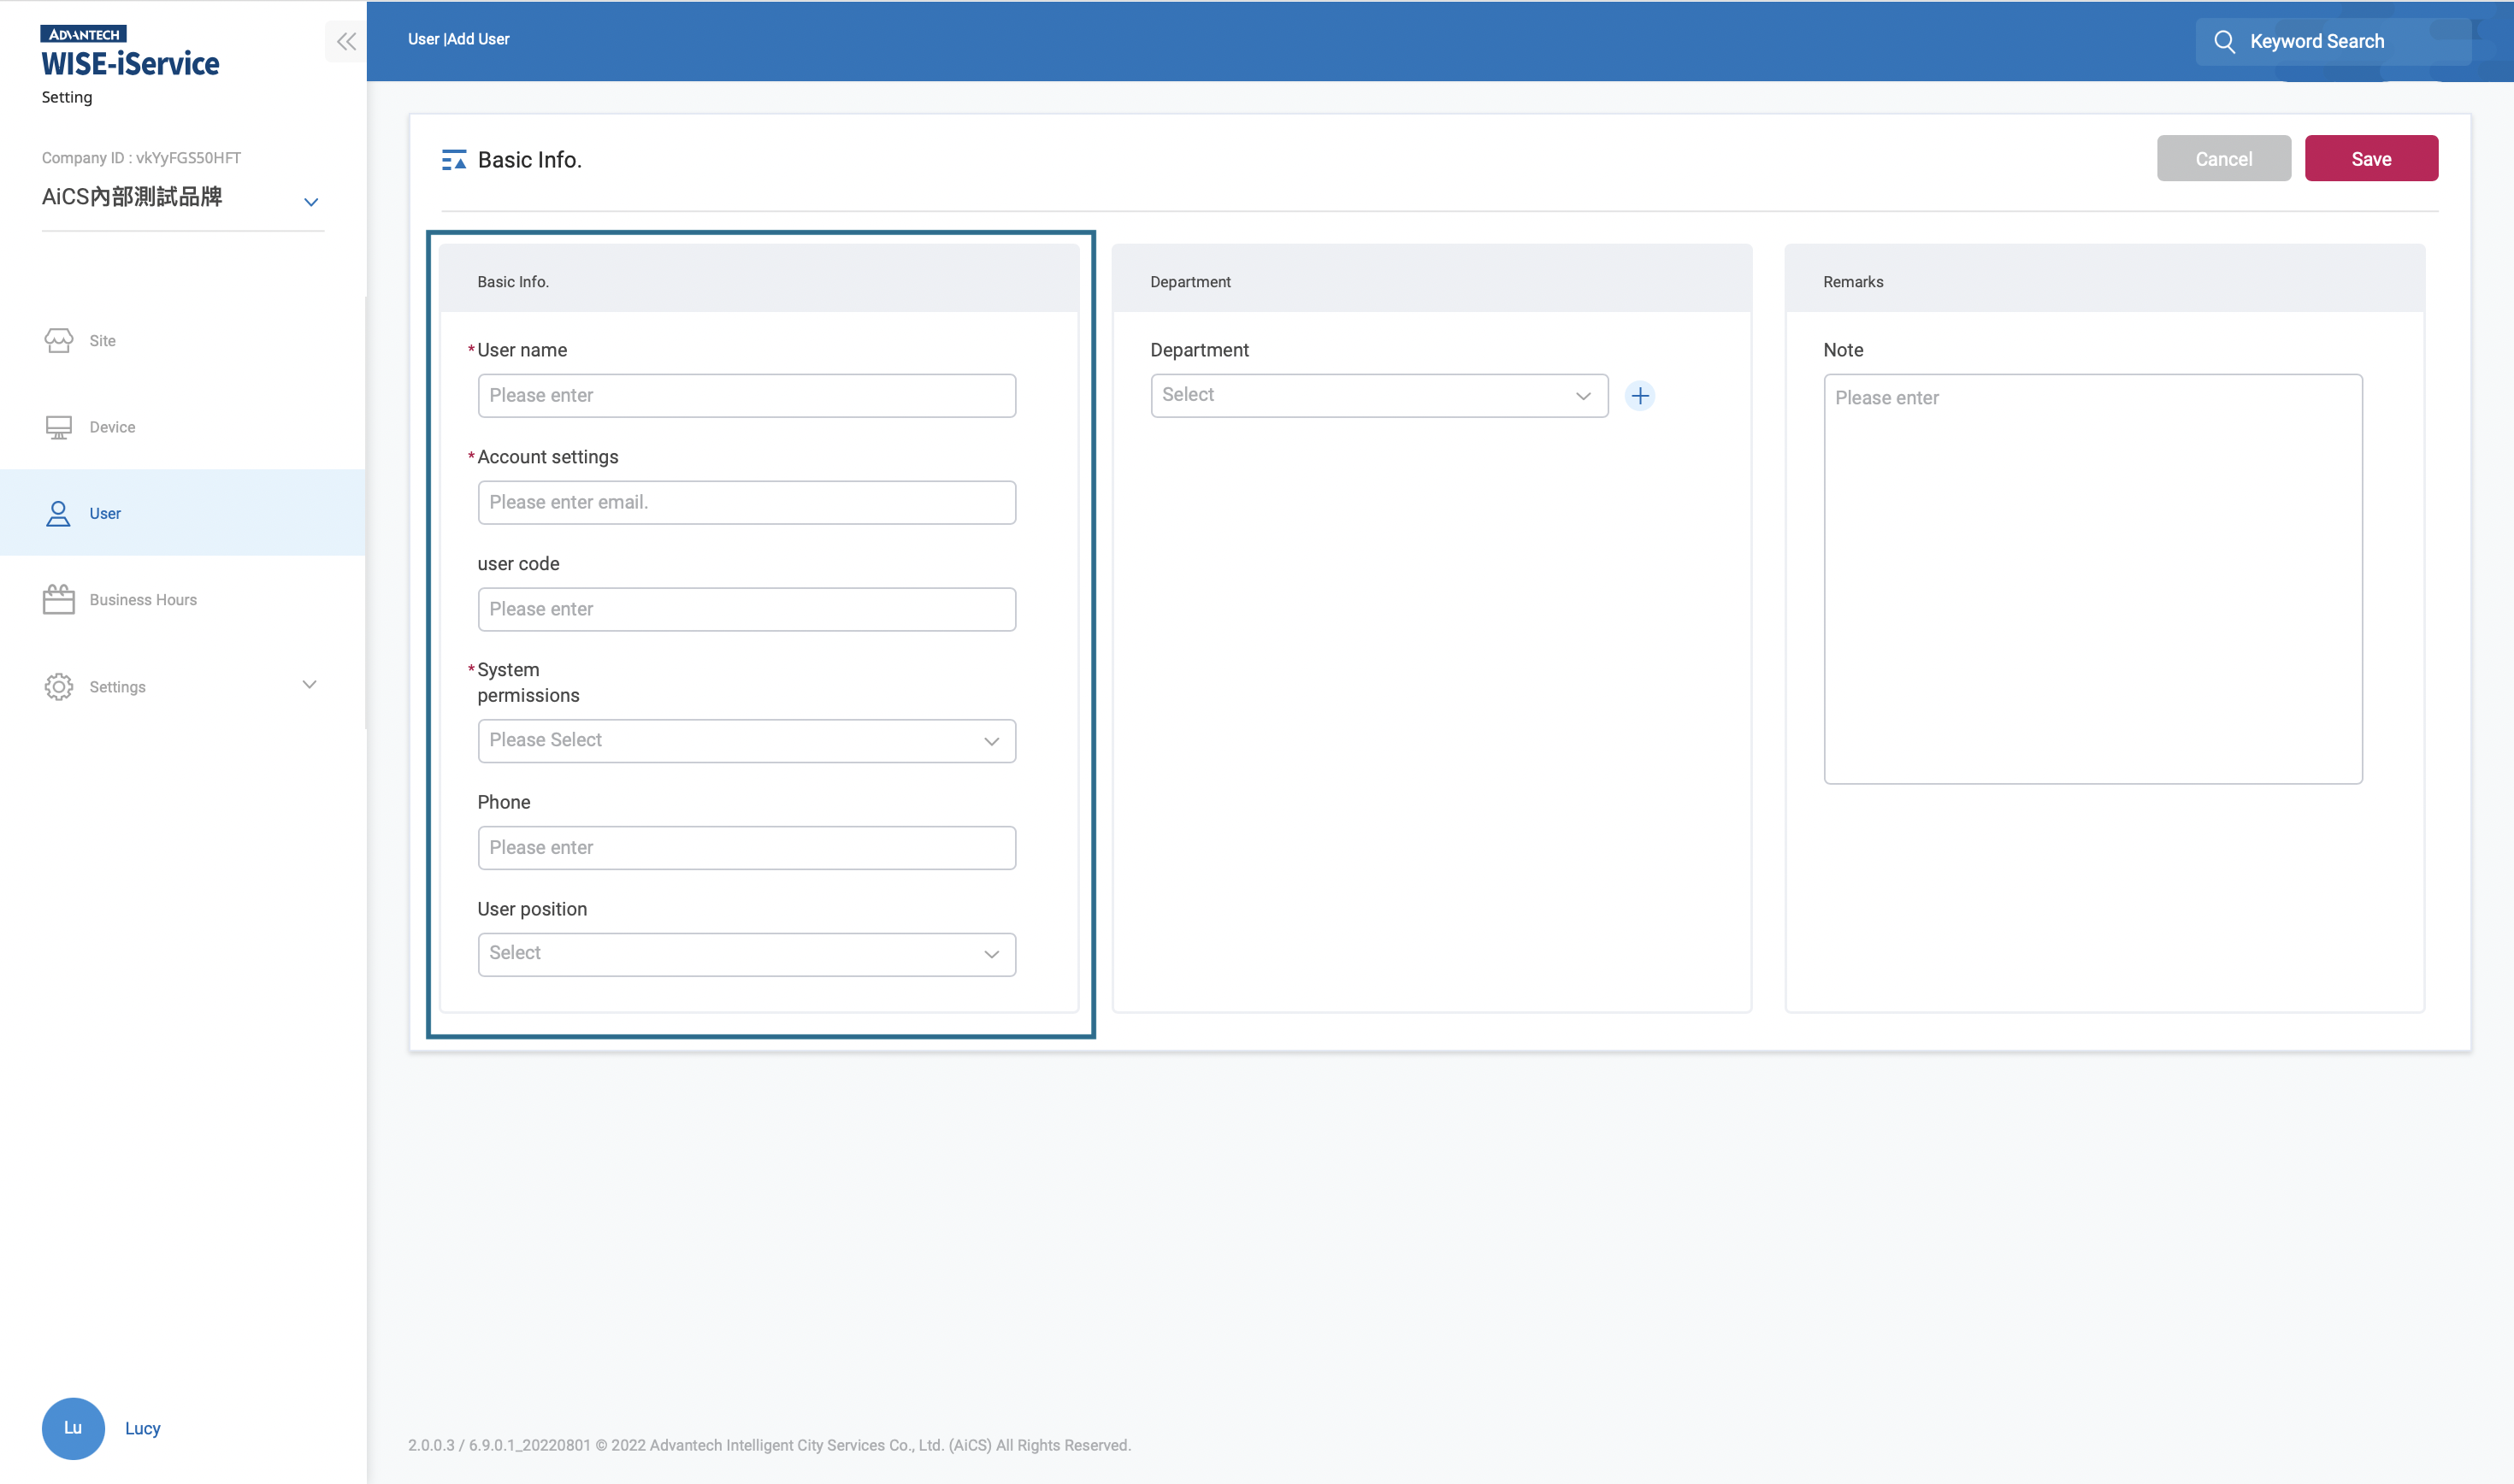
1. Basic info: Including basic information such as user names, accounts, system permissions, and positions; multiple departments can also be set. 2. Service settings: For different users, you can use a specific service. When the user logs in to the system, you can only see the service with enlightenment authority. 3. Accessibility settings: The user's management of the site permissions.
3.2 New users
There are two ways to add new users: 1. Use Excel files to make new users. 2. Add a single user manually.
Click the "Downloa" to download the Excel template. After filling in the user-related information and required items, return to the system and click "Import" and select the Excel file. After the system is uploaded, the user batch will be added. "Export" can be remitted with the EXCEL files selected by the check-up users, and the user data content is modified before remittance into the system for update. > Note: When modifying the content of the data on the system, DO NOT modified the user ID field , otherwise it will cause unpredictable problems.
After clicking "+ Add User", fill in the field with * symbol in the basic information, and click "Save" to complete.
> Note: The user system permissions can refer to the following table.
| System setting | Admin | Manager | User | |
|---|---|---|---|---|
| Site Management | Site | Add/delete/modify | read | read |
| Device Management | Traffic Device | Add/delete/modify | read | read |
| EIS Device | Add/delete/modify | read | read | |
| Face Device | Add/delete/modify | read | read | |
| Virtual Device | Add/delete/modify | read | read | |
| Signage Device | Add/delete/modify | read | read | |
| CCM Device | Add/delete/modify | read | read | |
| User Management | User* | Add/delete/modify | Add/delete/modify | read |
| Business hours Management | Business hour | Add/delete/modify | read | read |
| Settings management | Department | Add/delete/modify | read | read |
| Position | Add/delete/modify | read | read | |
| Site type | Add/delete/modify | read | read | |
| Site group | Add/delete/modify | read | read | |
| Tag* | Add/delete/modify | Add/delete/modify | Add/delete/modify | |
| AccessKey Management | Add/delete/modify | read | read |
*Remarks 1: Admin can only add, delete and modify users of the same department as their own departments, and the highest user permissions they have added are also the admin. *Remarks 2: The common tag can only be added, deleted and modified by admin; custom tag can be added, deleted and modified by all users.
3. Disable/Delete users
Delete the user process: Disable user → Delete user.
After entering the user info page, click "Deactivate User" at the upper right to complete the user deactivation. At this time, the user cannot log in to the system or switch to the company, but the user's relevant information will still be retained in the system. "User enable" can be performed after the user is deactivated; or "delete users" can be performed. After the user deletes, the user-related information will be removed and cannot be restored.