Process
1.Operating System Configuration --> 2.Player Registration > Please carefully read the introductory notes at the beginning of each step.
1.Operating System Configuration
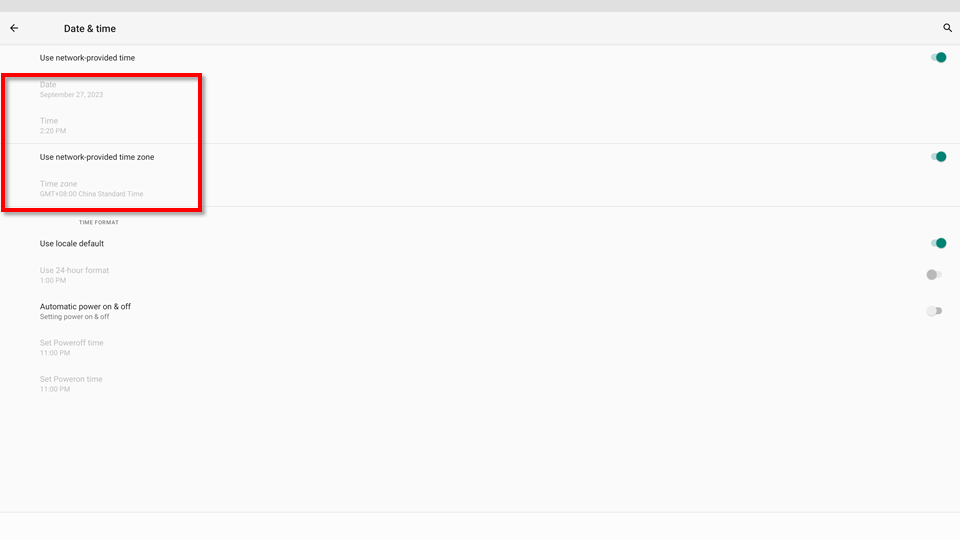
Step1. Switching Time Zone and Setting the Time > Time zone and time settings are crucial for the player. Incorrect settings may affect playback timing and sequence.
Settings --> System --> Date & Time
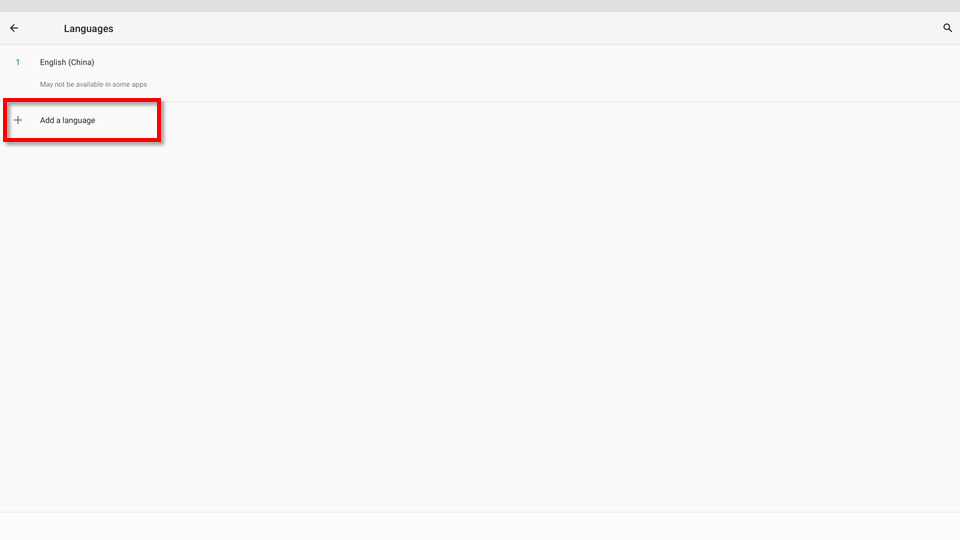
Step2: Changing Language(options)
By default, the system is set to English. Please add the corresponding language based on your region.
Settings --> System --> Languages & Input --> Languages --> Add a language
2. Device Registration
Supported Servers for SignageCMS
| Server | URL |
|---|---|
| StoreVue | https://portals.storevue.com/ |
| WISE-iService - Public Cloud | https://apps.wise-iservice.com/ |
| SignageCMS Server | Domain or IP.Address |
2.1 Public Cloud Registration
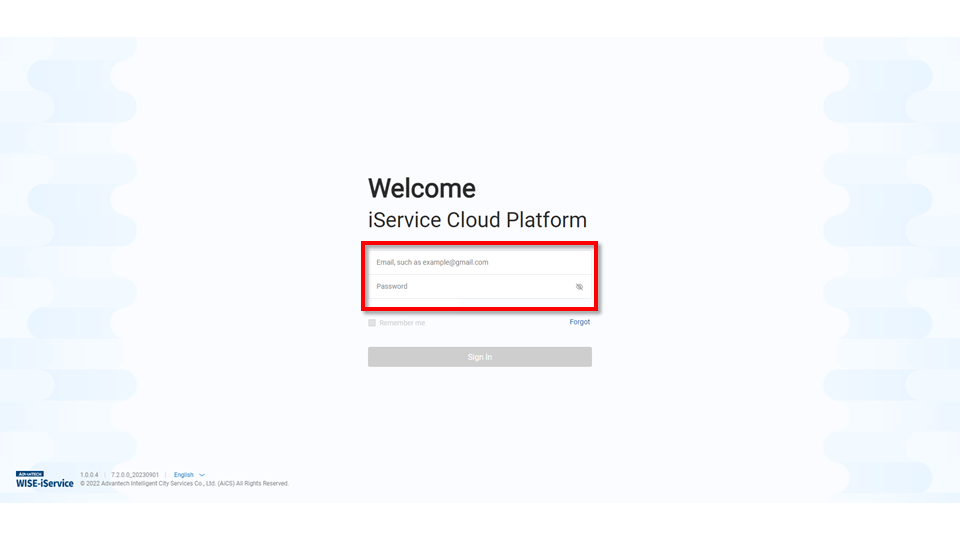
Step1: Opening the Browser Launch Chrome or Edge browser. , Entering Username and Password to Log In > If you do not have an account or password, please contact the brand manager to create one.
Step2: Click on Settings
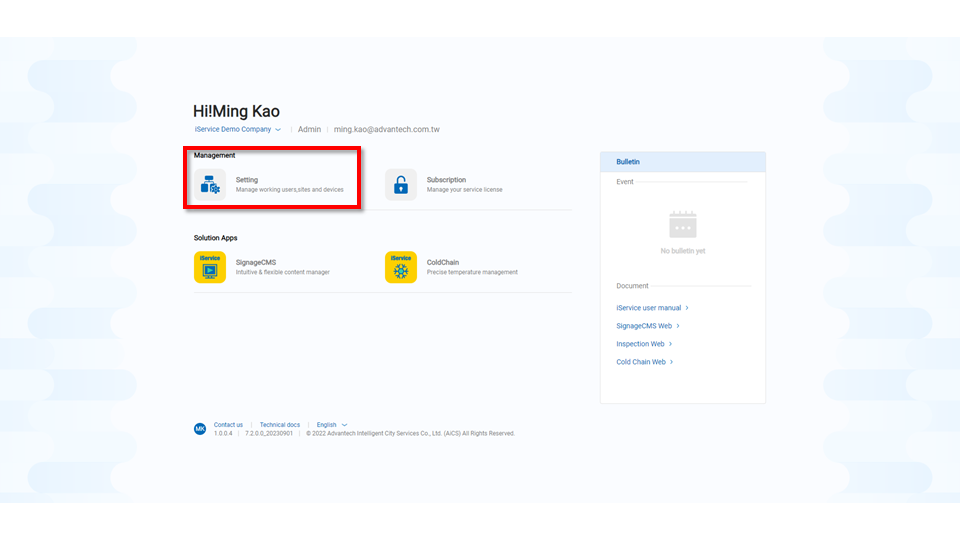
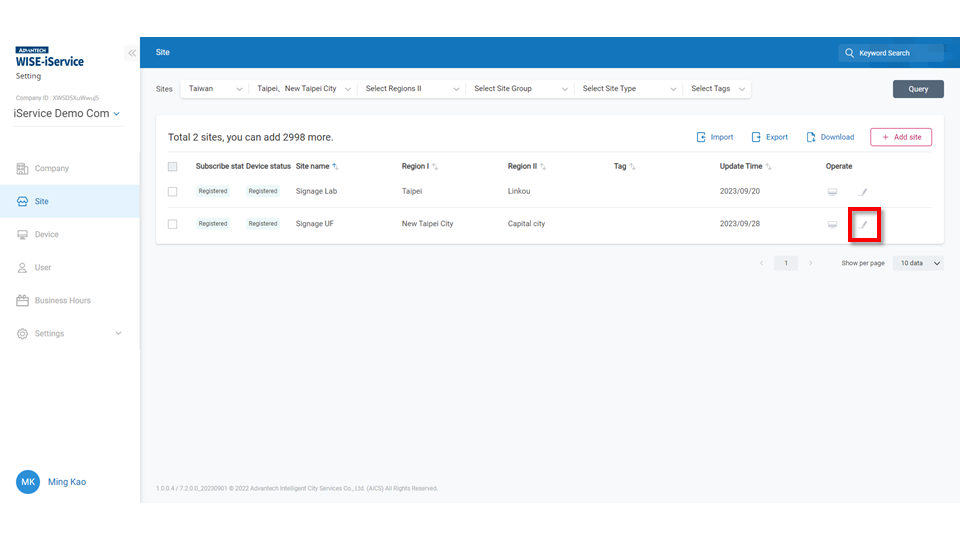
Step3: Location Management, In the Location Management section, select the store where you want to register the device. Click on the ![]() "Edit" button.
> If you cannot find the desired store for registration, please contact the administrator to add it.
"Edit" button.
> If you cannot find the desired store for registration, please contact the administrator to add it.
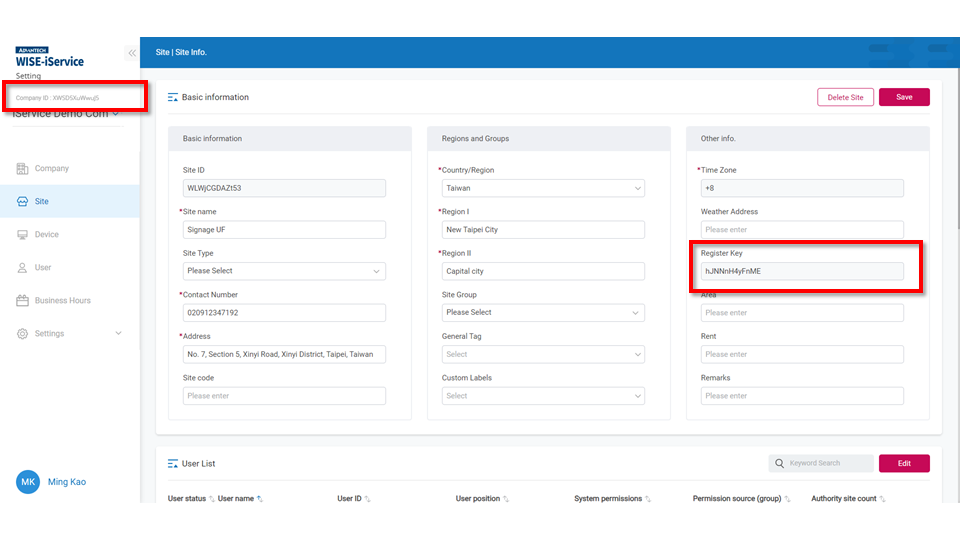
Step4: Record Company ID and Device Registration Code,Take note of the Company ID and Device Registration Code. You will need to input these details on the player later.
2.1.1 Guide Mode
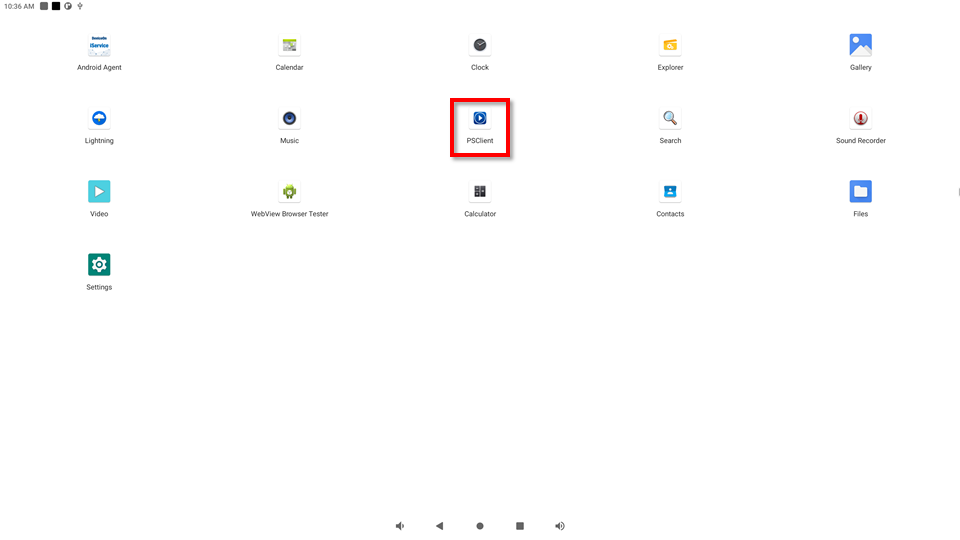
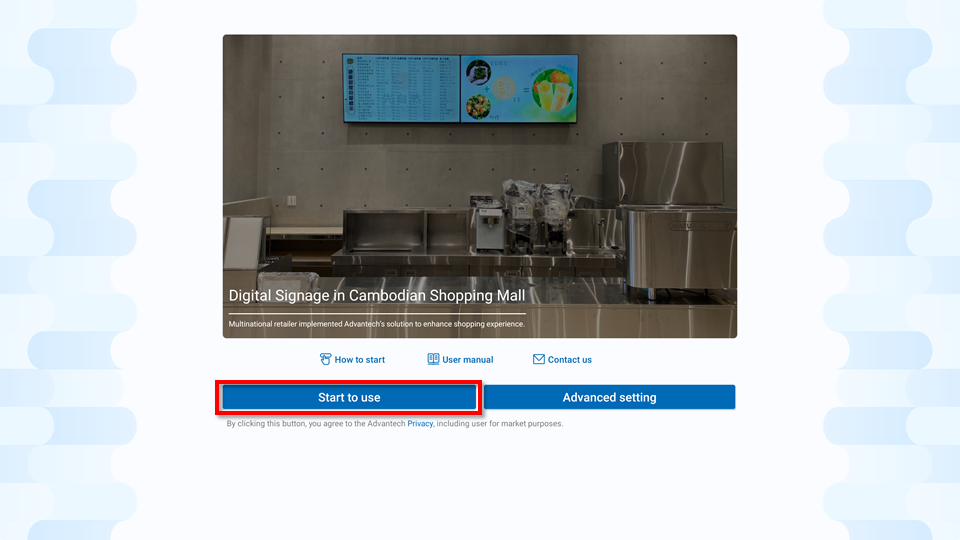
Step1. Click on the SignageCMS Client App icon to access the main program for digital signage management.
Step2. Click "Start to use" proceed to the next step. If you wish to use traditional settings, click on "Advanced Settings" and go to section 2.1.2 Advanced Setting Mode for further configuration.
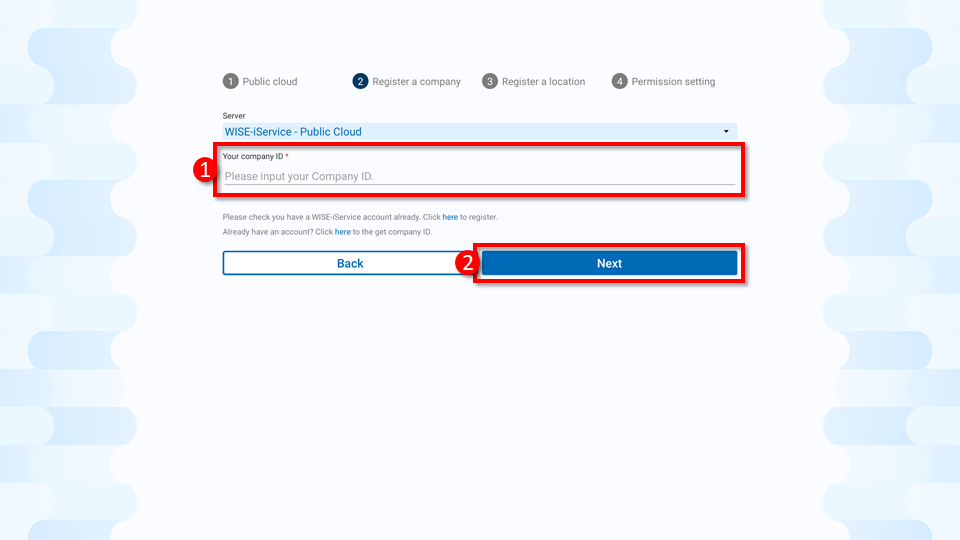
Step3. Select "Public Cloud" and click "Next".

Step4. After entering the recorded Company ID value into the Company ID field, click "Next".
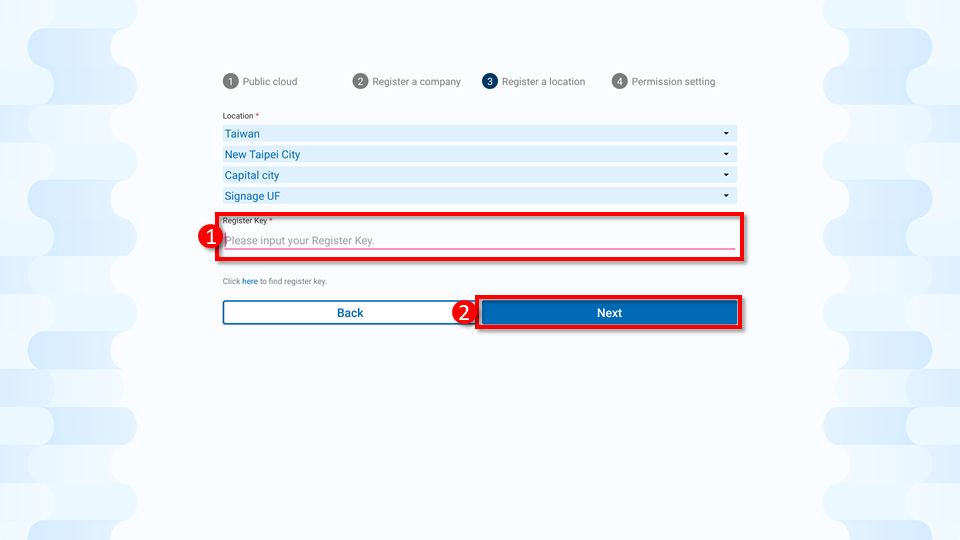
Step5. Choose the location where you want to register the device. Then, enter the Device Registration Key value into the Registration Key field and click "Next".
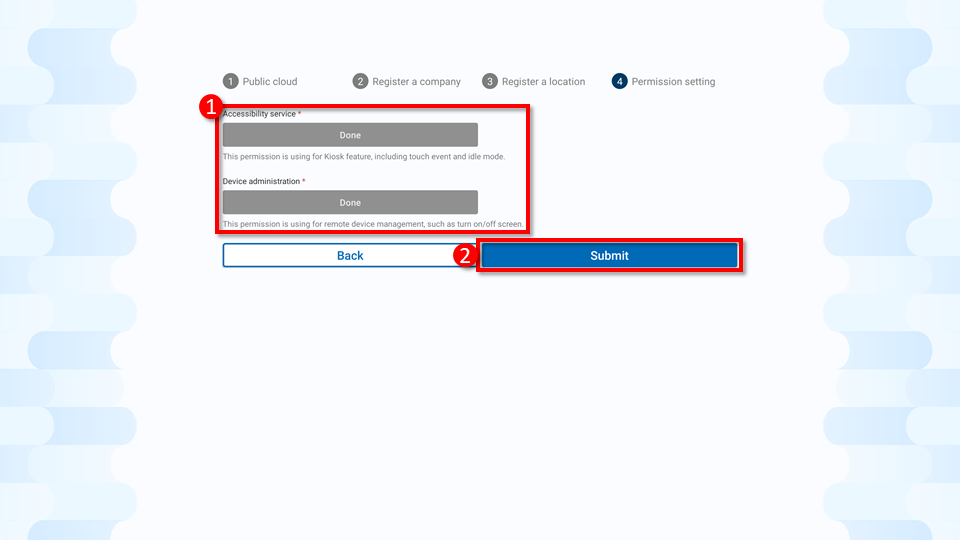
Step6. In this step, you will need to enable the relevant services. Gray buttons indicate that the service has already been enabled. Please click "Submit" to proceed to the next step. > If a button appears in blue, it means the service is not yet enabled. Please click to grant the necessary permissions in sequence.
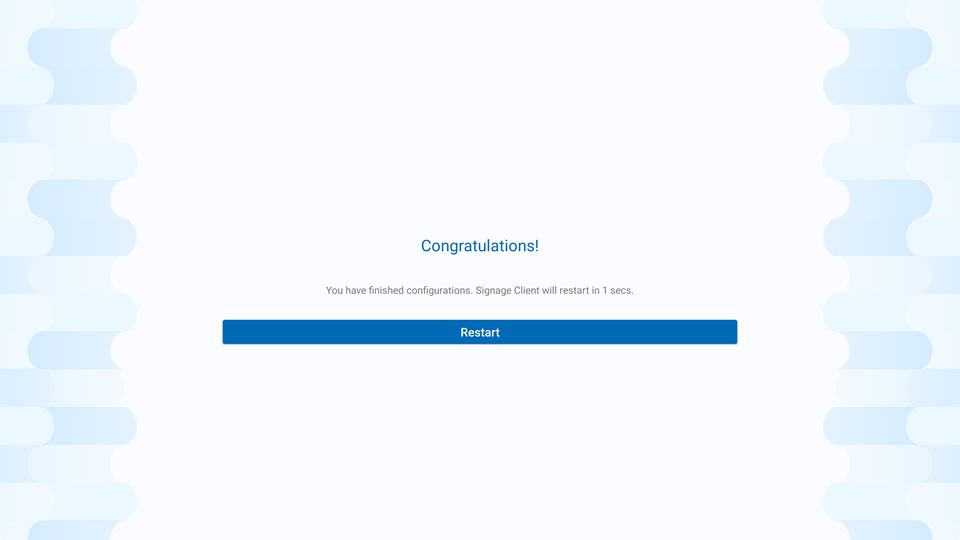
Step7. Initialization setup is complete. The player will start in three seconds, or you can press the "Restart" button.
Step 8. After completion, the SignageCMS main screen will appear.

2.1.2 Advanced Setting Mode
Step1. Click on the SignageCMS Client App icon to access the main program for digital signage management.

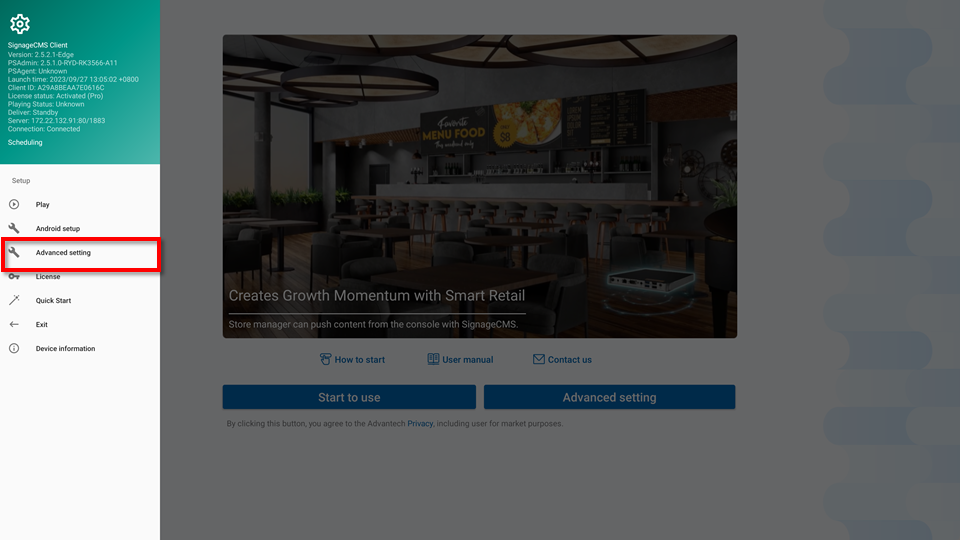
Step2. Click "Advanced Settings" to enter the traditional setting mode.

Step3. Enter Advanced Setting.
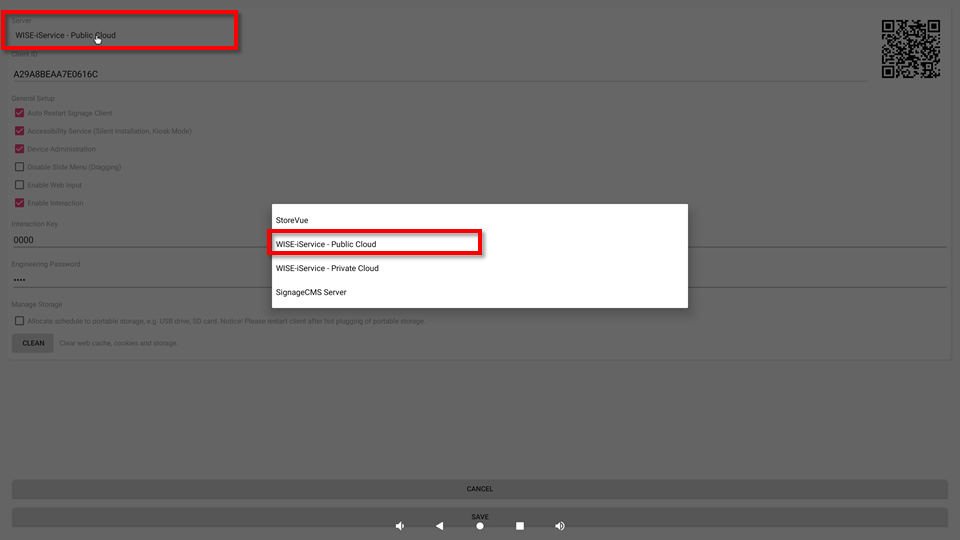
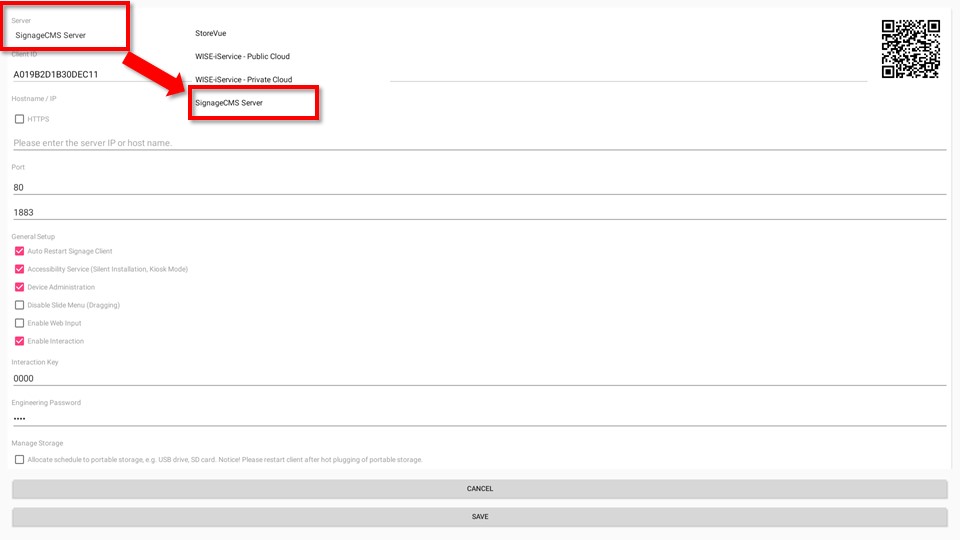
Step4. Select "WISE-iService - Public Cloud", then click the "SAVE" button to complete.
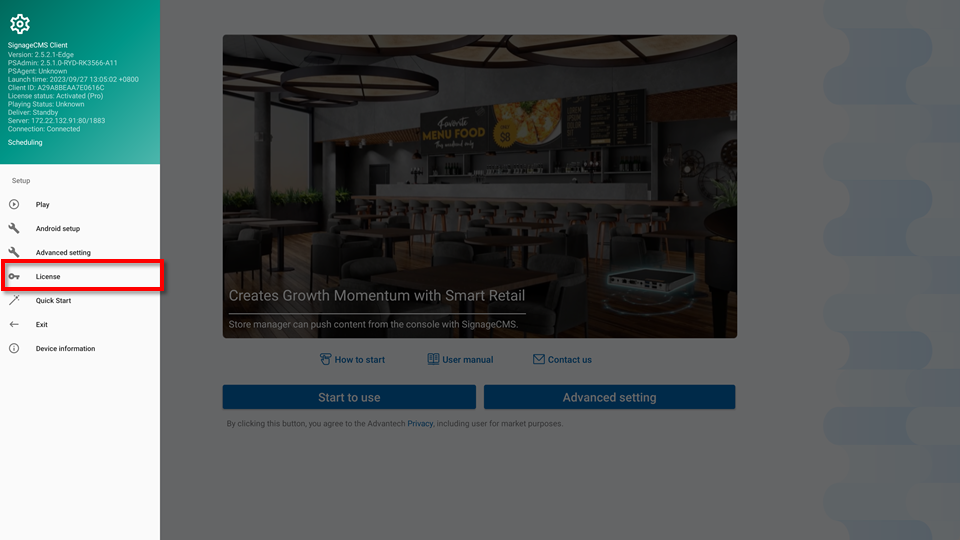
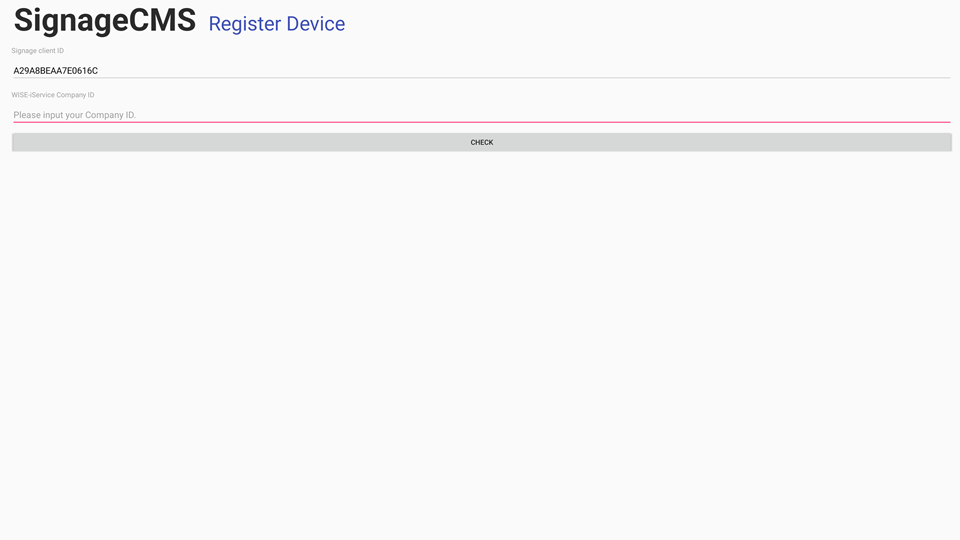
Step5. Access the License Activation screen for Public Cloud registration.
Step6. Enter the Company ID value that you just recorded into the Brand ID field. Afterward, click the "Check" button.
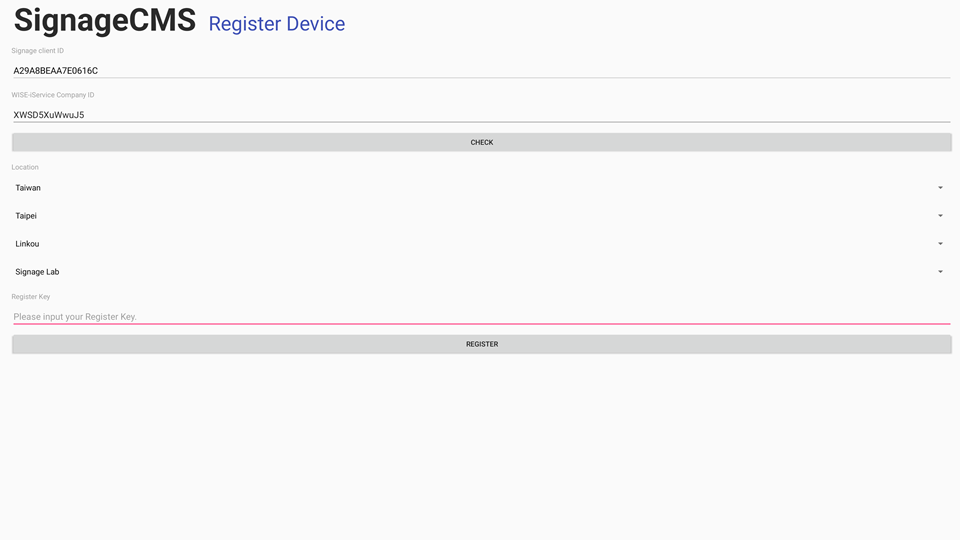
Step7. Select the store where you want to register the device. Then, enter the Device Registration Key value into the Register Key field and click the "Register" button.
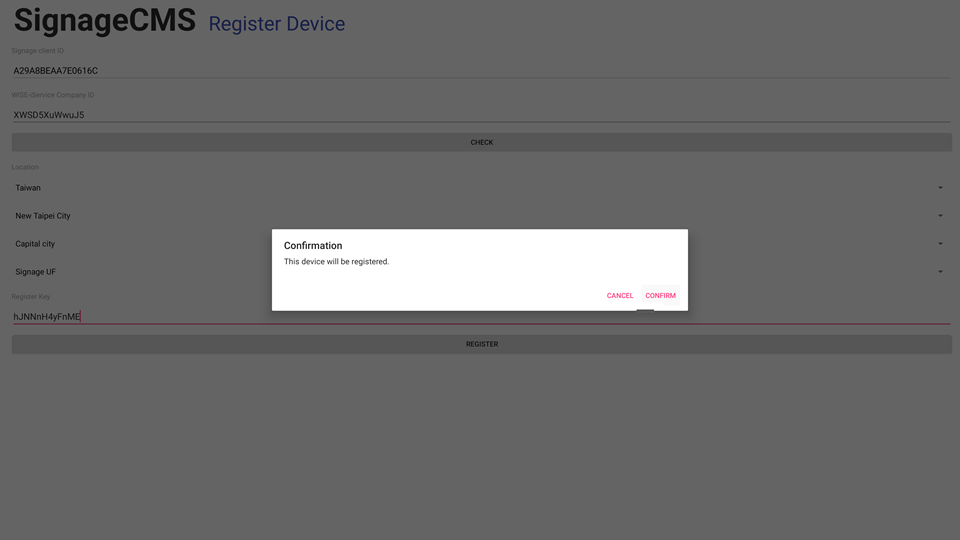
Step8. Click the "Confirm" button to proceed with the registration process.
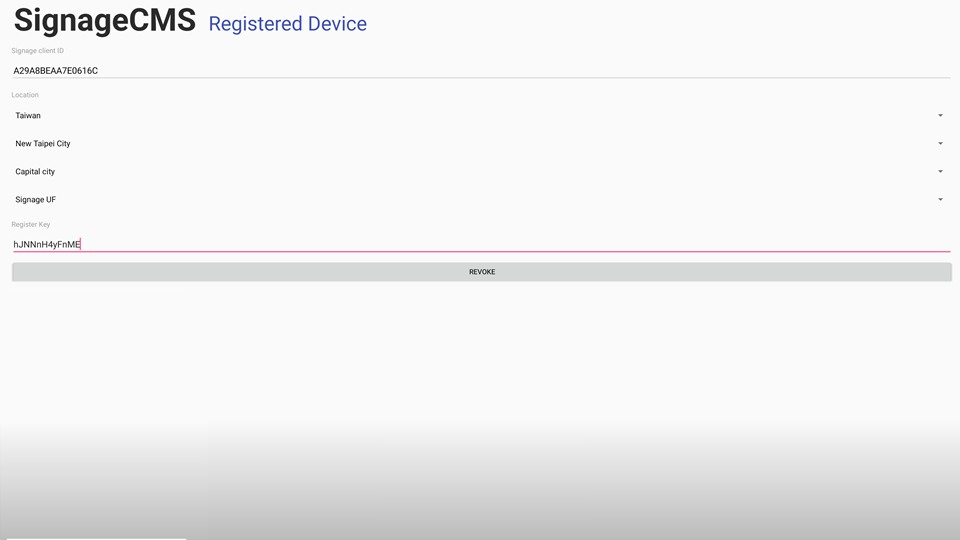
Step9. If you see this screen, it means the registration was successful.
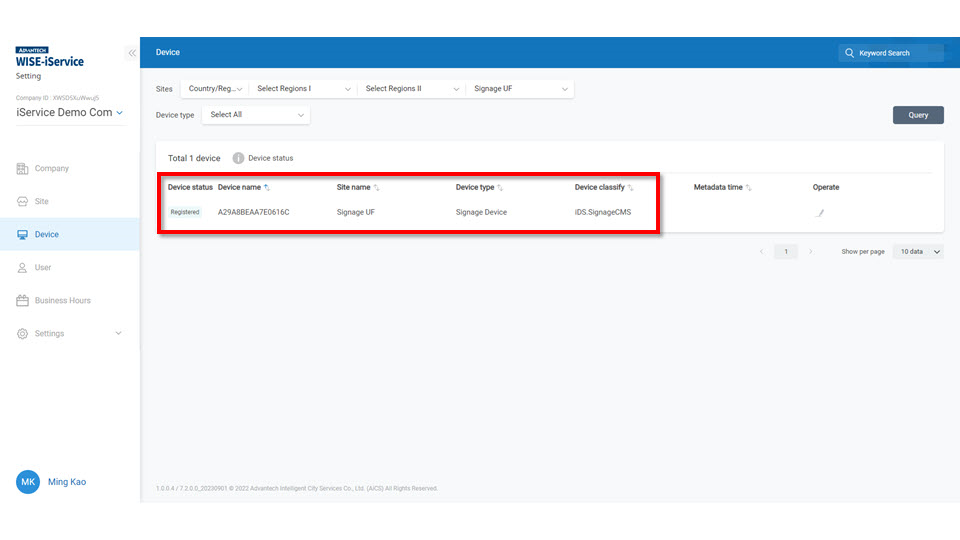
2.1.3 To verify the device registration status and enable cloud services:
Step 1. Go to the device management section where you can see that the device has been successfully registered and it shows as "Registered".
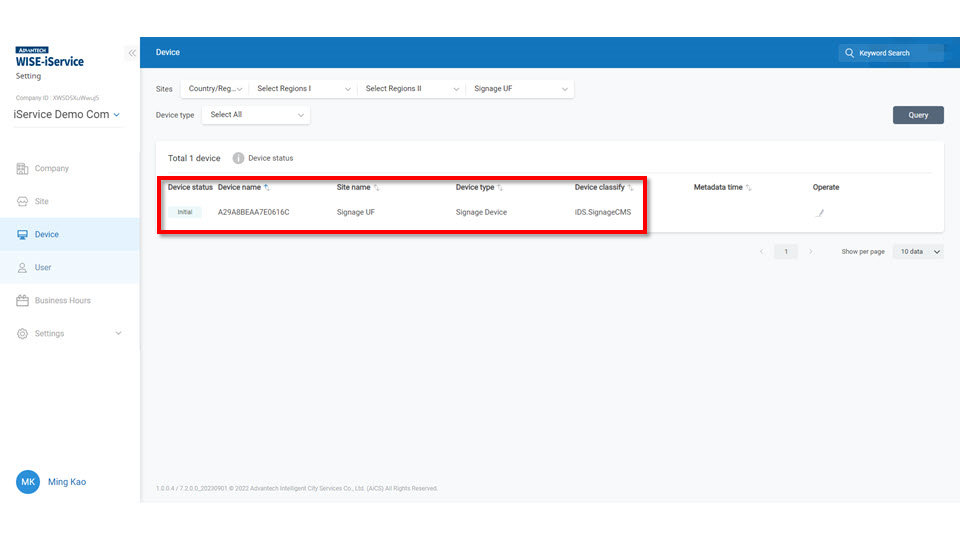
Step 2. Contact OP (Operator) and have them assist in activating the cloud serial number. Once completed, the device status will change from "Registered" to "Initial," indicating that programs can now be sent to the player.
2.2 Private Cloud Registration
2.2.1 Guide Mode
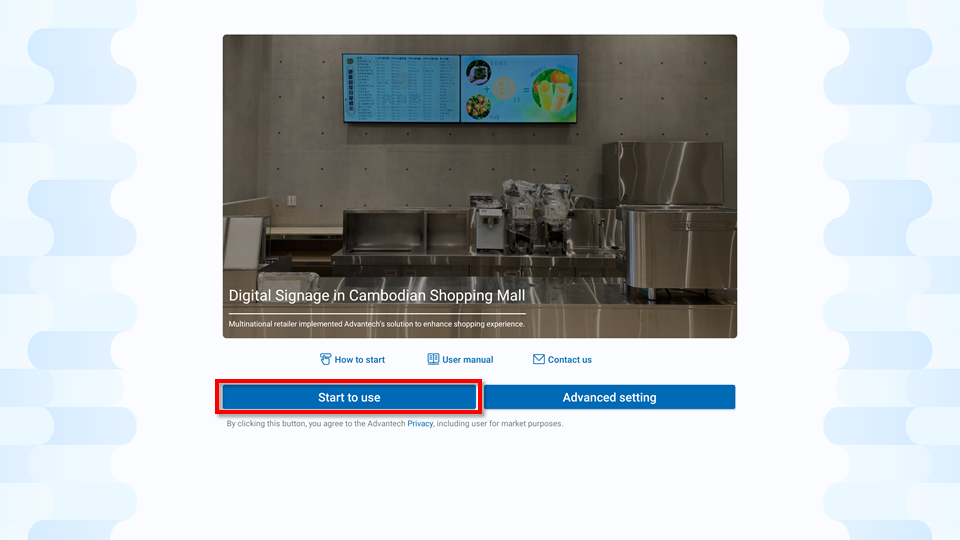
Step1. Click on the SignageCMS Client App icon to access the main program for digital signage.

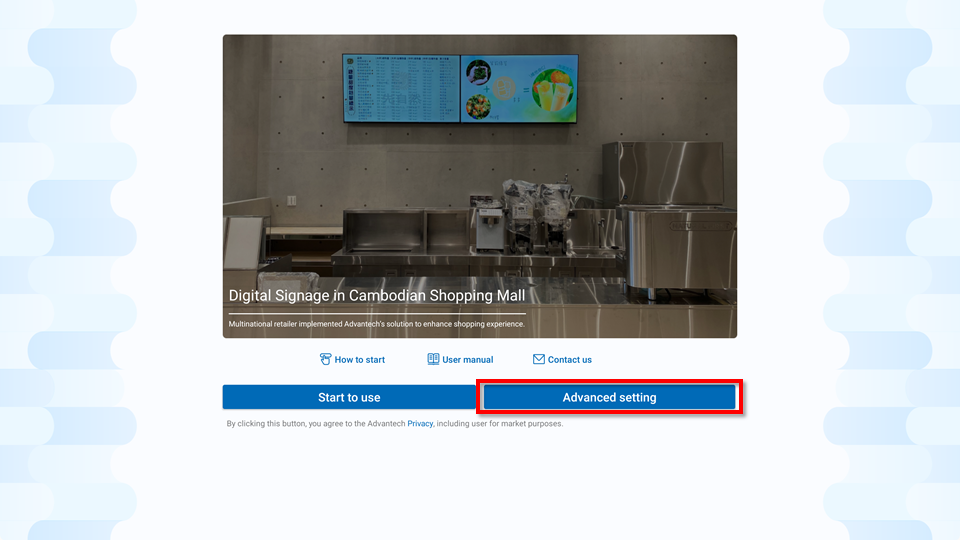
Step2. Click "Start" to proceed to the next step. If you wish to use traditional settings, click on "Advanced Settings" and go to section 2.2.2 Advanced Setting Mode for further configuration.
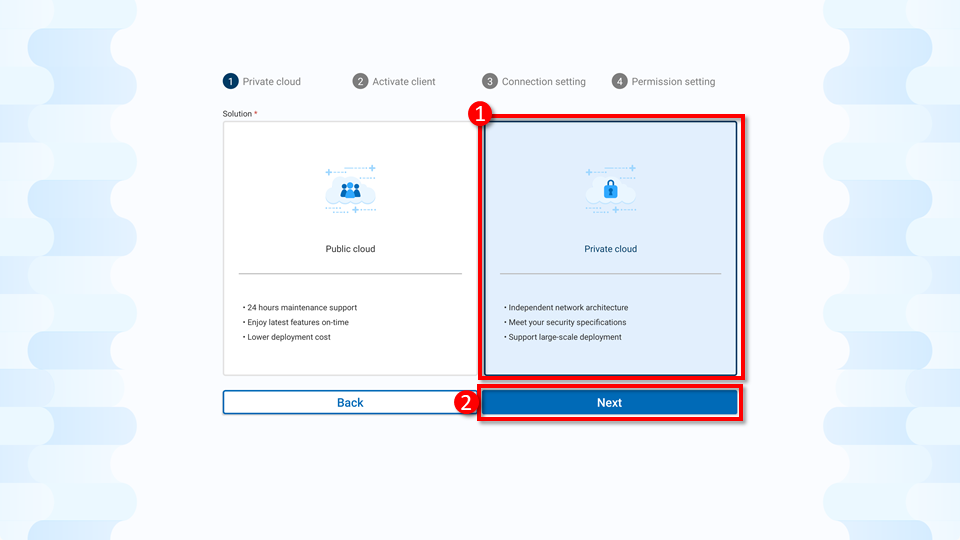
Step3. Select “Private Cloud” and click “Next”.
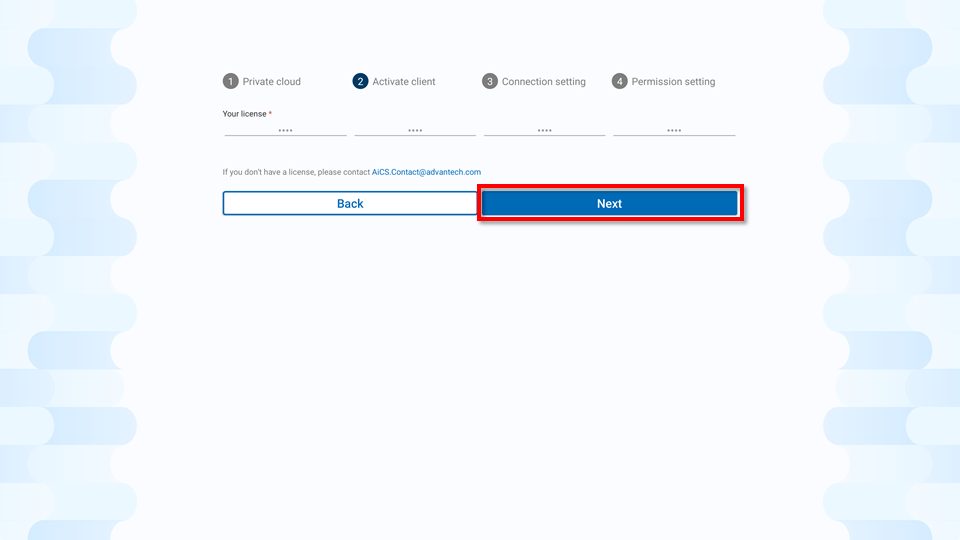
Step4. If you see a dot symbol above the serial number, it means it has already been activated. Please click "Next" to proceed. > If you do not see a dot symbol, please enter the authorization code and click "Next" to activate the serial number.
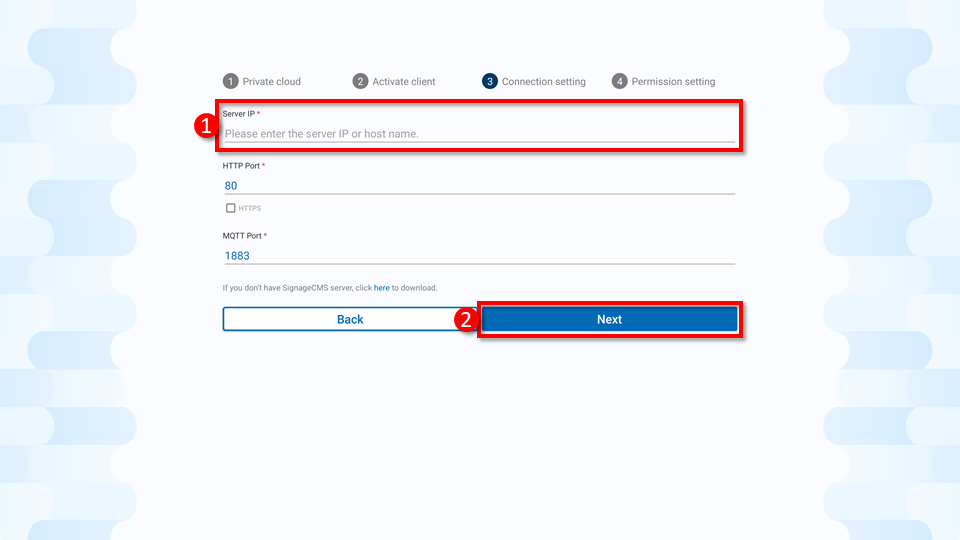
Step5. Please enter the SignageCMS server's IP address or domain name. Once completed, click the "Next" button.
Step6. In this step, you will need to enable the relevant services. Gray buttons indicate that the service has already been enabled. Please click "Apply" to proceed to the next step. > If a button appears in blue, it means the service is not yet enabled. Please click to grant the necessary permissions in sequence.

Step 7. Initialization setup is complete. The player will start in three seconds, or you can press the "Start Now" button.

Step 8. After completion, the SignageCMS main screen will appear.
2.2.2 Advanced Setting Mode
Step1. Click on the SignageCMS Client App icon to access the main program for digital signage management.
 Step2. Click "Advanced Settings" to enter the traditional setting mode.
Step3. Enter Advanced Settings.

Step4. Confirm the server location by selecting "SignageCMS Server". > f you cannot choose "SignageCMS Server," it means that this device has not been activated with a serial number. Please go back to "Step 2: Serial Activation."
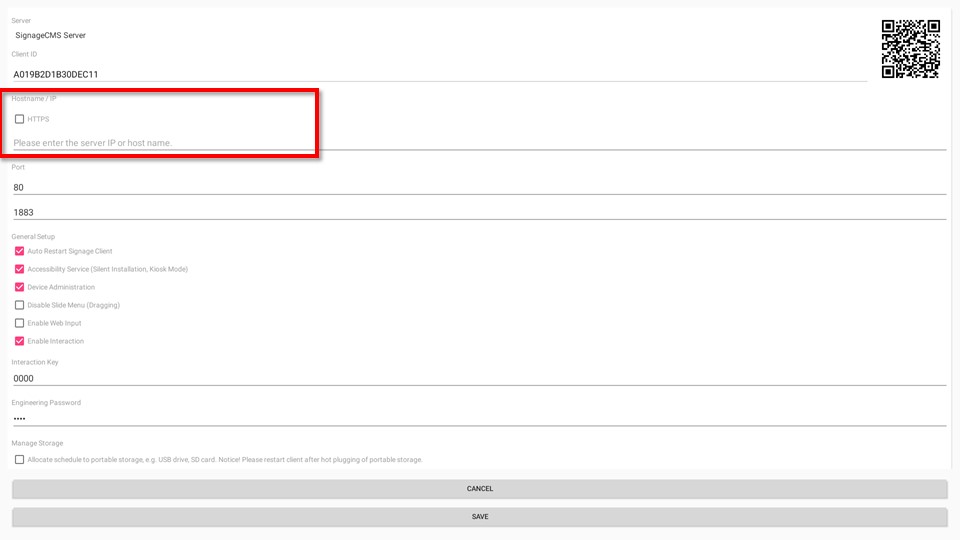
Step5. Set the server location as either the Domain or IP address.
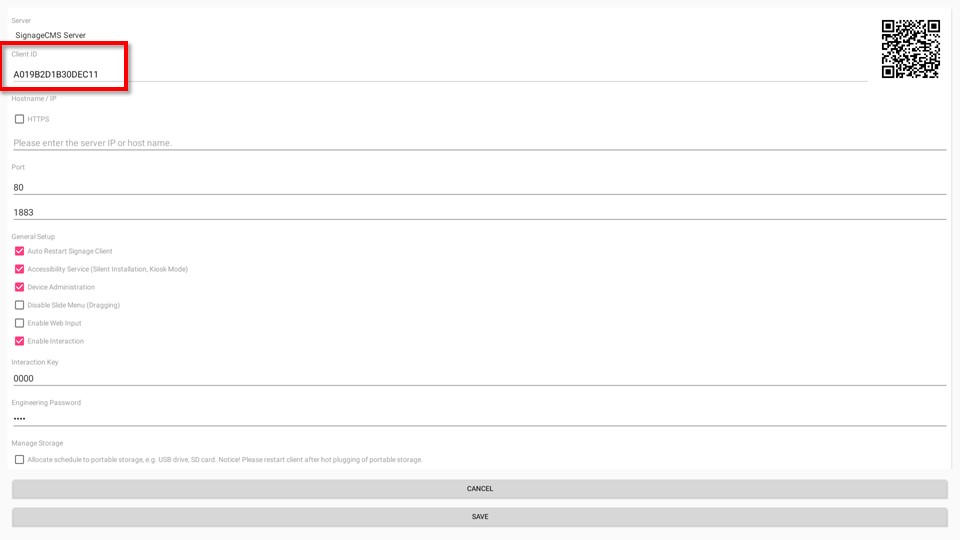
Step6. Record the Client ID, then click "SAVE" to return to the main screen.
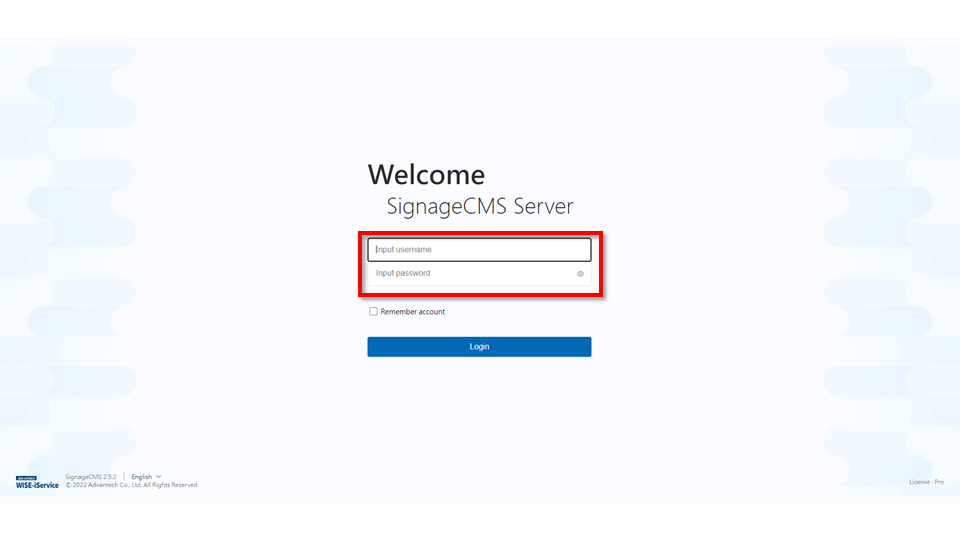
Step7. Open Chrome or Edge browser, enter the server's location (http://IP.ADDRESS/PSN), for example, http://127.0.0.1/PSN. Input your login credentials. At the bottom left corner, you can select the preferred language for display. > Enter the login credentials, with the default username and password for SignageCMS server being admin/admin.
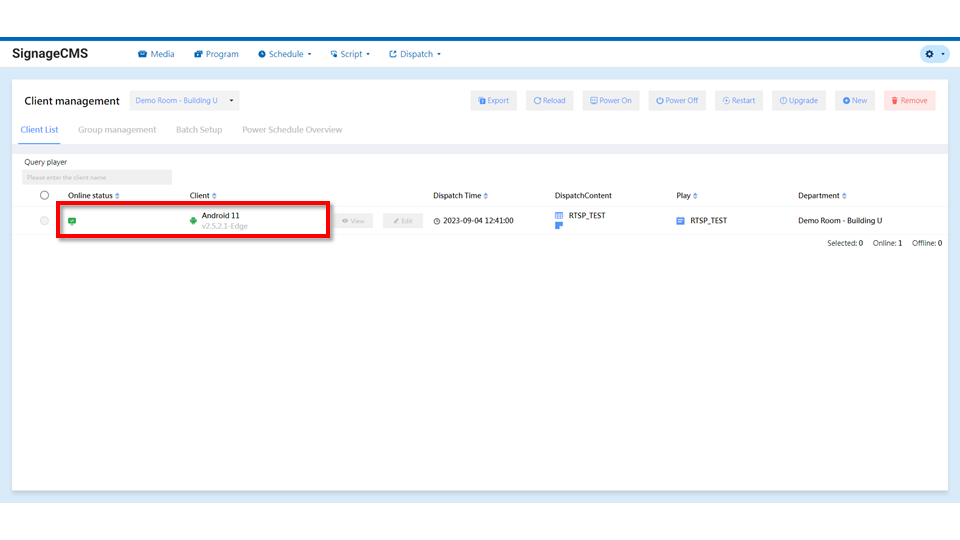
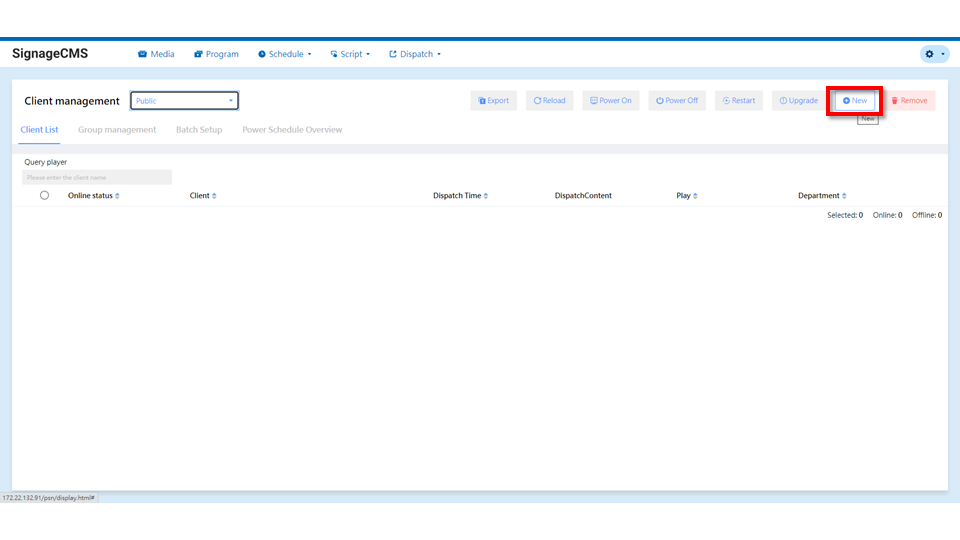
Step8. Click on the gear icon, then select "Client Management".

Step9. Click on the "Add New" button.
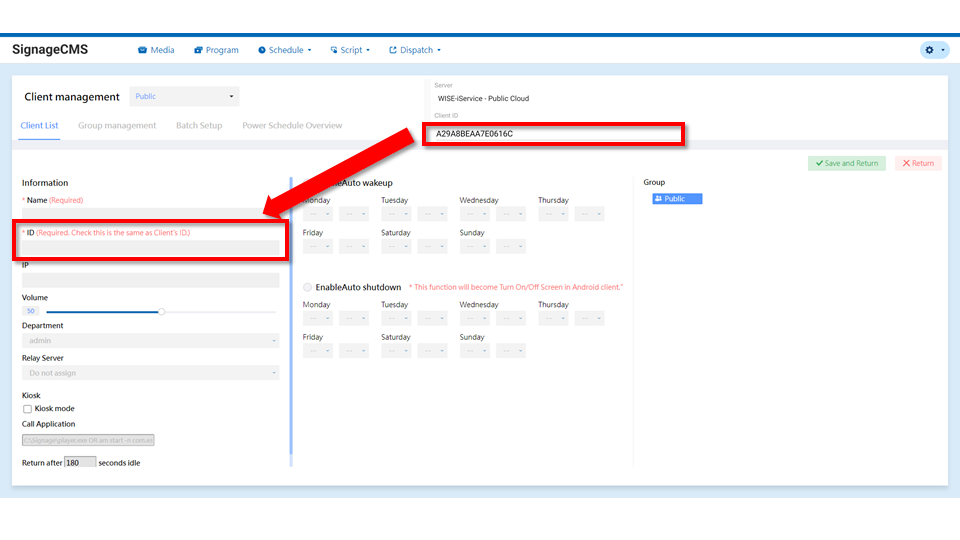
Step10. Enter the name and ID of the player you want to add. The ID can be found in the player's Client Setup. After entering the information, please click the "Save and Exit" button.
Step 11. Return to the device list page and check if the status of the device is online. > If you see a red light, please click on "Refresh" to update the client status. If it still shows a red light (offline), please confirm if the software is running or if the Client ID is correct.